Fresh timber needs to breathe before it accepts a stain, and skipping that waiting period is one of the most common and costly mistakes a new deck owner can make. When wood arrives from a sawmill or a builders’ merchant, it carries a significant amount of moisture locked inside the fibres. Apply a stain or sealant before that moisture escapes, and you haven’t protected your deck. You’ve trapped the problem.
Key takeaways
- New pressure-treated timber carries hidden moisture that pushes through any coating you apply too soon
- A simple water droplet test reveals whether your deck is truly ready — most people skip this crucial step
- Even after stripping and starting over, timing remains the secret that separates professional results from disappointment
What actually happens beneath the surface
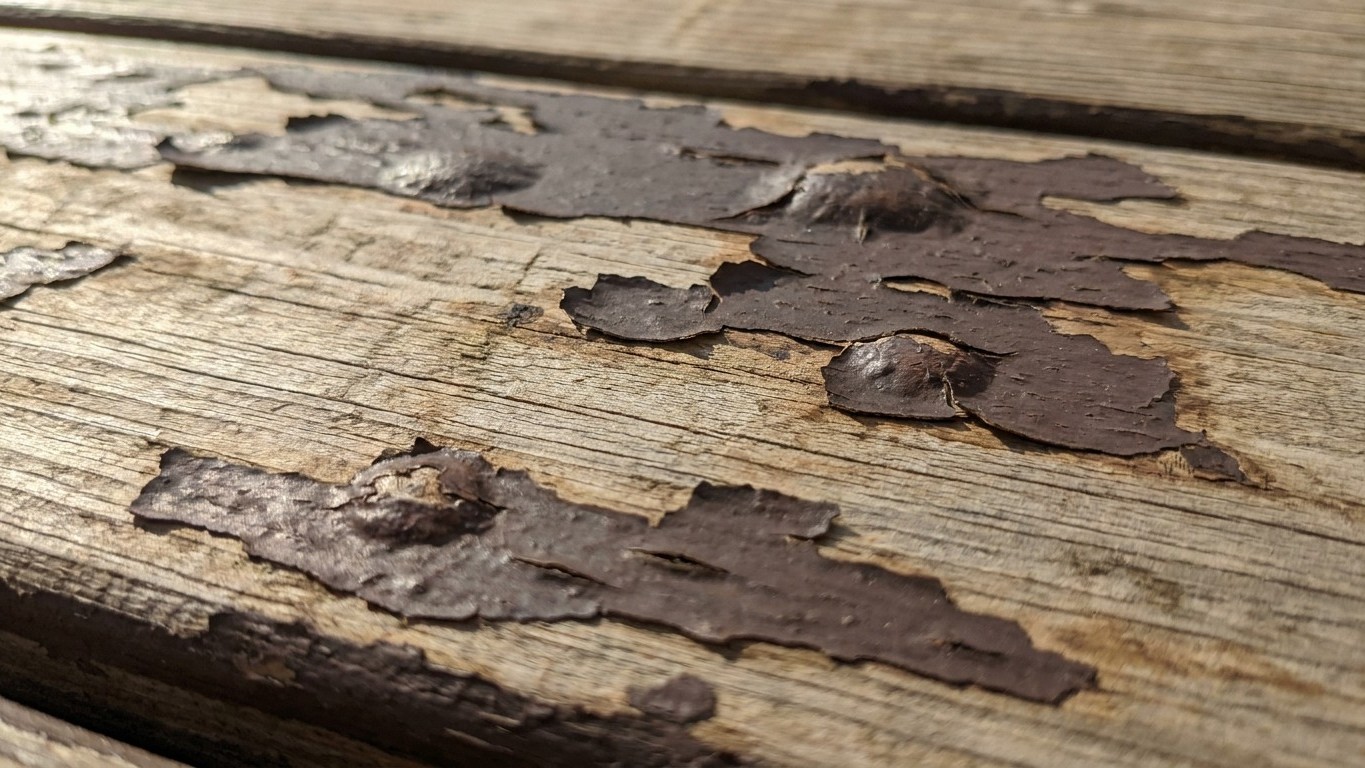
New pressure-treated timber typically has a moisture content well above 20% when it’s first sold. Some boards, particularly those treated with water-based preservatives, can be wetter still. As the wood dries out over the following weeks, that moisture pushes outward through the grain. Any coating sitting on the surface gets lifted, bubbled, or simply rejected in the process. Three weeks after staining a brand-new deck, you’ll often find the finish peeling in strips, or worse, the colour blotching unevenly because the stain never bonded properly in the first place.
There’s another factor that many people don’t realise: freshly milled and treated timber often has what’s called “mill glaze,” a slightly sealed surface created by the manufacturing process itself. Even if the wood were dry enough to accept stain, this glaze can prevent proper penetration. A light sanding with 80-grit sandpaper before you stain removes that layer and opens the grain, giving the product something to grip. Without it, you can apply the most expensive stain on the market and still end up with a patchy result.
How long should you actually wait?
The honest answer is that it depends on the type of timber and the weather you’ve had since laying the deck. As a general rule, pressure-treated softwood needs at least four to eight weeks to dry sufficiently in warm, dry conditions. In a British summer, with our unpredictable mix of sun and drizzle, many professionals recommend waiting a full three months before applying any finish. Hardwoods like ipe or cumaru, which are denser and hold moisture differently, may need even longer.
The simplest way to test readiness costs nothing at all. Sprinkle a few drops of water onto the surface of a board. If the water beads up and sits on top, the wood is still too wet or too sealed to accept a stain. If it soaks in within a minute or two, leaving a dark patch, the timber is ready. This water droplet test is a reliable shortcut that saves you from redoing months of work.
A moisture meter, available from most DIY shops for a modest sum, gives you a more precise reading. Aim for a moisture content below 15% before you stain. Above that threshold, you’re staining too soon regardless of how dry the surface feels to the touch.
Stripping back a mistake and starting over
If you’ve already stained too early and the results are as disappointing as they tend to be, you’re not without options. Deck strippers, applied with a brush and left to dwell for the time specified on the tin, will lift most water-based and oil-based stains from softwood. The process is straightforward, if a little tedious: apply the stripper, let it work, then scrub the surface with a stiff brush and rinse thoroughly. You’ll likely need to do it twice on areas where the stain soaked in more deeply.
After stripping, a light pressure wash helps open the grain and remove any remaining residue. Keep the pressure low, though, a powerful jet used at close range can actually damage softwood fibres, raising the grain badly and leaving furry patches that are difficult to sand back. Once the boards have dried completely after washing, which will take a couple of dry days at minimum, you can give the surface a light sand and begin the waiting game again from scratch.
The stripping process does add cost and effort, but it genuinely produces better results than simply applying another coat of stain over a failed one. Layering over a poor bond rarely works and usually makes the eventual failure worse.
Choosing the right product when you’re finally ready
Once the timber has dried to the right moisture level, the choice between oil-based and water-based stains is worth some thought. Oil-based products tend to penetrate more deeply into the grain, which suits older or more weathered wood particularly well. Water-based stains dry faster, are easier to clean up, and have become considerably better in recent years. For new decking, either can work well as long as the wood is properly prepared.
Colour is a surprisingly practical decision, not just an aesthetic one. Lighter tints show less dirt but fade more visibly over time. Darker shades absorb more heat (something worth considering on a south-facing deck in summer) but tend to hold their colour for longer. A mid-tone that complements the natural grain of the wood often hits the sweet spot for both appearance and longevity.
Apply stain on a dry day when rain isn’t forecast for at least 24 hours, and avoid working in direct, blazing sunshine if you can. Heat causes the product to dry too quickly on the surface before it’s had the chance to penetrate properly, which brings you back to the same bonding problems you started with.
One thing worth knowing: even a perfectly applied stain on perfectly prepared timber will need recoating. Horizontal surfaces take far more punishment from foot traffic, rain, and UV than vertical ones, and most deck stains, regardless of what the tin claims, benefit from a fresh coat every two to three years. A quick clean and a thin maintenance coat kept up regularly will always outlast a thick, remedial application done after years of neglect.