Laying new flooring straight over old floorboards feels like a masterstroke at the time. You save a weekend, skip the dusty, back-breaking business of pulling up boards, and the result looks perfectly fine. For a while. The trouble is that what you cannot see is busy getting worse, and by the time the clues appear on the surface, the damage underneath may already be serious.
Key takeaways
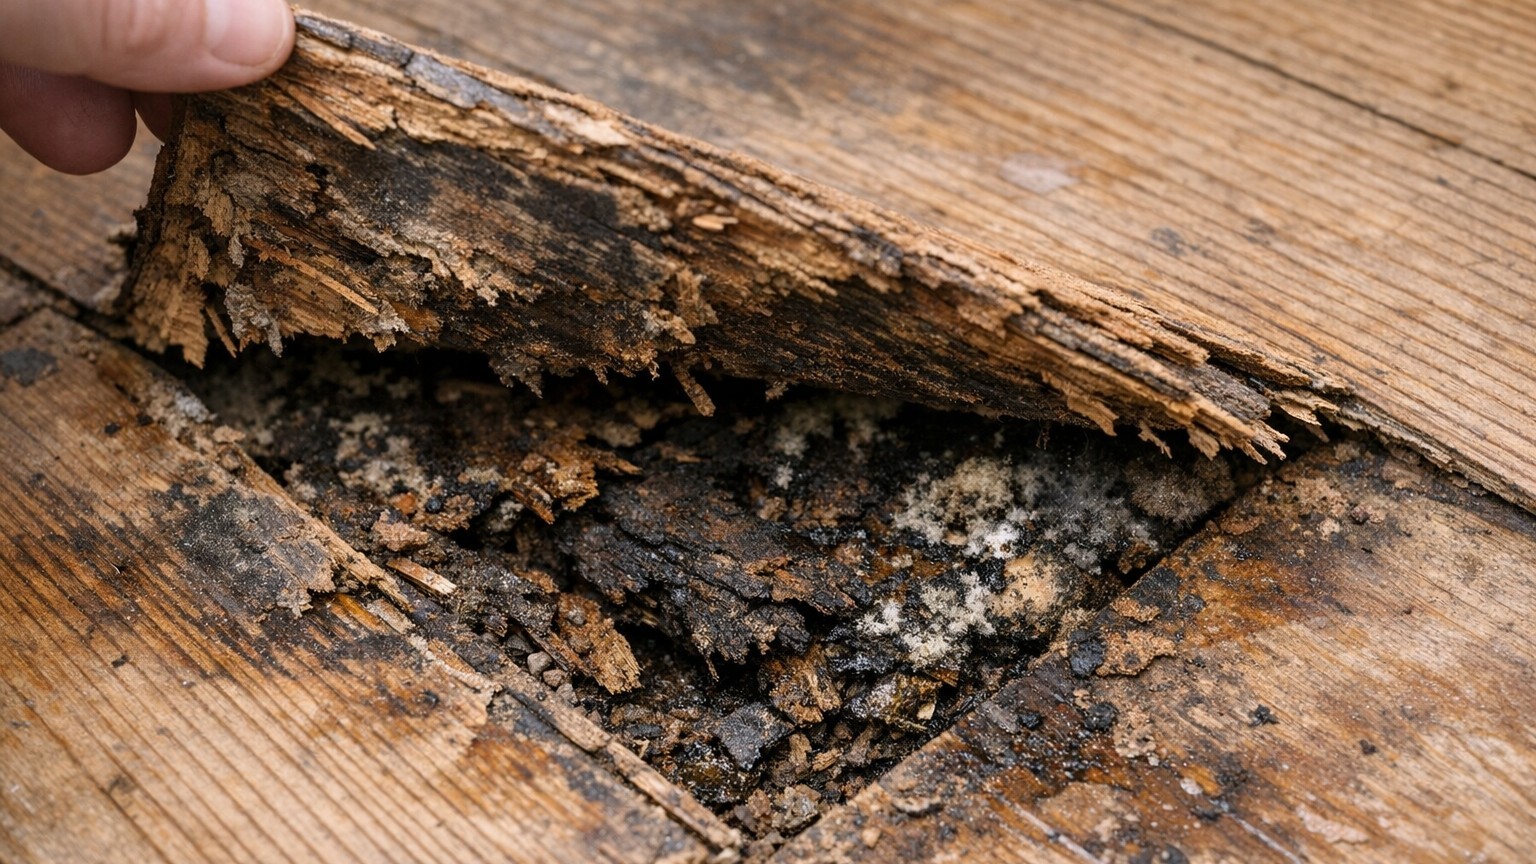
- What looks perfectly fine on the surface can be catastrophically damaged underneath—and you won’t know until it’s too late
- A simple moisture meter check costs £20 but could save thousands in repairs later
- The ‘shortcut’ that seemed brilliant takes two years to reveal itself as a costly structural disaster
The invisible problem you sealed in
When you install a new floor directly over the old one, you lose easy access to the subfloor, the structural base beneath everything. This can be risky if there are hidden issues like moisture, rot, or cracks. Old British houses, particularly those with suspended timber ground floors and underfloor voids, are especially prone to this. Draughts come through gaps in floorboards for a reason: that air flow is what keeps the timber dry. Block it off with a new layer and you change the whole breathing pattern of the floor.
Lack of proper ventilation in the subfloor space is one of the main causes of wood floor rot. Without sufficient air flow, moisture accumulates under the floor, creating ideal conditions for the development of mould and fungus, which destroys the wood. The cruel irony is that this process is entirely silent. Subfloor moisture is one of those hidden problems that quietly builds up until it turns into something much larger. Whether it’s caused by trapped humidity, seepage, or poor airflow, the moisture that sits below your flooring can lead to mould, warped boards, and even structural damage. By the time the floor starts to show signs on the surface, the damage underneath could already be serious.
Dry rot only needs a 20% moisture content to take hold in timber, a threshold that is depressingly easy to reach in a poorly ventilated floor void, especially through a British winter. And here is the detail that catches so many people out: trapping moisture under a new floor can lead to swelling, mould, or even structural damage over time. Two years is quite enough time for all three to take hold.
What your floor was trying to tell you
One of the most obvious signs of moisture migration is that your hardwood floor will begin to cup: it will exhibit a concave shape, like a soup bowl. You might also have noticed the floor had developed an odd spring to it underfoot, or that certain boards gave a creak they never used to. These are not trivial annoyances. A floor that feels soft or spongy underfoot is a clear indicator of subfloor decay due to moisture, and areas that were previously solid may now give way slightly. Floors that squeak or creak as you walk can also signal moisture damage, this noise usually occurs because the structural integrity of the subfloor has been compromised.
A musty smell in a room with otherwise clean surfaces is another giveaway. When subfloors have a lot of moisture, they will begin to warp, causing the nails that hold them to the joists to loosen, and a wet subfloor could also cause mildew growth, which might produce a musty smell in a given room. If you had lifted a corner of the new flooring after only a few months and pressed a thumb firmly into the board below, you might have caught it early. A floor that is rotted is often unsound and soft, the kind of give you feel before the boards actually begin to fail.
Rotting subfloors are caused by moisture problems, and moisture and rot can lead to mould contamination issues which can spread to other parts of the home. In some cases, whole houses can be made uninhabitable altogether by mould. That is not scaremongering, it is the logical end of a process that begins with a perfectly reasonable-seeming shortcut.
The right way to overlay, and when not to bother
Overlaying an existing floor is not always wrong. Done correctly, with the right checks, it can work perfectly well. The problem is that most DIY enthusiasts skip the boring part: the assessment. The existing floor must be structurally sound, dry, flat, and stable. All four. Not three out of four.
To assess the degree of dryness present in the floor, it is essential to conduct a moisture content analysis using a moisture meter. A reading of 11–14% moisture content or lower is required prior to the installation of any hardwood flooring. Moisture meters are not expensive, you can pick one up for under £20 at most DIY stores, and five minutes pressing one into the old boards could save you thousands in repairs down the line. Any existing floor that shows signs of warping, cracking, water damage, or looseness must be taken up. A compromised surface cannot provide a stable base, and any underlying moisture or rot will only worsen once it’s sealed under a new layer.
There is also the matter of direction. Once an existing wood floor is ready to act as a subfloor, you need to install the new floor at a 45-degree angle or perpendicular to the existing flooring. If you must install parallel to the existing floor, lay a minimum of 3/8-inch plywood over the top to increase stability. And a vapour barrier matters too. To protect subfloors from moisture damage, it is important to install effective vapour barriers. Vapour barriers prevent moisture from rising through the subfloor, thus protecting the flooring material on top. Popular choices include polyethylene sheeting, which is cost-effective and commonly used. This barrier is laid over the subfloor before installing the flooring, preventing moisture diffusion.
The golden rule: never install a third layer of flooring. If your current floor has already been overlaid once, adding another layer will raise the height too much and may trap long-term issues such as hidden damp or structural weakness. Excessive height can also interfere with doors, thresholds, and skirting boards, creating both practical and aesthetic problems.
Putting it right, and what it will cost
If you have lifted that corner and confirmed your worst fears, the path forward involves stripping everything back. Remove the old flooring down to the old subfloor, then remove all rotten wood and replace it. Spray the remaining subfloor and any exposed surfaces with a 50/50 bleach and water mix to kill remaining mould, and allow to dry thoroughly. Do not be tempted to simply treat what you can see and re-cover it, carefully remove any wood showing signs of decay, not forgetting surrounding areas. Once you have dried the area and removed decayed wood, apply a wood preservative, which helps prevent further decay and contains chemicals that kill fungus and prevent its regrowth.
The financial reality is sobering. The cost of replacing rotten floorboards depends on the extent of damage, whether it’s dry or wet rot, the size of the affected area, and the type of wood. For treating a rotting floorboard, the estimated cost is typically around £1,000–£2,000 plus VAT, including identification and assessment of the damage, removal of the affected floorboards, treatment to prevent further rot, and any necessary repairs. In cases where the damage is extensive or affects a larger area, replacing the entire floor might be necessary, with estimated costs ranging from £2,000 to £4,000. That is a substantial sum compared to the cost of a weekend’s proper preparation.
One thing worth knowing: the recommended approach for flooring installation is to remove old flooring first. This allows for inspection and repair of the subfloor, ensuring a level base and reducing the risk of future problems. That advice holds especially true in older British homes where the original Victorian or Edwardian boards may have spent decades absorbing whatever the ground and the plumbing have thrown at them. The weekend you save by not lifting them is rarely worth the weekend, or the bill, that comes later.
Sources : weles.us | oldetymefloor.com