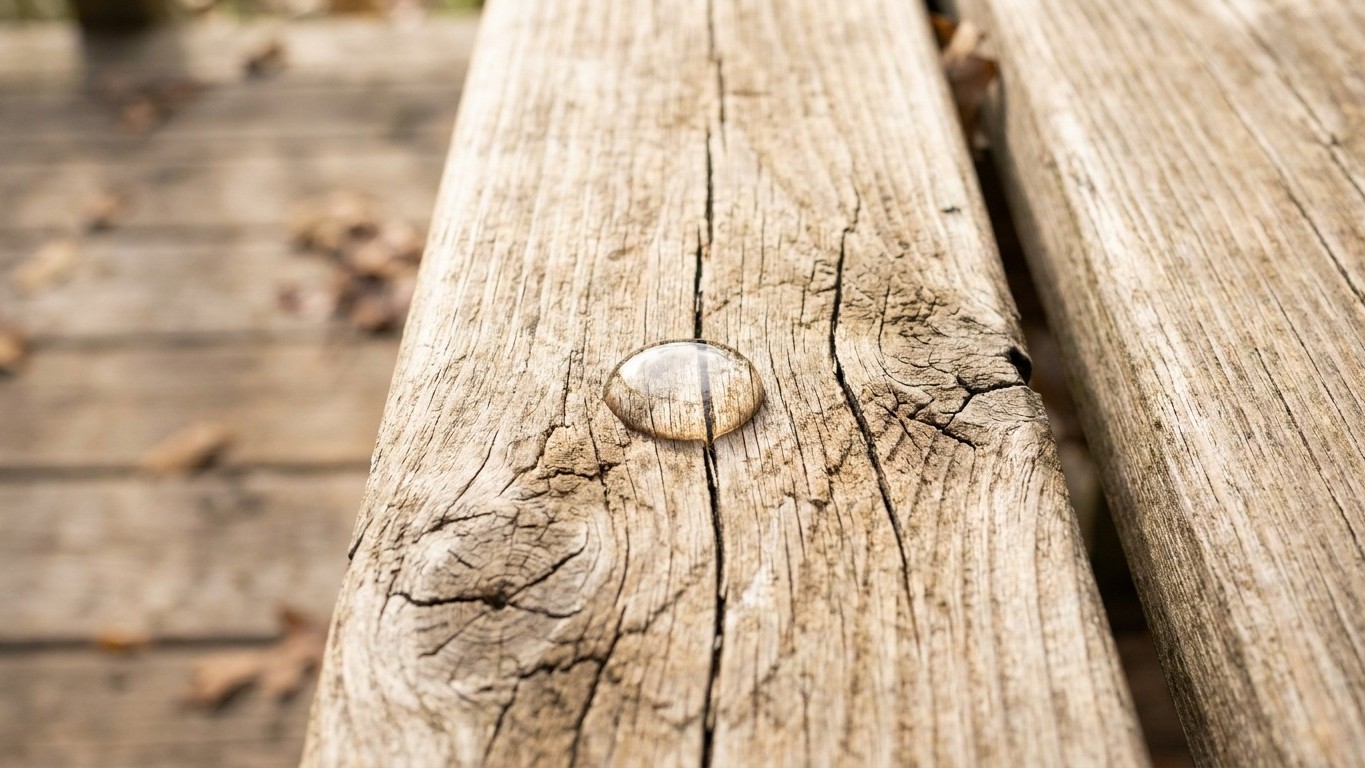
Before you buy a single tin of deck oil or pick up a brush, there is one test you absolutely must do. Splash a small amount of water onto a plank and wait ten minutes. What happens next will tell you Everything you need to know about the state of your wood and whether it is even ready to accept a new finish.
A retired carpenter explained it to me very simply: the wood either drinks the water or it refuses. If the wood readily absorbs the water, it needs sealing. If small droplets form and sit on the surface, the existing finish is still doing its job. It sounds almost too simple. But get this wrong and you will spend a weekend (and a fair amount of money) coating a deck that cannot absorb the product you’ve just applied. The finish will peel within months. The water test, known in the trade as the bead test or the splash test, costs nothing and takes no equipment at all.
Key takeaways
- A retired carpenter swears by a surprisingly simple test that costs nothing and takes just 10 minutes
- What happens when water hits your deck plank holds a secret most DIYers completely miss
- This one test could save you a weekend of wasted work and hundreds of pounds in failed finishes
What the water is actually telling you
Ultraviolet rays break down lignin, the natural substance that binds wood fibres together. As the lignin deteriorates, the wood’s surface loses colour and becomes more prone to absorbing moisture, which accelerates the ageing process. That familiar silver-grey patina on an older deck is not just a cosmetic nuisance. Ultraviolet radiation from sunlight is the most damaging component of the outdoor environment because it initiates a wide variety of chemical changes in wood surfaces. The surface of wood becomes grey, rough, and stringy, losing its usual appearance. Also, its mechanical properties.
The water test cuts straight through all of that complexity. Before staining or treating a deck, performing a basic moisture test involves sprinkling some water on the surface. If the water beads up rather than soaking in, you should allow the wood to dry further. There is a catch that catches people out, though. If the wood is already saturated with water, water will bead off the surface regardless. Only test your deck after a few sunny days, allowing the wood to dry thoroughly. Many homeowners have misread a rain-soaked board as a well-sealed one. Do the test on a dry afternoon after at least two or three consecutive dry days.
The speed of absorption matters too, not just whether the water soaks in at all. If the first coat of stain soaks in within 20 minutes, a second coat is typically recommended. Soaking in less than 20 minutes is a sign that the interior of the wood is very dry and needs additional oil to condition the wood fibres. Very thirsty, bone-dry wood is as problematic as wood that refuses to absorb anything: it may gulp down the first coat so fast that the surface remains under-protected.
The screwdriver test: what comes before the water
Here is the thing most articles skip over entirely. The water test only makes sense on wood that is structurally sound. Before you splash a drop of anything on your deck, pick up a screwdriver and walk every plank. One reliable way to test for deck rot is the screwdriver test. Gently probe suspected areas with a screwdriver or awl. Healthy wood will resist penetration, while rotted wood allows the tool to sink in easily.
Check for wood rot by prying a chunk of wood away with a screwdriver or other probe. If it splinters, the wood is healthy. If the break splits in chunks without splinters, it may be rotted. These two responses feel completely different under your hand once you know what you are looking for. Healthy timber fights back. Rotten timber crumbles or gives a soft, spongy resistance that no amount of oiling will fix.
Problems typically crop up along the ledger (where the deck meets the house), where posts and stairs meet the ground, board ends, and anywhere that water lingers, so pay special attention to these areas. In Britain, that often means the side of the deck nearest a north-facing wall, where the sun rarely dries things out properly. If the screwdriver penetrates more than a quarter-inch, you are likely dealing with significant rot that requires professional evaluation. Covering that with a fresh coat of decking oil would be rather like painting over damp on an interior wall. Lovely for a fortnight, then worse than before.
Surface rot affects only the top layer of deck boards and typically appears as soft spots, discolouration, or areas where wood fibres separate easily. This type of damage often responds well to individual deck board replacement and does not necessarily indicate widespread problems. Replace those boards before you do anything else. If some boards are too far gone, remove the screws, prise the board away and get a replacement fitted.
Reading the results and deciding what to do next
Once you have confirmed the structure is sound, the water test result tells you which of three paths to take.
If the water soaks in evenly across the board within a few minutes, the wood is open and ready. Give it a clean, let it dry, and apply your chosen finish. Before stain can be applied, the wood must dry, or it will not absorb the finish. Three or four consecutive days without rain is enough time in most climates. A moisture meter, which you can borrow from many tool libraries, will confirm readiness: when it reads 15 percent or less, the wood is ready to coat.
If the water beads up cleanly, the previous finish is still intact and your deck may not need treating at all. The easiest way to keep a deck looking its best is to clean it periodically and reapply sealer before the wood begins to look as though it may need it. A good scrub with a stiff brush and a deck cleaner may be all that is needed this season.
If the water beads in some patches but soaks in on others, you have uneven coverage, which is where most older British decks sit. After cleaning the wood, always test the absorbency properties. Sprinkle a few drops of water on the surface; if water droplets do not penetrate, there could be an old finish still present. Stripping could be a necessary step to remove old finishes and coatings prior to applying a new treatment. An old finish that is failing in patches will prevent any new product from penetrating evenly, leaving you with a blotchy result. You can make a mild deck cleaner yourself, simply mixing one part bleach with three parts water, but for lifting a failing old stain a proper deck stripper will be needed. Work in sections of around two square metres and rinse thoroughly before moving on.
Getting the finish right after the test
Once your deck has passed both the screwdriver test and the water absorption test, the finish choice matters less than the preparation. For older decks, using a semi-transparent stain is commonly recommended. The grain still shows through, but the pigment gives the old wood a clean, uniform colour and helps any new wood blend in. The pigment also provides extra protection from the damaging effects of the sun and will last longer than clear finishes.
Deck sealers work in two ways. They prevent the wood from becoming saturated with water, then drying out. This wet and dry cycle can cause cracking and checking. The sealer interrupts this process by preventing water from penetrating. Apply on a dry, overcast day rather than in full sun, working with the grain and keeping a wet edge to avoid overlap marks.
One thing worth bearing in mind for decks made from softwoods such as pressure-treated pine or redwood: outside, softwoods tend to turn grey faster than hardwoods. They will need re-treating more frequently, roughly every one to two seasons depending on aspect and rainfall. Running the water test at the start of each spring takes thirty seconds and tells you immediately whether the job can wait another year. That is a habit worth forming, and it is entirely free.
Sources : youtube.com | alwayshomerepair.com