
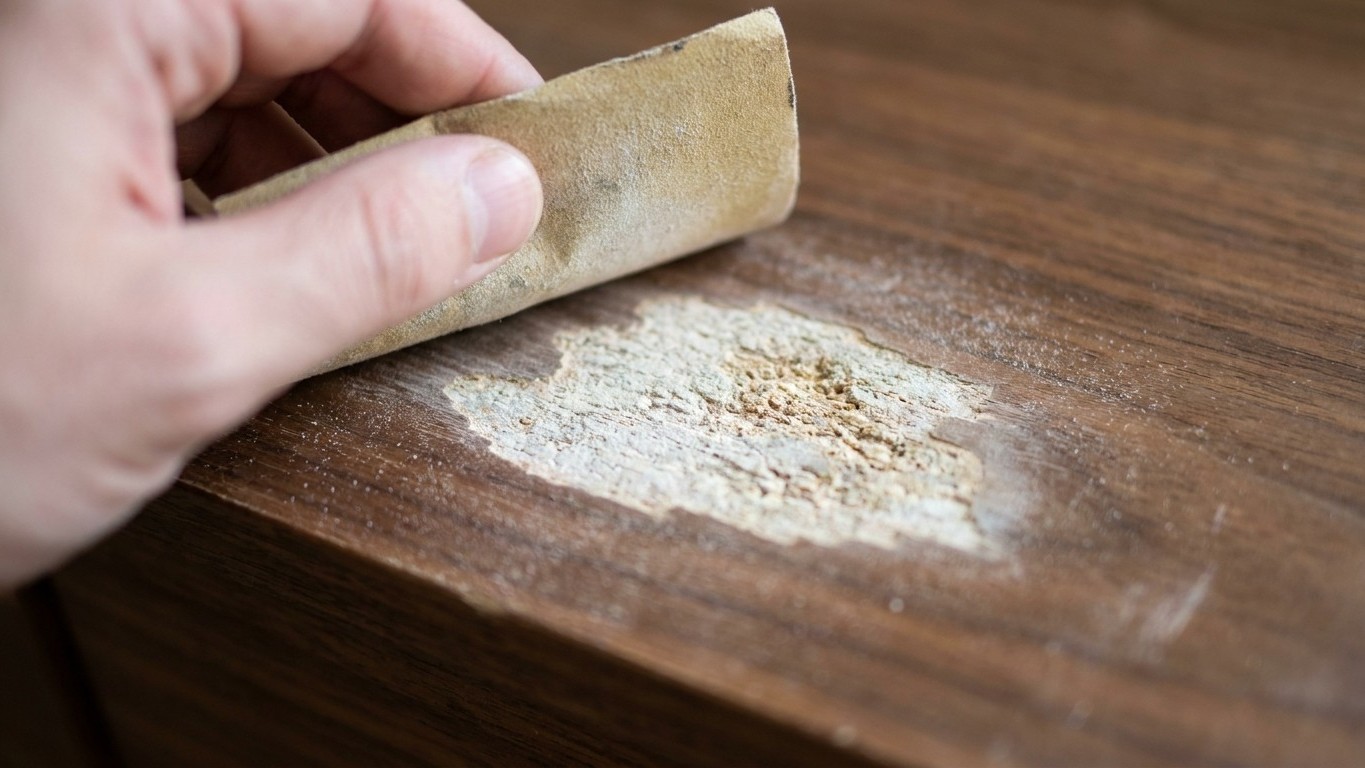
Twenty minutes into what was meant to be a gentle refresh, the sandpaper caught on something that wasn’t wood at all: a scatter of pale, chalky flecks, rough as sugar, with not a scrap of grain in sight. That’s chipboard, or MDF, sitting exactly where a thin skin of “wood” veneer used to be. Once you’ve gone through it, there’s no rubbing it back. The fix now is damage control, not restoration.
Key takeaways
- That wood-effect surface on your flat-pack dresser might be thinner than cardboard—one wrong move with a sander can destroy it
- The core materials (chipboard and MDF) look and behave nothing like real wood once exposed, and the damage is irreversible
- There are actual warning signs before catastrophic failure—but they arrive with almost no notice
What was actually hiding under that surface
Flat-pack dressers are almost never solid timber, whatever the panels in the shop suggested. The wood-effect skin usually covers materials like particle board, MDF, or lower quality wood. That top layer is doing a lot of visual work for very little material: on many pieces the veneer is only around one sixteenth to one twentieth of an inch thick, and on modern flat-pack furniture it’s often thinner still. In modern furniture, veneer can be thinner than cardboard, which explains why a job that would barely mark solid oak can strip straight through a chest of drawers from a Swedish warehouse.
The core underneath isn’t built to be seen. The surface of chipboard is rough and porous due to the nature and size of its particles, and the multiple gaps between them, which is exactly why manufacturers glue a nicer-looking face onto it in the first place. Once you’re sanding into that porous middle rather than the finished skin, Everything changes: the wood doesn’t behave, stain doesn’t sit properly, and the texture underfoot (or under sandpaper) turns gritty rather than silky.
The give-away moment, and why it comes so suddenly
What makes this such a nasty surprise is how little warning you get. Veneer’s thinness makes it stable and affordable, but also very easy to damage. One firm pass with an orbital sander in a spot you’ve already worked can be the difference between a smooth finish and a bald patch. The tell-tale sign to watch for is a “blonde” patch, paler and coarser than the surrounding surface, where the particles suddenly look bigger. After the initial pass, vacuum the surface and inspect for any “blonde” spots where the particles look larger, which indicates you are getting close to the core, so stop sanding immediately in those areas.
Grain, or the sudden lack of it, is the other giveaway. If you still see wood grain everywhere, you’re likely still in the veneer layer, but if you see layers, chips, or a flat brown surface with no grain, you’ve gone through it. Edges and corners tend to go first, simply because they’re thinnest and easiest to catch at an angle. That’s worth remembering for next time: edges and corners are the most dangerous areas, so tape them off or sand them by hand only. I’ve heard from more than one reader who lost the top edge of a wardrobe door in seconds flat, purely from lingering a moment too long with the machine tilted slightly.
What you can do once the damage is showing
There’s no honest way to un-sand chipboard back into veneer, but a bald patch needn’t mean the whole piece is ruined. Small, shallow spots (a couple of inches across, say, where you’ve only just broken through) can sometimes be filled and disguised rather than replaced. Wood filler isn’t ideal for veneer, but sometimes it’s the only practical option, so use a stainable filler rather than wall putty, and apply it slightly higher than the surface because it shrinks as it dries. Once it’s dried and sanded flush, expect the patch to take colour differently to the surrounding wood, which is where a bit of patience with a wood-tone marker pen or wax stick comes in for blending the edges.
For anything larger than a coin-sized patch, or damage across a whole drawer front, painting is usually the kinder option, both for your nerves and your budget. It’s certainly the route most furniture-flippers reach for once the veneer has gone: opting for the quickest and easiest fix by painting over the mistake still turned the piece out rather charming in the end. Before any paint goes on, though, the exposed chipboard needs proper priming, since without sealing, exposed particle board will absorb moisture unevenly and look unfinished, and two thin coats of a decent primer will do far more good than one thick, gloopy one.
Sparing yourself the shock next time
The single best habit is testing an unseen spot first, the inside of a drawer side or the underside of a shelf, so you learn how thin that “wood” really is before you commit to the visible surfaces. Start with a finer grit than instinct suggests: avoid very rough grits, since starting with 180 or 220 grit feels slow but it saves veneer. Check your progress often rather than trusting your eye alone. Wiping the surface with mineral spirits as you go shows you exactly what’s happening before it’s too late. A light touch by hand around any edge or corner, rather than reaching for the power sander, costs you a few extra minutes and saves an entire dresser front.
One quirk worth knowing before you even pick up the sandpaper: flip the piece over first. If the underside has a grain that looks completely different from the top, top and bottom were cut from two different pieces of wood, meaning it’s veneer rather than solid timber all the way through. It takes thirty seconds, and it tells you far more honestly what you’re dealing with than any amount of guessing once the sander’s already running.
Sources : laurelcrown.com | lukesfurniturecompany.com