Hard cement mortar and old bricks are genuinely incompatible, and that single fact, if you don’t know it beforehand, can cost you thousands of pounds in remedial work. Victorian brickwork, typically dating from the 1840s through to around 1900, was built with soft lime mortar for a very deliberate reason. The mortar was always intended to be the sacrificial element in the wall: softer than the brick, it absorbs movement, frost expansion, and the slow breathing of a building as temperatures shift. Replace that lime mortar with modern Ordinary Portland Cement, and you’ve reversed the logic entirely. Now the mortar is harder than the brick, and something still has to give. That something is your brickwork.
Key takeaways
- Victorian bricks were engineered to work with soft, sacrificial lime mortar—not modern rigid cement
- Hard mortar traps moisture behind the joints, and when it freezes, it explosively destroys the brick face from within
- The visible damage (spalling) appears within 1-2 winters, but invisible structural compromise can take a decade to fully manifest
Why Victorian bricks behave so differently from modern ones
The bricks made during the Victorian era were fired at lower temperatures than today’s engineering bricks or modern facing bricks. They’re softer, more porous, and genuinely beautiful for it, that warm, slightly uneven texture is precisely what gives a period terrace its character. But that porosity means they absorb moisture readily, and they flex, however imperceptibly, with seasonal changes. A wall is never truly static. It expands faintly in summer warmth and contracts in a frost. In the original construction, the lime mortar accommodated all of this movement by being slightly flexible itself.
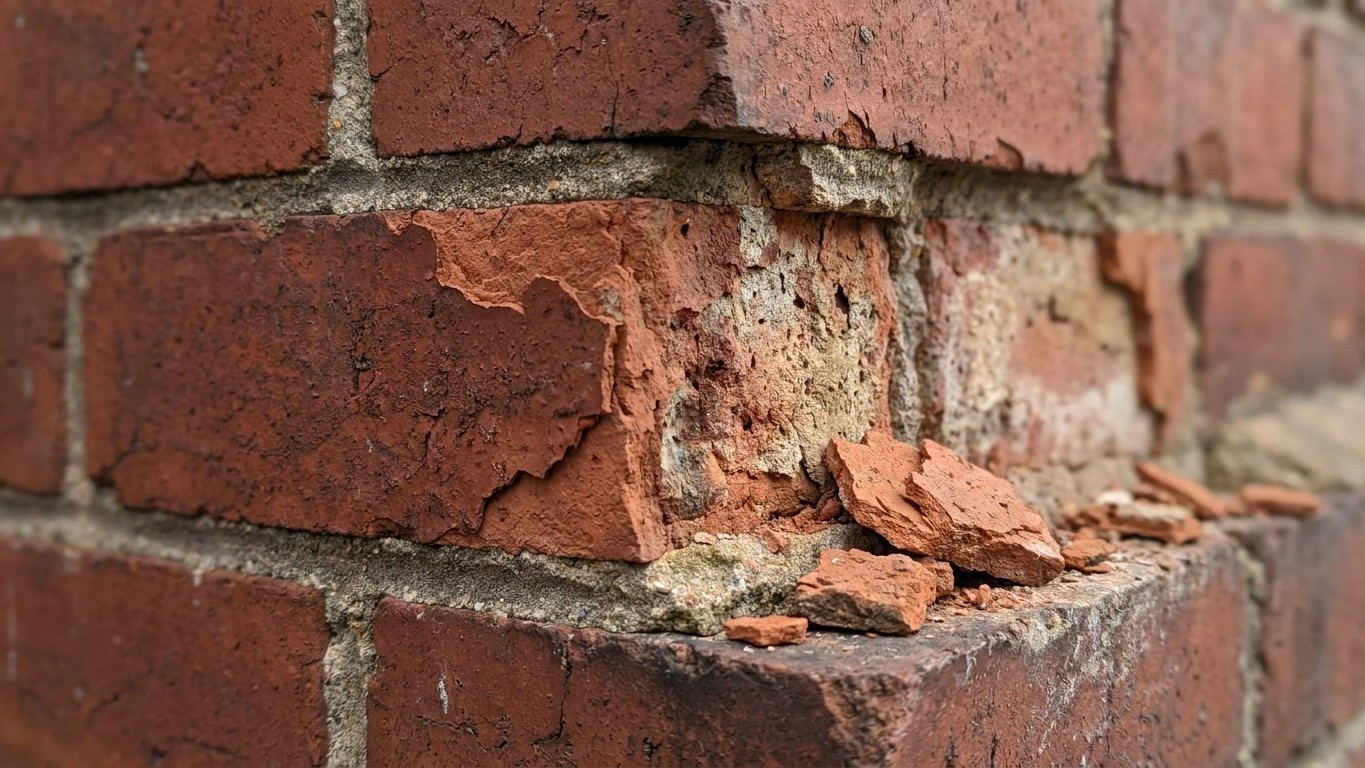
Modern cement mortar has a compressive strength that can be five to ten times greater than soft lime. When that rigid mortar is packed into the joints of a Victorian wall, it essentially locks the bricks into a vice. The movement still happens, physics doesn’t negotiate, but instead of the mortar absorbing it, the stress transfers directly into the face of the brick. The result, over one or two winters, is what’s called spalling: the face of the brick literally pops off in flakes and shards. Once that outer, hardened skin is gone, the porous inner material of the brick is exposed directly to rain and frost, and deterioration accelerates dramatically. A wall that stood for 140 years can become structurally compromised within a decade of incorrect repointing.
The moisture trap nobody warns you about
Spalling is the visible damage, but there’s a secondary problem that’s worse because it’s invisible for years. Hard cement mortar is far less permeable than the old lime it replaced. Victorian walls were built to allow moisture to pass through them and evaporate, the whole assembly breathes. Block that evaporation pathway with an impermeable cement skin in the joints, and the moisture that enters the wall (through the bricks themselves, which remain porous) simply has nowhere to go. It builds up behind the mortar line.
Come winter, that trapped water freezes. Water expands by roughly nine percent when it becomes ice, and it does so with enormous force. This freeze-thaw cycle, repeated over several winters, drives the face of the brick outward with every freeze. I’ve seen Victorian terrace walls where someone re-pointed in cement in the 1980s, and by the early 2000s entire stretches of brickwork had to be rebuilt from scratch, not just re-pointed, but rebuilt, because the structural face of the wall had been destroyed. The cost of doing the job wrong, then putting it right, routinely runs to several times what correct lime repointing would have cost originally.
What the correct approach actually looks like
Lime mortar repointing is not complicated, but it does require patience and the right materials. The traditional mix for Victorian brickwork is a lime putty and sharp sand combination, typically in a ratio of one part lime putty to two and a half or three parts sand. Hydraulic lime mortars (NHL 2 or NHL 3.5, the numbers referring to strength grade) are also appropriate where slightly higher strength or faster set is needed, particularly on exposed elevations. NHL 5, the strongest hydraulic lime, is generally best avoided on soft Victorian brick, it starts to approach the rigidity problem of cement.
The old mortar needs to be raked out to a depth of at least 15 to 20 millimetres before new material is applied. This is slow work done with a plugging chisel and a hammer, or a small angle grinder with a mortar-raking disc if you’re comfortable with power tools (and careful not to touch the brick faces). Rushing this stage is where many DIY attempts go wrong, shallow repointing, applied over barely scratched joints, simply falls out within a year or two.
New lime mortar should be applied in two or three thin layers if the joints are deep, allowing each layer to stiffen before the next goes on. Lime sets by carbonation, a chemical reaction with atmospheric carbon dioxide, which means it cures slowly. In cold or very dry weather, the freshly pointed joints benefit from being kept slightly damp and shaded for the first few days, a piece of hessian draped over the wall works perfectly. Lime mortar applied in temperatures below five degrees Celsius simply won’t carbonate properly and should wait for a kinder day.
One thing worth knowing before you start
If your wall has already been cement-pointed in places, don’t assume you can simply re-point over or beside it with lime and everything will balance out. The two materials behave differently under stress, and the junction between them becomes a point of concentrated movement. Where possible, the cement should be removed first, all of it. This is tedious, genuinely so, but the alternative is a wall with two incompatible systems competing against each other.
One detail that surprises people: original Victorian mortar joints were often slightly recessed, or “bucket handle” profile, rather than flush or proud of the brick face. Matching that profile isn’t just an aesthetic choice. A slightly recessed joint actually sheds rainwater more effectively than a flush one, reducing saturation of the joint face. Period details often had practical logic behind them that wasn’t obvious at the time, and in the case of lime mortar, that logic has been quietly vindicated by every conservation survey carried out on surviving Victorian housing stock.