Yellowing skirting boards are rarely a paint problem. That was the lesson I learned the hard way after three consecutive springs of touching up my hallway woodwork, only to watch the same warm, buttery stain bleed through within weeks. A decorator friend, called in for an unrelated job, crouched down, pressed a thumbnail into the skirting, and said quietly: “This isn’t the paint failing. Something underneath is pushing through.” He was right, and understanding what that “something” is can save you a great deal of time, money, and frustration.
Key takeaways
- Most yellow stains aren’t paint failure—they’re tannins or resin pushing through from inside the wood
- A simple 48-hour test tells you exactly what’s causing the problem and how to fix it
- One overlooked primer application stops the stain dead; everything else you’ve tried was just hiding the symptom
Why the yellow keeps coming back
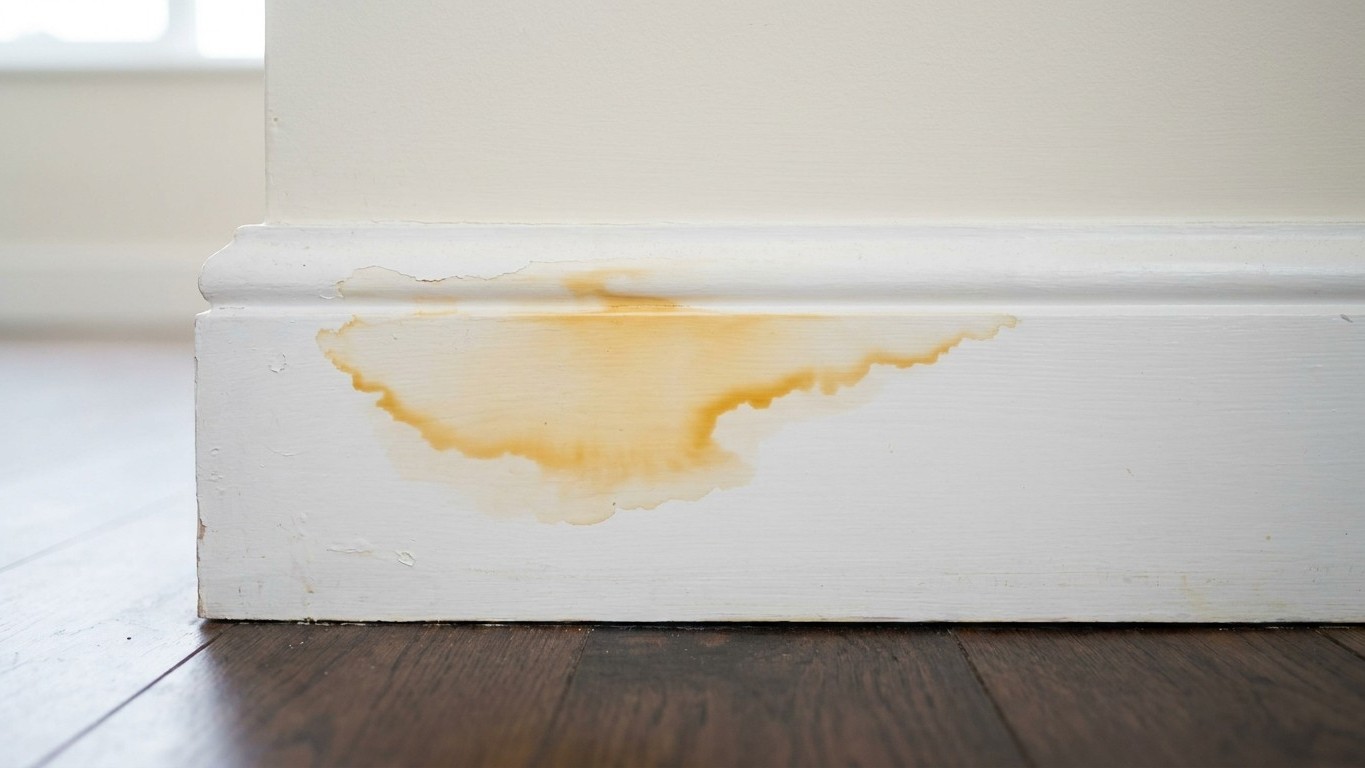
The most common culprit behind persistent yellow staining on skirting boards is tannin bleed. Wood naturally contains tannins, the same compounds that give tea its colour and red wine its astringency. When moisture gets into timber, even in very small amounts, those tannins dissolve and migrate toward the surface. Once they reach the paint layer, they push right through standard emulsion or even most gloss finishes, leaving that unmistakable amber or yellow tinge. The stain often looks like a watermark or a faint shadow, and no amount of extra topcoats will stop it, because you are painting over the symptom rather than sealing off the source.
Skirting boards are particularly vulnerable because of where they sit. They occupy the junction between floor and wall, which is one of the most moisture-prone areas in a home. Condensation from cold floors, slight gaps that allow draughts carrying damp air, and even cleaning with a wet mop that splashes the base of the boards all introduce moisture over time. In older houses, the problem can be compounded by slightly damp plaster behind the skirting, or by boards that were fixed directly against external walls without a damp-proof membrane.
There is a second possible cause worth knowing about: resinous knots in the timber. Pine skirting boards, which remain common in British homes built between the 1930s and 1980s, are full of resin pockets. That resin is not water-soluble, but heat and time cause it to liquefy and seep outward. The stain from resin tends to be slightly more orange-brown and often appears in a very localised spot rather than across the full length of the board. Running your finger over a resin bleed feels slightly tacky, whereas a tannin stain feels dry and flat.
What the decorator actually did to fix it
The first step, before any paint touches the wood, is to identify whether you are dealing with moisture or resin. My decorator stripped back a test section of paint with a heat gun on a low setting, then left the bare wood for 48 hours. If moisture is the cause, the stain reappears fairly quickly once the surface is warm. If it is resin, gentle heat actually encourages the pocket to empty itself, after which you can scrape away the residue with a palette knife and the spot stabilises.
For tannin bleed, the fix is a shellac-based stain-blocking primer. This is the step that most amateur decorators, myself included, skip entirely. Shellac creates a physical barrier that neither tannins nor moisture can penetrate. It goes on quite thin, dries in under an hour, and smells strongly of methylated spirits, so open every window you have. Two coats over the affected area, followed by one coat over the entire board length for consistency, and the stain simply stops. It does not fade it or cover it with white; it stops the chemical migration dead.
Water-based stain-blocking primers also exist and have improved considerably, though shellac remains the benchmark for severe cases. The water-based versions are lower odour and easier to clean up, but if your staining has bled through three or more layers of conventional paint, shellac is the more reliable choice. You can find both types in any decent decorators’ merchant, and they cost rather less than the endless tins of gloss you have been buying each spring.
Preventing the problem from returning
Sealing the stain is only half the work. Addressing the moisture source is the other half, and skipping it means you will be back on your knees with a brush in eighteen months. Check the seal between the bottom of the skirting and the floor. A thin bead of decorator’s caulk along that joint does two things: it stops draughts carrying damp air behind the boards, and it prevents mop water from wicking underneath. Press the caulk into the gap with a wet finger, smooth it flush, and leave it to cure for 24 hours before painting over it.
If you suspect the issue is behind the wall rather than at floor level, the damp patch will often feel slightly cool to the touch even in summer, and the paint on the wall above may be blistering or flaking in a way that matches the skirting stain. That points toward a plaster or structural damp issue that a stain-blocking primer alone cannot solve, and a damp survey would be money well spent before you pick up a paintbrush again.
One detail that surprises most people: the type of topcoat you choose after priming genuinely matters. Oil-based gloss is more vapour-resistant than water-based alternatives, which means it is slightly better at keeping ambient moisture from re-entering the wood over subsequent winters. Water-based satinwood has come a long way and is perfectly adequate in dry rooms, but in a hallway that faces a frequently opened front door, the old-fashioned oil gloss still holds its ground rather well. Whatever you use, apply it in thin coats rather than one thick one. A thick coat traps air bubbles, creates an uneven surface that holds dirt, and, as I now know from tiresome experience, gives any residual tannin the perfect hiding place to start working through all over again.