Painting a radiator with the heating switched on is one of those mistakes that seems harmless until you’re staring at a blistered, yellowing mess three days later. The damage is done before the paint even dries properly, and the science behind it is surprisingly straightforward once you understand what heat does to freshly applied gloss at a molecular level.
Key takeaways
- Surface temperature matters more than most people realize—and your radiator is probably 45°C too hot
- The yellowing that appears within days isn’t a paint quality issue; it’s a heat-triggered chemical reaction
- Even radiator-specific enamel won’t save you if applied to a hot surface—the cure happens after application, not during it
What actually happens when paint meets a hot radiator
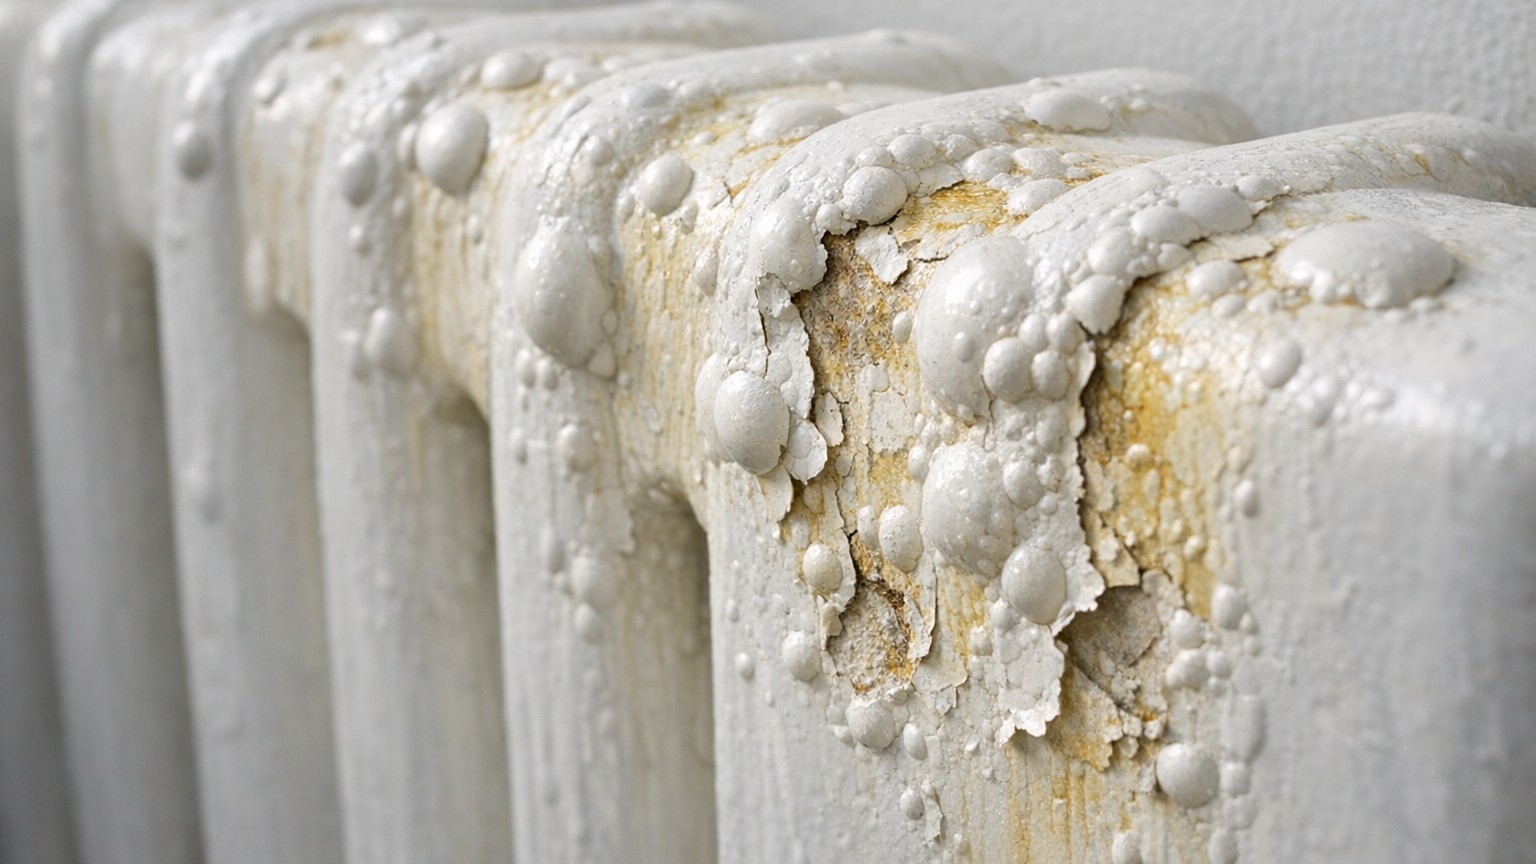
Most radiator paints, including standard gloss, are solvent-based or water-based coatings designed to cure gradually as the solvents evaporate. When the surface beneath them is warm, that evaporation happens far too quickly. The outer skin of the paint dries and forms a crust before the layers underneath have had any chance to off-gas properly. Trapped solvents then push upward through that hardened skin, creating bubbles. Some burst. Others harden into permanent raised lumps. The result looks rather as though your radiator has developed a rash.
The yellowing is a separate problem, and an even more stubborn one. Many oil-based gloss paints contain alkyd resins, which oxidise with heat exposure. This oxidation process turns the paint amber, then yellow, then a sad shade of magnolia that nobody chose. White radiators are the worst victims, because the discolouration is immediately visible. The frustrating part is that this can happen even with correctly applied paint if the wrong type is used, but the process is dramatically accelerated when the paint is still fresh and the radiator is pumping out heat.
The temperature rules that most people skip past
The guidance on most tins of gloss, if you read the small print, is clear: the surface temperature should be between 10°C and 25°C at the time of application, and for a period of several hours afterwards. A radiator running in winter can easily reach 60°C to 70°C on its surface. That gap between 25°C and 70°C is not a minor discrepancy. It completely overwhelms the paint’s ability to cure correctly.
Specialist radiator enamel paints are formulated differently. They use resins that are engineered to withstand sustained heat, often up to 100°C, and they resist the yellowing process far better than standard gloss. But here is the thing that the tins of radiator paint don’t always shout loudly enough: even radiator-specific paint needs to be applied to a cold surface. The heat resistance kicks in after curing, not during it. Painting a cold radiator with radiator enamel, then allowing it to cure for 24 hours before switching the heating back on, gives you a proper result. Rushing that window by even a few hours can still produce bubbling, just less dramatically than with standard gloss.
A useful rule of thumb: turn the heating off the evening before you plan to paint, let the radiator cool overnight, and don’t switch it back on until the following day at the earliest. In a centrally heated British home in winter, the surface temperature can take six to eight hours to fully drop, so this isn’t overcautious advice.
Stripping back and starting again: the only real fix
If bubbling and yellowing have already set in, there is no shortcut. Painting over bubbled gloss simply seals the problem beneath a fresh layer, and the uneven surface will telegraph through. The bubbled paint needs to come off. A fine-grade wet-and-dry sandpaper (starting around 120 grit, finishing with 240) will flatten bubbles and key the surface for a new coat. For more severe cases, a heat gun on a low setting can help lift stubborn patches, though obviously the radiator itself must be completely cold before you use one near it.
Once stripped back to a smooth surface, a light coat of metal primer designed for radiators makes a real difference, particularly on older cast iron radiators where rust can lurk under the paint. Primer also gives the topcoat something to bond to, which matters on the slick, non-porous surface of a modern steel panel radiator. Two thin coats of radiator enamel, applied with a short-pile roller for a smoother finish than a brush, and allowed to cure fully between coats, will give you a result that lasts years rather than weeks.
One detail worth knowing: gloss applied with a brush on radiators tends to show brush marks once dry, even with careful technique. A foam roller leaves a slightly stippled texture, but on a radiator that sits against a wall, this is rarely visible enough to matter, and the finish is considerably more even overall.
The longer life of a properly painted radiator
A radiator painted with the right product under the right conditions can look fresh for five years or more without significant yellowing or chipping. The main enemies after correct application are knocks from furniture, and the accumulation of dust in the fins that gets baked on with each heating season. A wipe-down with a slightly damp cloth at the start of winter keeps the surface looking cleaner and reduces the burnt-dust smell that older radiators produce.
Some older cast iron radiators, particularly the decorative column styles, develop a following among people who value their heat-retaining properties. Cast iron holds warmth considerably longer than modern steel panels after the boiler switches off, which can make a measurable difference to room temperature during the night. If you have one and it’s badly chipped, it’s worth the extra effort of stripping it properly, because the underlying metal, once cleaned up, is usually in excellent condition and can take a beautiful finish that a modern pressed-steel radiator simply can’t match.