A constantly running toilet is one of those household annoyances that starts as background noise and slowly drives you quietly mad. The sound of water trickling through the cistern at two in the morning, the nagging feeling that your water bill is creeping upward, it’s genuinely maddening. What most people don’t know is that in the vast majority of cases, the culprit is a single small component that costs next to nothing and takes about ten minutes to sort out yourself.
Key takeaways
- A single small part hidden in your toilet tank is responsible for the majority of running toilet problems
- Professional plumbers check this component before anything else—and it costs less than a coffee to replace
- You can diagnose and fix the issue yourself in minutes, potentially saving hundreds on your water bill each year
The part a plumber will check before anything else
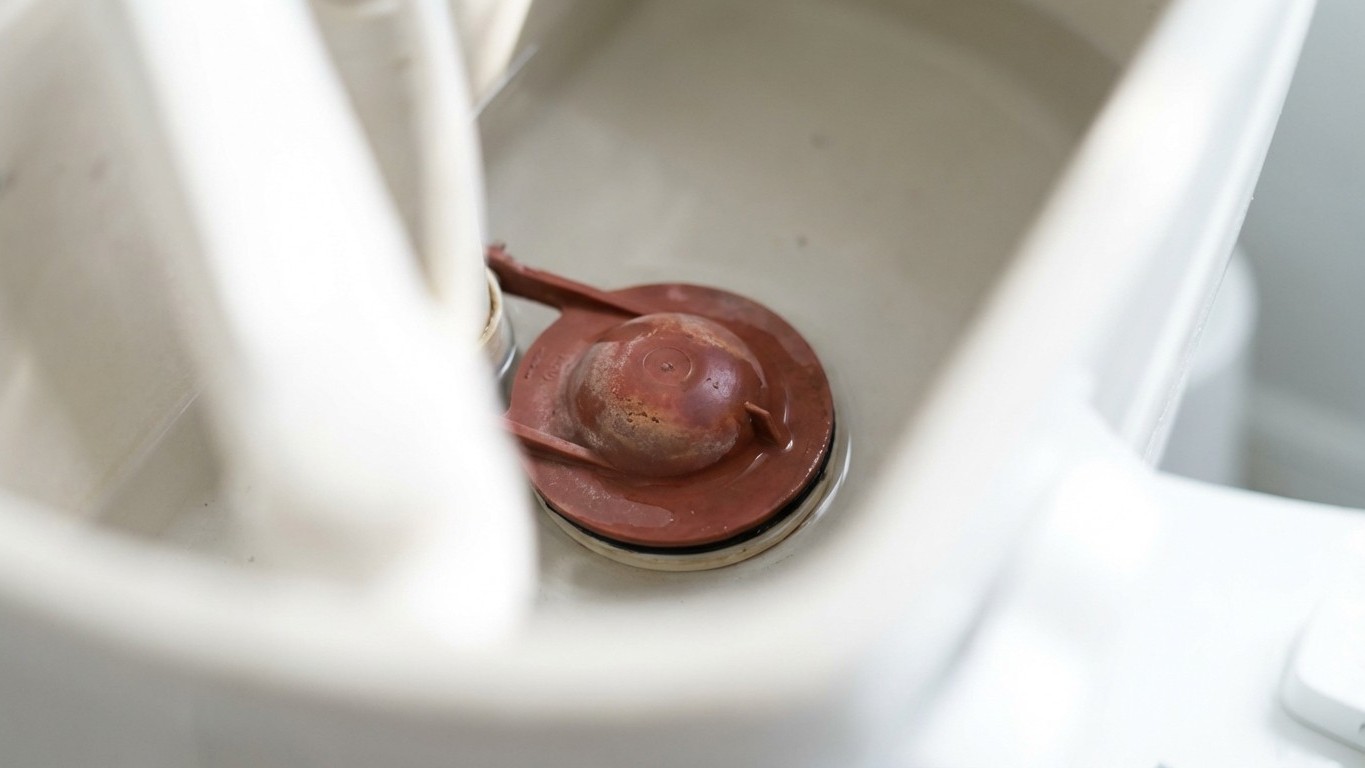
The flapper valve. That’s it. That’s the thing. Tucked inside the bottom of your toilet cistern, this small rubber disc is responsible for sealing the flush valve Opening between the tank and the bowl. When you flush, it lifts to let water rush through, then drops back down to allow the tank to refill. Simple in theory, and simple in its failure, too. Rubber degrades over time, warping, cracking, or collecting a rim of mineral deposits that stops it from sitting flush against the seat. The result? A constant, slow leak of water from the tank into the bowl, which triggers the fill valve to keep running indefinitely.
Lift the lid off your cistern (it just rests on top, no tools needed) and have a look. The flapper is usually a circular rubber flap, often red or black, attached to a small chain connected to your flush handle. If you’re not sure whether it’s the problem, try this: drop a few drops of food colouring into the tank and wait ten minutes without flushing. If that colour appears in the bowl, water is leaking past the flapper. It’s an old trick, but an effective one.
How to replace it, no plumbing experience needed
Turn off the water supply first. There’s usually an isolation valve on the pipe coming out of the wall or floor behind the toilet, a flat-head screwdriver slot, turned a quarter turn clockwise, will do it. Then flush to empty the tank. You’ll be working with a mostly dry cistern, which makes the whole job far less unpleasant than you might imagine.
Unhook the chain from the flush lever arm, then slide the flapper’s two ears off the pegs on either side of the flush valve. Have a good look at the old flapper when it’s in your hand. You may see visible cracking, a rough or uneven rim, or a brownish residue from hard water limescale. Any of these is enough to cause a seal failure.
Take the old flapper to your local DIY or plumbing merchant and match it by size and shape, they’re not all identical, and fitting the wrong one is a common Mistake that sends people back to square one. Universal flappers exist and will suit most standard cisterns, but if yours is a less common make, matching it directly is worth the five-minute trip. The replacement will cost somewhere between one and three pounds in most cases. Genuinely. This is a one-pound fix that plumbers charge a call-out fee to address.
Clip the new flapper’s ears onto the pegs, reattach the chain (leaving a small amount of slack, about 1 to 2 centimetres, so it closes fully when not flushing), turn the water back on, and test. In the majority of cases, the running stops immediately.
When the flapper isn’t the problem
If you’ve replaced the flapper and the toilet is still running, the next thing to look at is the fill valve, sometimes called the ballcock in older systems. This is the taller assembly on the left side of the tank, with a float mechanism attached. Its job is to shut off the water once the tank reaches a certain level. When it fails or is set too high, water keeps rising until it pours into the overflow tube, which drains constantly into the bowl.
You can spot this easily. Remove the lid and watch what happens after a flush. If the water rises right up to the overflow tube (a vertical tube in the centre of the tank) and keeps spilling in, the fill valve float needs adjusting downward. On most modern fill valves, there’s a simple adjustment screw or clip on the side of the valve body, turning it slightly will lower the water level by a centimetre or two, which is usually all it takes. Aim for the water to sit roughly 2 to 3 centimetres below the top of the overflow tube.
Older ballcock systems with a large plastic or rubber ball on a long arm can be bent gently downward by hand, carefully, to achieve the same effect. It sounds improvised, but it genuinely works and has done since the days when every household had a small toolkit on the kitchen shelf for exactly this sort of thing.
The water bill argument for fixing it today
A running toilet can waste somewhere in the region of 200 to 400 litres of water every single day, depending on the severity of the leak. Scaled up over a month, that’s a significant addition to a metered water bill, the kind that makes you do a double-take when the statement arrives. There’s something almost philosophically frustrating about paying for water that goes directly down the drain without serving any purpose whatsoever.
My own grandmother used to say that a house tells you what it needs if you’re willing to listen. A running toilet is about as direct a message as a home ever sends. The fix is cheap, the tools required are minimal, and the satisfaction of having sorted it yourself, without waiting two weeks for a tradesperson’s diary to free up — is genuinely worth something. And once you’ve peered into a cistern for the first time, you’ll wonder why it ever seemed daunting at all.