
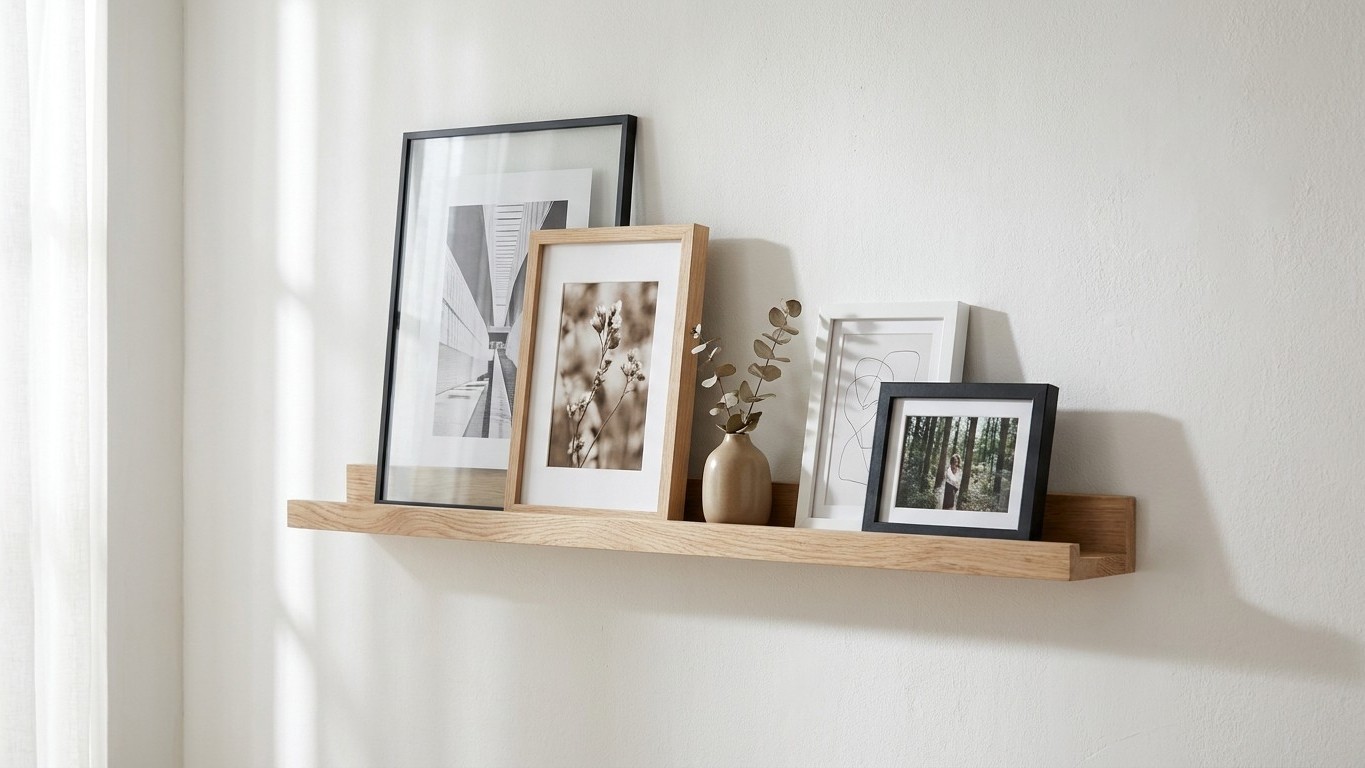
Thirty pin holes, half a tube of filler, and a spirit level that mysteriously vanishes the moment you need it most: that’s the traditional gallery wall experience, and most of us have lived through it at least once. There is a far simpler route, and it involves fixing a single shallow shelf to the wall rather than hammering in a nail for every frame. Screw a picture ledge along one wall in an afternoon, and suddenly the entire room reads as curated rather than cluttered, with none of the weekend-long commitment a full gallery wall usually demands.
Key takeaways
- A shallow shelf screwed into studs replaces the need for thirty individual nail holes in your wall
- Frames lean instead of hang, meaning your display can evolve and rearrange without leaving permanent marks
- One afternoon of installation gives you a styling flexibility that static gallery walls can never match
What this “one strip” actually is
Forget anything complicated. A picture ledge is simply a narrow shelf, typically built from two lengths of timber joined together with a lipped front edge, mounted flush against the wall so that frames can lean against it rather than hang from it. You screw through the back board into the studs in the wall, with at least two screws needed to hang the picture ledge. Builders often use inexpensive timber for this: pine furring strips cost roughly £2 for a 1×3 and £1 for a 1×2, and will paint just fine or take a stain if you fancy a rustic look. The front lip, usually another strip screwed on at a right angle, is what stops your frames sliding off, and it’s worth getting the depth right before you start. Depth matters more than people expect: a thin ledge suits standard frames, while a deeper shelf lets you layer chunky frames and stand objects in front.
Don’t worry about strength either. You could line up twenty framed photos on a single shelf and a decent bracket system wouldn’t notice, with ratings around 150 lbs per stud, so weight capacity is genuinely the last thing to worry about on a picture ledge setup. The only time it becomes relevant is if you start mixing in heavier decorative pieces alongside your frames, and even then you’d have to try pretty hard to overload a shelf that’s rated for 300 lbs across two studs.
Why one shelf changes how a whole room reads
A traditional gallery wall is a fixed grid. Once the nails go in, the arrangement is essentially permanent, and swapping one print for another means patching plaster and starting the measuring all over again. A ledge flips that logic entirely. Gallery shelves keep your art display an ever-evolving thing rather than a static collection, with no additional nail holes beyond the initial shelf-mounting required. That single distinction is what makes the room feel different: instead of staring at a fixed composition, you’re looking at something that visibly could change tomorrow, which somehow makes a wall feel more alive.
The styling possibilities open up too. Because frames simply lean rather than hang flat, you can overlap them, tuck a small print in front of a larger one, or rest an odd little object between two frames without a second thought. You could overlap a small painting with a larger photograph, tuck a tiny object between two frames, or lean an unframed postcard in front of a small ticket in a tiny frame. This is precisely why so many stylists reach for ledges over grids: a picture ledge lets you swap, layer, and rearrange framed art freely, with no nails per frame, no holes, and no commitment to a single layout. Nothing needs to be “finished” the day you install it. A holiday photo can join the arrangement next month, a child’s drawing can retire to a drawer when a new one arrives, and the whole thing keeps evolving without a single extra hole in the plaster.
Getting it level and keeping things put
The one part of this job you genuinely cannot skip is finding the studs, and marking them accurately before you drill. Ideally you would drill a few points of your rail into the studs to ensure that it is sturdy, and the trickiest part is making sure your rail is level. A cheap stud finder from any hardware shop solves the first problem; a decent spirit level, checked twice, solves the second. If you’re building your own ledge from timber rather than buying one ready-made, try to avoid going shorter than about 60cm, because it can be hard to find a stud within a very short span.
Once the shelf itself is up, a little extra insurance keeps leaning frames from wandering when a door slams or a toddler barrels past. Small adhesive strips placed where the back of each frame meets the wall do the job neatly, and can be peeled away without marking anything. Apply command strips to the wall where the frames will meet the wall, and to the back of the frames themselves where they overlap. It’s a belt-and-braces approach: the shelf does the heavy lifting, the strips just stop the odd frame slipping forward over time.
If your walls are the kind of delicate old plaster where even a single picture hook feels risky, it’s worth knowing that ledges aren’t the only screw-once solution going. A discreet rail fitted near the ceiling, with cords or hooks sliding along it, achieves something similar for framed pieces you’d rather hang flat than lean. You don’t have to puncture the wall every time you want to make a change, with no nail holes and no mars from putty, tape or adhesive strips, which makes it easier to change decorative items for a fresh look. Whichever route suits your walls better, the underlying trick is the same one your grandmother’s generation would have approved of: mount something sturdy once, properly, and let everything else move freely around it.
Sources : shelfexpression.net | gilbertartservices.com