For years, the ritual was the same every spring: get down on your knees, work your fingers raw, and yank out the stubborn green invaders threading through every crack in the patio. A week later, they’d be back. The problem wasn’t effort. The problem was skipping the one step that actually stops weeds from returning — repointing the joints with the right material, after properly clearing them out first.
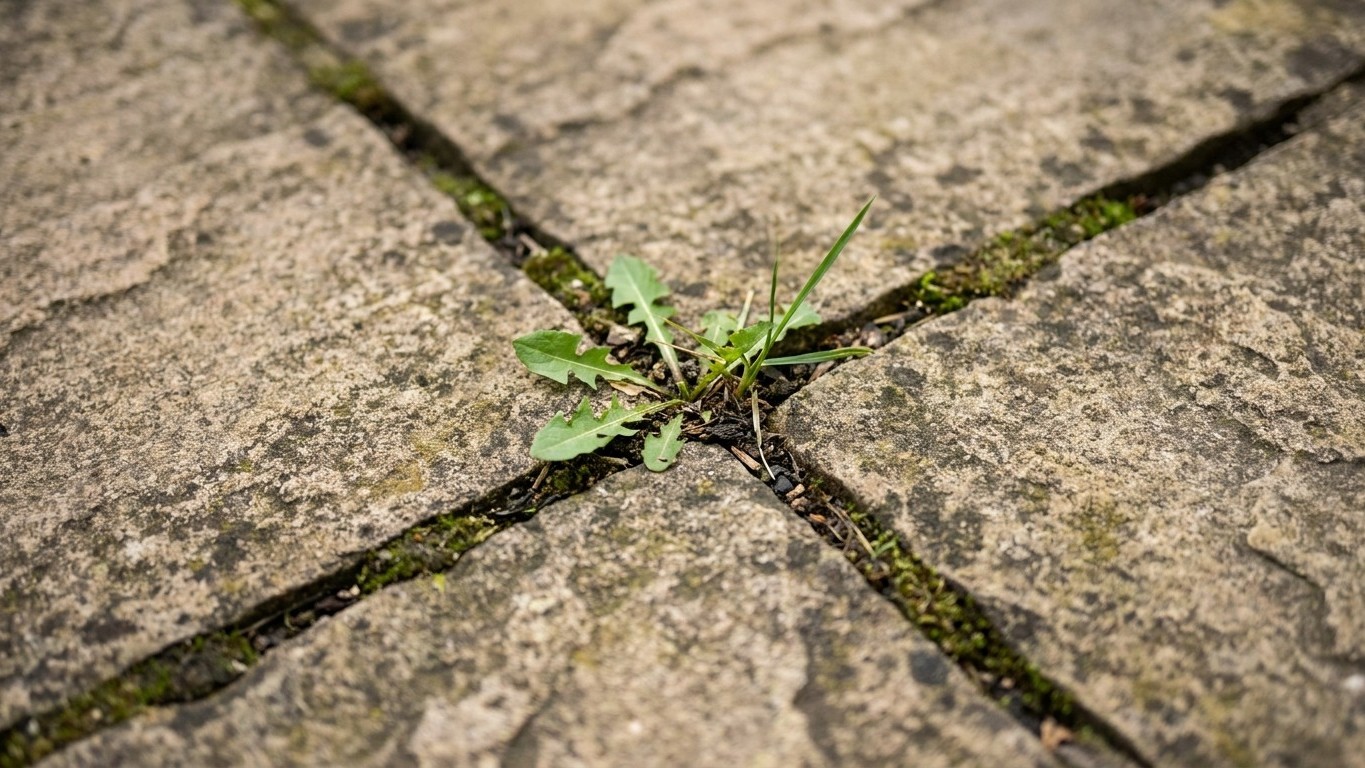
A landscaper watching the usual pulling-and-sighing routine will spot the mistake immediately. Most of us remove the visible weed but leave the joint wide open, a little hollow filled with damp grit, organic debris, and almost certainly a few hundred seeds waiting their turn. Weeds in patios thrive when they find a space with access to moisture, air, and soil. When gaps between the stones allow water to accumulate, it creates a fertile environment for weed seeds to settle and grow. Ripping out the top growth without sealing that gap is, essentially, just tidying the table before setting the next meal.
Key takeaways
- Most people yank visible weeds but leave the joints wide open—a perfect seedbed for next season
- There’s a critical prep step involving complete debris removal that 90% of homeowners skip entirely
- The right material (polymeric sand) creates a barrier that works for up to 5 years when applied correctly
Why Weeds Keep Winning (Until You Understand the Joint)
Weeds do not come from underneath the pavers because there is a layer of crushed stone beneath. They come from seeds that make their way into the joints and take root. Those seeds arrive via wind, bird droppings, and the neighbour’s dandelion clock drifting across the fence. If leaves, mulch, or grass clippings collect between your pavers, they can decompose and create a thin layer of organic soil, perfect for weeds.
Standard jointing sand, the fine, dry stuff brushed in when a patio is first laid, does a reasonable job for a season or two. Traditional jointing sand washes out during heavy rains, allowing water to penetrate the subgrade and destroy the patio’s structural integrity from the bottom up. Once that happens, every joint becomes a miniature seed tray. Over time, jointing materials degrade. If you see gaps forming, it’s time to repoint your paving. Filling the gaps quickly stops weeds from returning and protects the structural integrity of your surface. Most homeowners never do this, season after season, and then wonder why the weeds are winning.
The Step Most People Skip: Proper Preparation Before Repointing
Here is where the landscaper’s advice becomes genuinely useful. The single skipped step isn’t just choosing the right jointing material, it’s the thorough preparation that makes the new material bond properly and last. You need to get rid of the weeds that are already growing between your pavers before using any strategy to stop them from coming back. Cleaning the area ensures that fresh joint fillers or sealants stick well.
Start with a stiff-bristled brush or an old flat-head screwdriver and work out the debris from each joint. Use a narrow weeding tool, stiff brush, or a flat-head screwdriver to remove any weeds growing in the joints. For a larger patio, a pressure washer is far faster, run it along each joint to flush out loose sand, grit, and roots. The first thing you need to do is remove all of the existing sand down to the bottom of the paver. Polymeric sand works best when used at full depth. This is the bit most people skip entirely. They scrape the surface, see it looks cleaner, and reach straight for the bag of sand. The result? New material sitting on top of old, damp debris, and the weeds returning within weeks.
Once you’ve cleared the joints, let Everything dry completely. Apply only when the path or patio is completely dry. The binders in the sand are activated by water, so they won’t fill in the gaps properly and will begin to bind incorrectly if the work surface is damp. A warm, dry morning in late spring is ideal. Trying to rush this on a damp British afternoon is a reliable way to waste both your time and your materials.
The Right Fill Makes the Difference: Polymeric Sand and Jointing Compound
Polymeric sand is the most effective joint filler available for weed prevention and it’s become the standard for good reason. It combines fine sand with binding agents that activate when wet, once it cures, it forms a firm, cohesive mass in the joint rather than the loose granular fill that standard sand provides. Airborne weed seeds cannot send taproots through a high-PSI barrier. That’s not marketing language — it’s simply physics.
For British patios with slightly wider joints, a brush-in jointing compound works on the same principle and is widely available in builders’ merchants. These specially formulated compounds fill the gaps between paving stones, making it very difficult for weeds to take root. Ready-mix jointing compounds offer exceptional resistance against weeds, as they are rock solid, creating a strong barrier.
The application method matters as much as the product itself. Sweep the polymeric sand into the joints, then use a leaf blower to remove any excess from the paver faces before activating. Mist the surface lightly with water, enough to activate the binders without washing the sand out of the joints. Avoid heavy watering or rain for at least 24 hours after application. Sweep more sand into the joints until the sand is within 1/8 inch of the top of the paver. You don’t want the sand to be even with the top, especially if the top of the paver has a bevel.
Polymeric sand also acts as a barrier to keep insects like ants from burrowing beneath the joints and invading your patio, a bonus that anyone who has lifted a patio slab to find a metropolis of ants beneath it will appreciate greatly.
Keeping It Weed-Free Once You’ve Done the Hard Work
The repointing is done, the surface is set, and the patio looks properly smart. The temptation is to consider the job finished. Regular cleaning is essential to stop weeds from taking hold. Sweep your paving weekly to remove leaves, soil, and debris that can trap moisture and create a seedbed. A quick sweep takes two minutes and genuinely makes a measurable difference, sweeping removes seeds before they get the chance to take root between your pavers.
On drainage: standing water is one of the main reasons weeds grow in paving joints. If your paving system doesn’t allow for proper drainage, it creates a damp environment where weeds can flourish. Ensure that your paving stones are properly installed with the right angle for drainage, and that water can flow freely through the joints and away from the surface. Even the best jointing compound will degrade faster if water is pooling against it after every shower.
As for how long all this effort lasts: polymeric sand, once applied to cleaned joints, will bind to seal out weeds for up to 5 years. Reapply sealer over the top every few years for added protection. Reapplying sealer every 2 to 5 years maintains effectiveness, protecting pavers from fading, weathering, and ant infestations. The sealer also repels stains and locks in the sand between pavers, ensuring a secure fit.
One thing worth knowing if you reach for the vinegar bottle as a quick fix: don’t use vinegar to kill weeds between pavers or patio stones because its acidity can etch, discolor, and eventually weaken the stone. Similarly, don’t use any DIY method that contains any form of salt, that salt will seep into the soil and kill your plants. The old-fashioned remedies feel satisfying in the moment but can quietly damage both the stone and the surrounding garden beds. Boiling water poured directly onto isolated weeds is a safer, chemical-free alternative that works well for spot treatment on a flagged patio.
Sources : gardeningknowhow.com | aol.com