
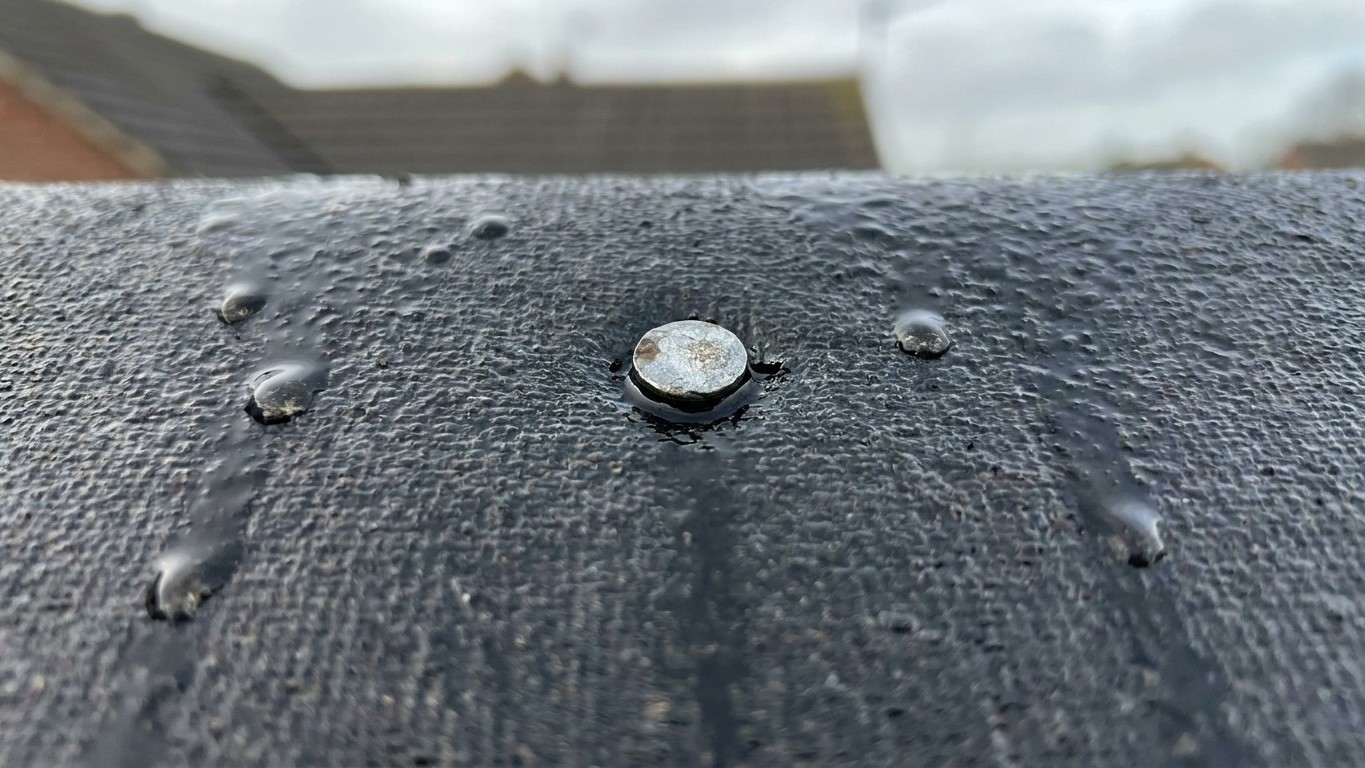
Those nail heads down the middle of the felt hadn’t been holding anything in place at all. They’d simply been punching neat little holes straight through the one material that was supposed to be keeping my shed dry, and the first proper downpour found every single one of them. Water doesn’t need much of a gap to get in, and a clout nail driven through open felt, away from any overlap, gives it exactly that.
Key takeaways
- Nails driven through the flat middle of roofing felt create punctures with nothing behind them to stop water infiltration
- The critical fixing points are the overlaps between sheets—not the open field—where water is designed to flow downward, not sideways
- Modern felt can self-seal around nail shafts, but only when they’re placed exactly where they belong: the seams and edges
Why nailing the middle of the sheet is the classic mistake
Roofing felt was never designed to be pinned down like a tablecloth. It works on the same principle as roof tiles or fish scales: each strip overlaps the one below it so that water always runs onto felt, never under an edge. The purpose of shed roof felt adhesive is to seal the join where two sheets of roofing felt overlap, applied in a continuous line to stop wind-driven rain and water driven by capillary action up the roof slope. Nails belong in that same zone, reinforcing the glued lap, not scattered across the flat, uninterrupted field of a single sheet where there’s no second layer beneath to catch what leaks through.
When you hammer a nail through the open middle of a sheet, you create a puncture with nothing behind it but bare roof board. Modern bituminous felts do have a clever trick up their sleeve here, as I later discovered: the material can seal itself around a nail shaft under the right conditions. But that self-sealing relies on the felt being properly bedded and the nail sitting in a spot designed to take it, not scattered mid-panel to fight wind uplift that should have been dealt with at the edges instead. One old hand on a DIY forum summed up the danger neatly, warning that nailing straight through the felt at regular intervals “inevitably causes leaks through the clout nails- despite the instructions on the rolls telling me to do this this way.” The counterpoint from a more experienced roofer in that same thread was reassuring, though: “Modern roofing felts have an unusual property in sealing around the clout nails when penetrated”, provided you’re not relying on that seal alone in a spot never meant to be fixed.
How the overlaps and nailing pattern should actually work
A typical apex shed roof uses three strips of felt: two side pieces and a ridge cap over the top, and the overlap between them needs to be generous. Each run of shed felt should overlap the next by at least 7.5cm, though several suppliers recommend going further still, with one guide suggesting the ridge section should overlap the left and right piece by at least 300mm on both sides for real belt-and-braces protection. That overlap is where your nails earn their keep, not the flat expanse in between.
Spacing matters too, and it isn’t the same all over the roof. At the top of the felt, use clout nails at 100mm intervals, while at the bottom, you can use clout nails at 300mm intervals. That’s because the top edge, tucked under the layer above, needs closer fixing to stay snug against wind, while the bottom edge is doing less work and simply needs to hold its line. Wherever two sheets meet, the rule tightens further: the seams between sheets use nails at 5cm spacing. As for the nails themselves, size genuinely matters on a thin roof deck. A typical shed roof deck will be made from roof boards or OSB that are about 12mm thick, so using 13mm nails will be the most secure, allowing for maximum nail penetration without going through the roof to the underside. Anything longer and you risk a nail tip poking through into the shed itself, which is its own soggy surprise waiting to happen.
Here’s the bit that would have saved me a bucket under the workbench: adhesive on a felt roof isn’t there to glue the sheet to the timber at all. The purpose of shed roof felt adhesive is NOT to stick the felt to the wooden roof boards, as this can cause problems in the future with repairs and retaining any water that gets through the roof felt. It’s strictly a felt-to-felt job, sealing the overlaps against exactly the kind of wind-driven rain that had been rattling my shed roof that afternoon.
Sorting out the damage without starting from scratch
I didn’t need to strip the whole roof, thankfully. Every nail sitting in the open field, away from an overlap, got a small dab of roofing mastic worked under its head with a scraper, which plugs the puncture without disturbing the felt around it. If you’re standing at this stage yourself and wondering whether to just add more nails to stop future lifting, don’t. The proper fix for wind-lift is pulling the felt taut before you fix it and keeping your nailing tight along the true fixing lines: the eaves, the verges, and every overlap. Some traditionalists prefer treated battens laid over the felt rather than nails through it at all, an approach one experienced tradesman described as sound so long as the battens are tanalised and laid vertically down the roof with a bead of roofing mastic run along their length before fixing, which squeezes out and prevents water from being trapped underneath.
A year on, my shed’s still bone dry, and I’ve come round to thinking that felt roofing forgives almost every mistake except impatience with the overlaps. Buy slightly more felt than your measurements suggest you need, because a roll cut just a few centimetres short tempts you into skimping on exactly the laps that keep the water out, and there’s no false economy quite like a shed roof you’ll be climbing back up to fix within the year.
Sources : community.screwfix.com | powernailglobal.com