
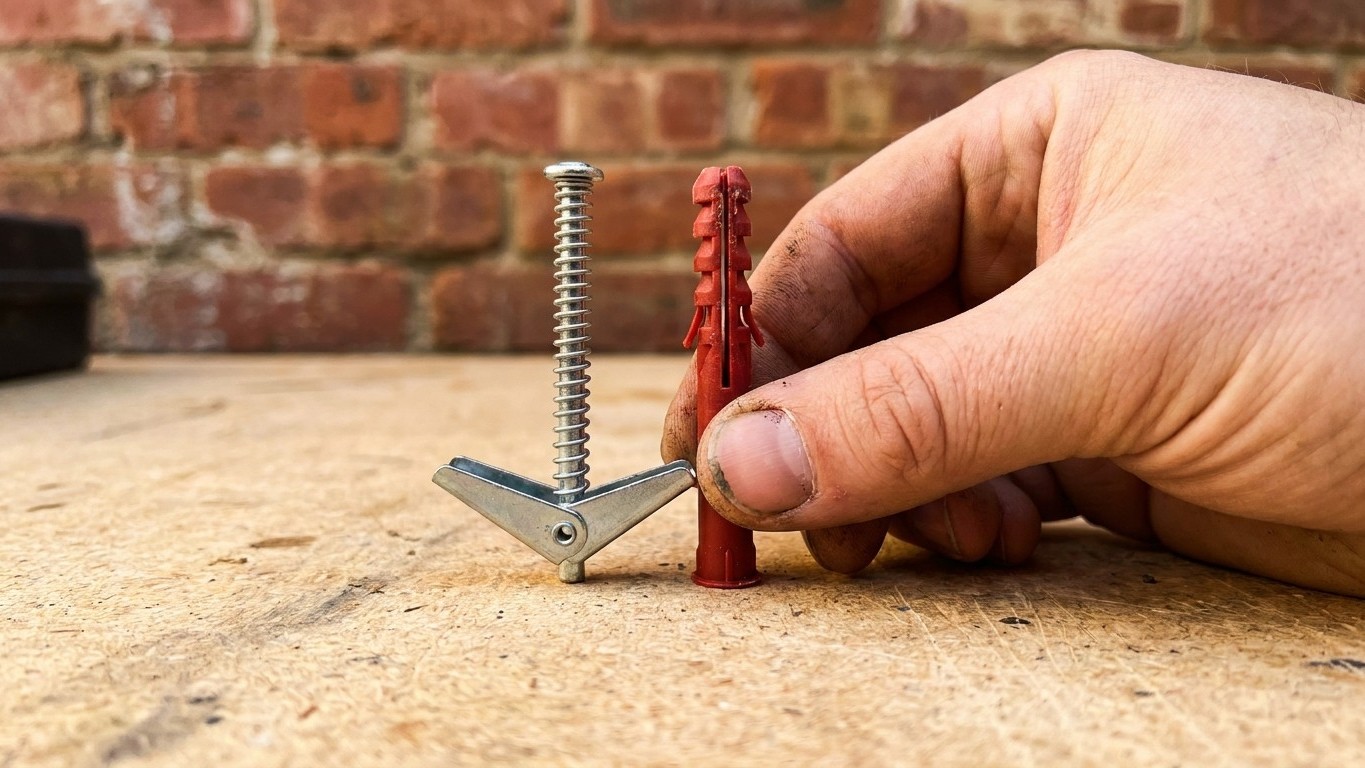
A wall plug that spins loose isn’t a job for a fatter screw. It’s usually a sign you’re using entirely the wrong type of fixing for your wall, and no amount of brute force will change that. I learned this the hard way after months of wrestling with a bathroom shelf that kept sagging, before a builder popped round to fix a leaky tap and pointed out my mistake within about ten seconds of looking at the wall.
Here’s what was actually happening. Every time the screw spun freely instead of biting, I’d pull it out, grab a slightly thicker one, and jam it back in. Sometimes I’d even wind the plug in with pliers first. The shelf would hold for a fortnight, then start wobbling again. My working theory was that the plug itself was worn out. The real problem was that I’d drilled into plasterboard, a hollow stud wall with nothing but air and the occasional wooden batten behind it, and I was using a plug designed for solid brick or blockwork.
Key takeaways
- A spinning wall plug isn’t a sign you need a bigger screw—it usually means you’re using the wrong fixing for your wall type
- Standard plugs designed for solid masonry don’t work in hollow plasterboard because there’s nothing solid behind them to grip
- Forcing thicker screws actually makes it worse by enlarging the hole and crumbling more plaster away
Why the plug keeps spinning
A standard red or brown wall plug works on a simple principle: as the screw goes in, the plug expands sideways and grips the sides of the hole in solid masonry. That friction is what holds everything up. Push that same plug into plasterboard, though, and there’s nothing solid for it to press against. The plaster face is only around 10-12mm thick, sitting in front of a cavity, so the plug either pokes straight through into empty space or just spins uselessly in a hole that’s gone slightly too big.
Forcing a bigger screw makes this worse, not better. A thicker screw needs a wider hole, which means more plaster crumbles away around the edges, which means even less material left to grip. Eventually you’re left with a hole so chewed up that nothing short of filler will sort it. The builder told me he sees this constantly on jobs, people assuming a spinning fixing means “not enough grip” when it actually means “wrong grip entirely” for that wall type.
The fixing that actually works
For hollow walls, plasterboard fixings (sometimes called cavity fixings) are built for exactly this situation. Rather than relying on friction against the sides of the hole, they work behind the plasterboard, spreading the load across the back face where there’s proper resistance. There are a few types worth knowing:
- Spring toggles, which fold flat to pass through the hole, then spring open behind the board once inserted
- Self-drilling plasterboard plugs, which you screw straight in with a screwdriver, no pilot hole needed, and which grip the board itself with a broad thread
- Metal cavity anchors, which expand and clamp the plasterboard between two flanges, good for heavier items like mirrors or small shelving units
For anything with real weight, mirrors, curtain poles, a decent-sized shelf, the safest bet is always to find the timber stud or noggin behind the plasterboard and screw straight into that. A basic stud detector does this reliably, or you can tap along the wall and listen for the duller thud that means solid wood rather than hollow cavity. Once you’ve found it, you often don’t need a plug at all, just a screw long enough to bite into the timber.
Getting it right without wasting money
None of this needs to cost much. Multipacks of assorted plasterboard fixings are available from most hardware shops and DIY chains for a few pounds, and a single spring toggle or self-drilling fixing usually costs pennies rather than pounds. The mistake I made, buying bigger screws instead of the correct fixing, actually cost more in the end once you count the filler, the sandpaper, and the second trip to the shop.
Match the fixing to the job before you match it to the wall. A picture frame under a kilo needs very little. A bathroom shelf loaded with bottles, or a curtain pole taking the weight and pull of heavy curtains, needs something rated for several kilograms, and the packaging on plasterboard fixings usually states a safe working load. It’s worth a moment’s read rather than a guess.
Drilling technique matters too. Go in at a right angle to the wall, not at a slant, and don’t force the drill once you feel it break through the plasterboard into the cavity behind, since going too far can crack the board around the hole. If you’re using a self-drilling fixing, a bit of hand pressure with a cross-head screwdriver is usually enough, no power tool required, which is part of why builders like them for quick jobs.
The bathroom shelf, once refitted with proper spring toggles rather than an ever-thickening parade of screws, hasn’t budged in over a year now. The old holes, three of them stacked slightly apart from my earlier attempts, got a dab of filler and a lick of paint and you’d never know. What stuck with me most was how confidently that builder diagnosed it from across the room, simply by tapping the wall with one knuckle and listening for the hollow sound that told him everything he needed to know before he’d even touched a screwdriver.