Bleeding a radiator with the heating switched off is one of those mistakes that feels completely logical until someone explains why it’s wrong. The air trapped inside your radiator is exactly that, trapped, and the way it escapes depends entirely on the pressure and circulation happening inside your system. Turn the heating off before you bleed, and you’ve removed the very conditions that allow the air to move.
Key takeaways
- A common radiator bleeding mistake could be making your home colder, not warmer
- The timing of when you turn off your heating matters more than you’d think
- One forgotten step could mean repeating the entire process next week
Why the heating needs to be on first (but not quite yet)
Central heating systems work by circulating hot water through a closed loop of pipes and radiators. When air gets into that loop, it rises to the highest point it can find, which is usually the top of your radiators. This is why cold patches at the top of a radiator are the classic sign that bleeding is needed. The pump that drives water around the system actively pushes that air upward and forward, concentrating it in predictable spots.
The standard advice, confirmed by the Energy Saving Trust and most plumbing guidance, is to run the heating until the radiators are warm, then turn the system off and wait about fifteen to twenty minutes before bleeding. That waiting period matters. With the pump still running, you risk sucking air back into the system through the bleed valve the moment you open it, rather than letting trapped air out. The pressure also drops to a safer level once the pump has stopped. So the correct sequence is: heat on, radiators warm, pump off, short wait, then bleed.
What you absolutely do not want is a completely cold system with no pressure built up. Open a bleed valve on a cold, depressurised radiator and you may well draw air in rather than push it out, which is precisely what that plumber was referring to.
How to bleed a radiator properly, step by step
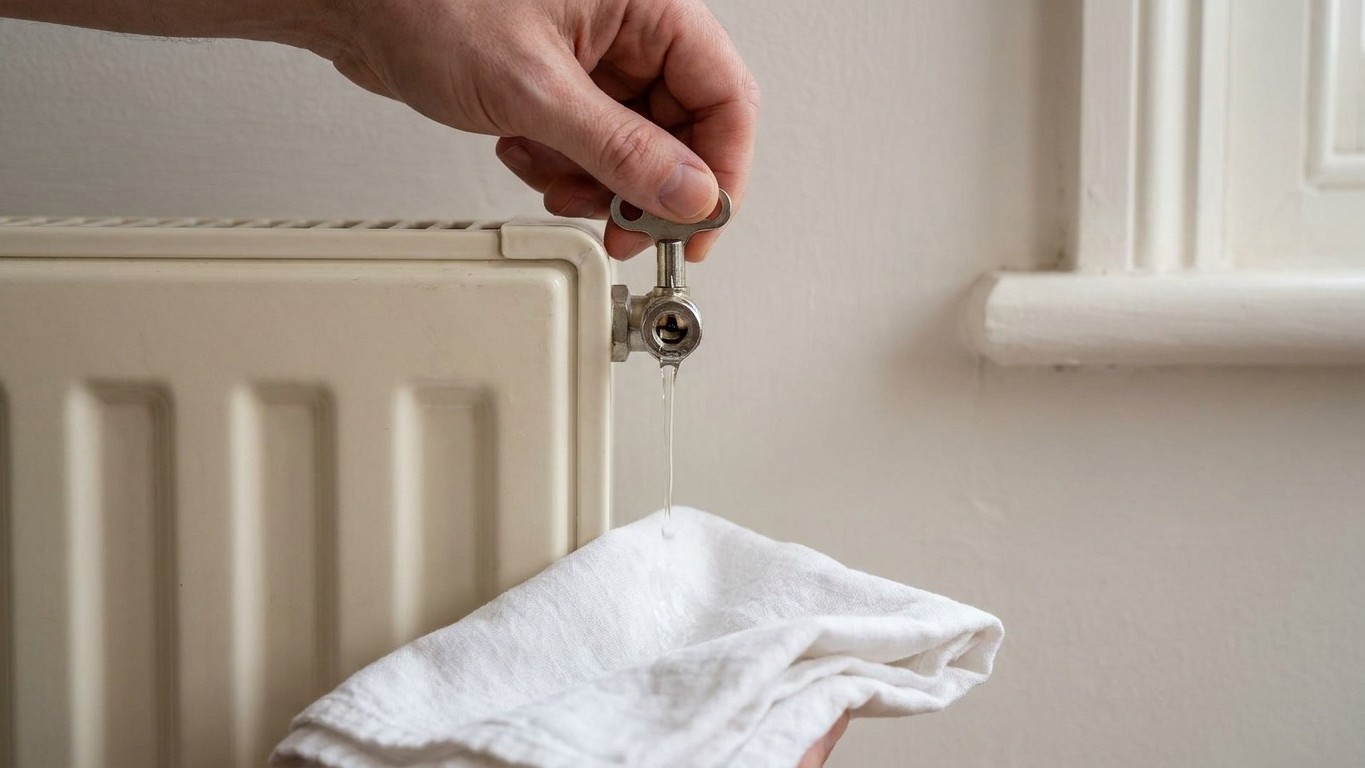
The tools involved are reassuringly simple. You’ll need a radiator bleed key, which costs very little from any hardware shop, and an old cloth or small container to catch any drips. Start with the radiator farthest from your boiler, typically upstairs if you have two floors, and work your way back toward it. This systematic approach ensures you’re clearing the most remote parts of the circuit first.
Insert the bleed key into the square-headed valve at the top corner of the radiator, usually on the right-hand side. Turn it slowly anticlockwise, no more than half a turn. You’ll hear a hissing sound as trapped air escapes. Hold your cloth underneath. The moment the hissing stops and a steady trickle of water appears, close the valve immediately by turning the key clockwise again. Don’t wait for water to pour out freely; a small amount is enough to confirm the air has cleared.
Once you’ve bled all the radiators that need attention, check your boiler pressure gauge. Bleeding releases water from a sealed system, and the pressure will have dropped slightly. Most combi boilers operate best between one and one-and-a-half bar when cold. If the needle has dropped below one bar, you’ll need to repressurise the system using the filling loop, which is usually a braided hose with a valve underneath or beside the boiler. Top it up slowly, watching the gauge, and stop at around one-and-a-quarter bar. Then run the heating again and check that the bled radiators are warming evenly from top to bottom.
When radiators need bleeding more than once a year
Some households find themselves bleeding radiators repeatedly throughout the winter, which points to an underlying problem rather than simple air ingress. A system that constantly accumulates air often has a small leak somewhere, even one too minor to cause visible damp, because water escaping means air entering to replace it. Corrosion inside older steel radiators can also produce hydrogen gas, which behaves exactly like trapped air and causes identical cold spots.
If you notice the water that comes out when bleeding is dark brown or black rather than clear, that’s a strong indicator of sludge and corrosion inside your system. This is worth taking seriously. A powerflush, where a specialist machine forces a chemical cleaning solution through the entire circuit at high pressure, can restore a gunged-up system considerably. It’s not a cheap job, but it’s far less expensive than replacing corroded radiators or a damaged boiler heat exchanger, and it genuinely improves efficiency, which shows up on your gas bill.
Older properties with cast iron radiators tend to need less frequent bleeding than modern panel radiators, partly because the greater water volume inside them dilutes the effect of minor air ingress. Modern double-panel radiators hold less water relative to their surface area, which makes them more susceptible to cold spots from relatively small amounts of trapped air.
One detail that often surprises people: if bleeding makes no difference at all to a cold radiator, the problem may be a stuck thermostatic radiator valve rather than trapped air. The pin inside TRVs can seize, particularly at the start of each heating season after sitting unused all summer. Removing the TRV head and gently pushing the pin in and out with a pair of pliers will often restore it without any cost at all. A stuck open valve means the radiator stays cold regardless of how many times you bleed it.