The mortise and tenon joint. That’s the secret. Before an experienced carpenter drives a single screw or applies a drop of glue to a new workbench, they check whether this Ancient connection is correctly sized, cleanly cut, and properly oriented. Most home woodworkers rush past it entirely, reaching instead for metal brackets and pocket screws, and then wonder why their bench wobbles after six months of use.
Key takeaways
- The joint carpenters check first isn’t at the top—it’s hidden in the lower stretcher rails where most DIYers never look
- One small detail called a ‘haunch’ prevents the entire frame from twisting under pressure—skip it and your bench slowly leans
- Two extra hours of careful work on this single joint determines whether your bench lasts decades or needs rebuilding in a year
Why the workbench joint matters more than the bench top
A workbench takes punishment unlike any other piece of furniture in your home. You plane against it, you hammer on it, you lean your entire body weight into it when sawing. The top can be replaced; a failed leg joint means rebuilding from scratch. Old-school joiners understood this intuitively, which is why traditional bench construction has barely changed in three hundred years. The mortise and tenon resists racking forces in every direction simultaneously, something no bracket can honestly claim.
The physics are straightforward enough. When you push a plane along a workpiece, you’re applying a horizontal force to the bench legs. That force tries to rack the frame sideways. A well-fitted mortise and tenon, with its long gluing surface and mechanical interlocking, absorbs that force through sheer wood-on-wood contact. A metal bracket, by contrast, holds with only a few screws driven into end grain, which is the weakest possible orientation in timber.
There’s a reason the joint appears in Egyptian furniture dating back four thousand years. Longevity isn’t accidental.
The specific joint most DIYers skip, and how to get it right
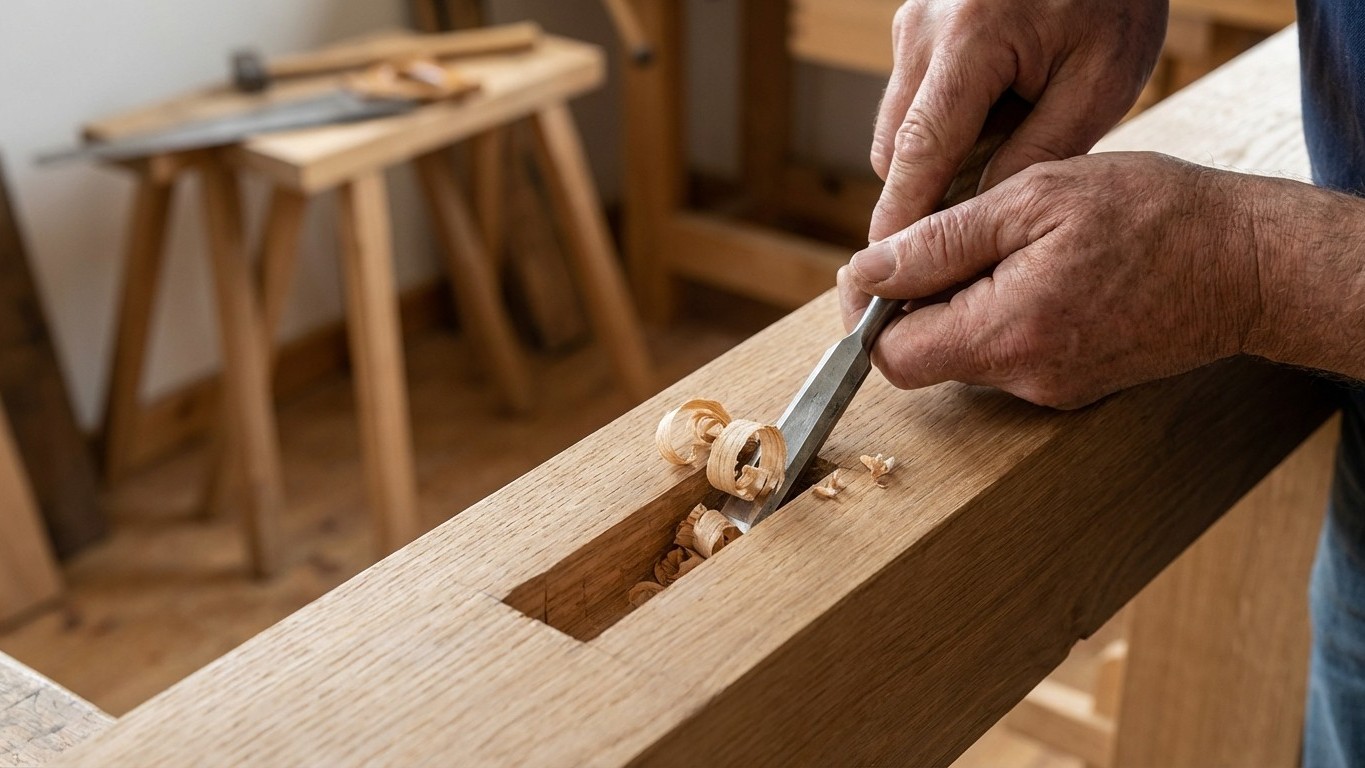
The joint in question is the haunched mortise and tenon connecting the bench legs to the stretcher rails. Not the top rail, not the vise hardware, but those lower horizontal members that tie the legs together near the floor. Ask yourself honestly: did you include stretchers in your last workbench build? Many people don’t bother, assuming the bench top carries all the structural load. It doesn’t. The stretchers prevent the legs from spreading outward, particularly on wider benches, and the haunched tenon keeps that connection tight even as the wood moves through seasonal Changes in humidity.
Cutting the joint well is a morning’s work, not a weekend’s. You’ll need a sharp mortise chisel (a 12mm is the right size for most bench-weight timber), a marking gauge, and a decent tenon saw. Here’s how to approach it step by step.
First, mark your mortise on the inside face of the leg using the marking gauge. The standard rule is that the mortise width should be one third of the timber’s thickness. For a 75mm leg, that means a 25mm mortise. Mark the depth at 50mm minimum; shorter than this and you’re just hoping for the best. Chop the waste in stages, working from both ends toward the centre, and pare the walls clean before you attempt a test fit.
The tenon on the stretcher should be cut fractionally fat, then trimmed to a snug fit rather than a loose one. “Snug” means you can push it home with firm thumb pressure but it won’t simply fall in under its own weight. The haunch, that small step cut into the shoulder of the tenon, fills the groove at the top of the mortise and prevents the joint from twisting. Skip the haunch and the rail will rotate slightly every time you apply lateral pressure. Over months, that tiny rotation becomes a noticeable lean.
One honest tip from decades of workshop tradition: dry-fit Everything before glue touches anything. Assemble the entire bench frame without adhesive, check it for square by measuring diagonals, and live with it for a day. You will almost certainly find one joint that needs a small adjustment. Far better to discover this dry than while the glue is going off.
Modern materials, traditional method
There’s a temptation to use engineered timber for a workbench, particularly the laminated pine sold cheaply at builders’ merchants. It’s stable, which is genuinely useful, but it does behave differently under the chisel. Engineered boards have varying grain directions, and you’ll need to take lighter paring cuts than you would with solid oak or beech. The joint geometry remains identical; only the cutting technique changes slightly.
Glue choice matters here too. Standard PVA wood glue is perfectly adequate for interior workbenches, but if your workshop isn’t heated, consider a waterproof or cross-linking PVA rather than standard grade. Temperature fluctuations and condensation will test any adhesive over time, and a workbench should last decades, not years.
Some carpenters peg their mortise and tenon joints with a wooden dowel driven through the assembled joint once the glue has cured. This is called drawboring when the holes are offset slightly to pull the joint tight, and it adds a pleasing permanence to the connection. A 10mm hardwood dowel, slightly longer than the leg width and planed flush after fitting, is the traditional finish. No glue needed on the peg itself; the compression does the work.
What experience actually looks like
There’s a particular satisfaction in pulling a finished bench frame off the assembly trestles and feeling, rather than hearing, that it’s solid. No flex, no creak, no tiny give when you press down hard on one corner. That sensation is the mortise and tenon doing its quiet work.
The irony is that this joint takes perhaps two extra hours compared to screwing brackets on. Two hours spread across a project that might represent a whole weekend’s effort. Carpenters who’ve been building benches for forty years don’t skip it because they enjoy the extra work; they do it because they’ve seen what the alternative looks like after a year of honest use. Perhaps the better question isn’t whether you have time to cut the joint properly, but whether you have time to rebuild the bench when you haven’t.