There I was, drill in hand, feeling quietly proud of myself for finally tackling the shoe pile by the front door. Ten Minutes later, I had a shoe rack on the wall, yes, and also a small geyser of water quietly bubbling up through my skirting board. The mistake I made wasn’t choosing the wrong rawl plug, or drilling at a wonky angle. It was something far more fundamental, and I’ve since discovered I’m far from alone in making it.
Key takeaways
- A routine shoe rack installation revealed a water pipe no one had warned about
- The real culprit wasn’t poor technique—it was skipping one critical preparation step
- One affordable tool could have prevented hundreds of pounds in emergency plumber bills
The mistake nobody talks about
Everyone warns you to check for electrical cables before drilling. Most people have absorbed that message by now, even if they don’t always act on it. But pipes, water pipes, in particular, get surprisingly little attention in the same breath, and they are just as capable of ruining your afternoon. Central heating pipes, cold water supply pipes, and sometimes even gas pipes run vertically and horizontally inside walls, often in places you’d never anticipate. Builders don’t always follow the logical routes you might expect. A pipe heading to an upstairs bathroom can travel in directions that seem almost perverse when you finally trace them on a diagram.
My shoe rack went up on a hallway wall, which seemed harmless enough. No sockets nearby, no obvious reason for cables. What I hadn’t considered was a short pipe run supplying a radiator on the other side of that same wall. The drill bit found it with unerring accuracy. A 6mm masonry bit, a copper pipe, and a very memorable Saturday afternoon.
The cost of that particular lesson, by the time I’d called a plumber and had the wall replastered, was considerably more than the shoe rack itself. That’s the thing about DIY mistakes: the rack might cost you ten pounds, but the repair can run into the hundreds.
How to actually check before you drill
A pipe and cable detector (sometimes sold as a stud finder with multi-detection) is the tool that would have saved my wall. These handheld devices scan the surface of a wall and give you a warning signal when they detect live wires, metal pipes, or wooden joists beneath. They’re widely available in hardware shops and online, and even the more modest models do a respectable job for household use. You don’t need a professional-grade device to hang a shoe rack safely.
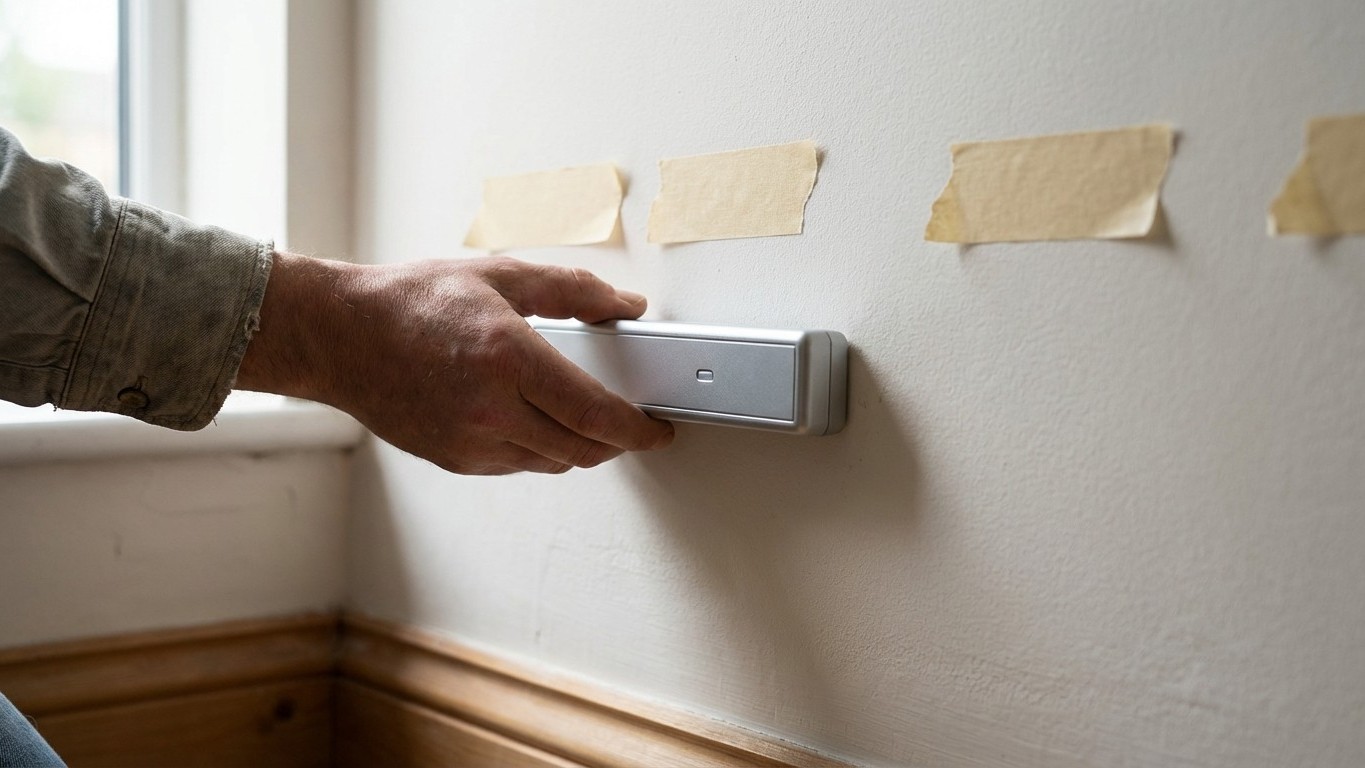
The technique matters as much as the tool. Run the detector slowly across the wall in a grid pattern, both horizontally and vertically, and mark anything it flags with a small piece of masking tape. This takes perhaps five Minutes, which is nothing compared to the time spent calling emergency plumbers. Once you’ve mapped out the safe zones, you can drill with a good deal more confidence.
There’s also an older method that still holds up well: thinking logically about where pipes are likely to travel. In most British homes, pipes run vertically from the floor or ceiling, and horizontally at skirting board level or just above. They tend to follow straight lines between fixtures, boilers, radiators, sinks. If you’re drilling anywhere near a radiator, a bathroom above, or the kitchen on the other side of the wall, that’s the moment to be most careful. Common sense, used alongside a detector, is quite the combination.
What to do if you do hit a pipe
First, try not to withdraw the drill bit immediately. This sounds counterintuitive, but pulling back quickly can sometimes make the initial flow of water worse if the bit has caught in the pipe wall. Turn the water off at the mains stopcock, usually found under the kitchen sink or near the water meter, as quickly as you can. Then you can remove the bit calmly and deal with the damage.
Keep a few things in mind for this unfortunate scenario: a small puncture in a copper pipe is actually a manageable repair for a competent plumber, and temporary patch kits (available from most plumbers’ merchants) can stem the flow while you wait. What you genuinely don’t want to do is ignore a slow drip and hope it dries out on its own. Water travelling inside a wall cavity causes damp, and damp causes mould, and mould is a problem that has a habit of becoming very expensive very quietly.
For the record, hitting an electrical cable is the more immediately dangerous scenario, always turn off the mains electricity at the consumer unit if you suspect you’ve caught a wire, and call a qualified electrician before touching anything further. Pipes are a costly nuisance; live wires are a genuine safety risk.
A small investment that changes everything
A decent pipe and cable detector costs somewhere in the region of what you might spend on a good meal out. Given that a single plumbing repair can cost many times that, the maths are fairly self-evident. What strikes me, though, is how many of us reach for the drill without this step simply because nobody ever showed us to do otherwise. DIY confidence is a wonderful thing, but it sometimes skips past the preparation stage rather too quickly.
My shoe rack, as it happens, now lives on a different wall entirely, fixed with proper masonry anchors after a very thorough scan. The shoes are tidy. The pipes are intact. And I’ve become mildly evangelical about detector tools to anyone who’ll listen at a dinner party, which I accept is its own kind of problem.
The question worth sitting with, before your next drilling project, is simply this: do you actually know what’s behind that wall? Because the wall doesn’t give much warning before it tells you the hard way.