
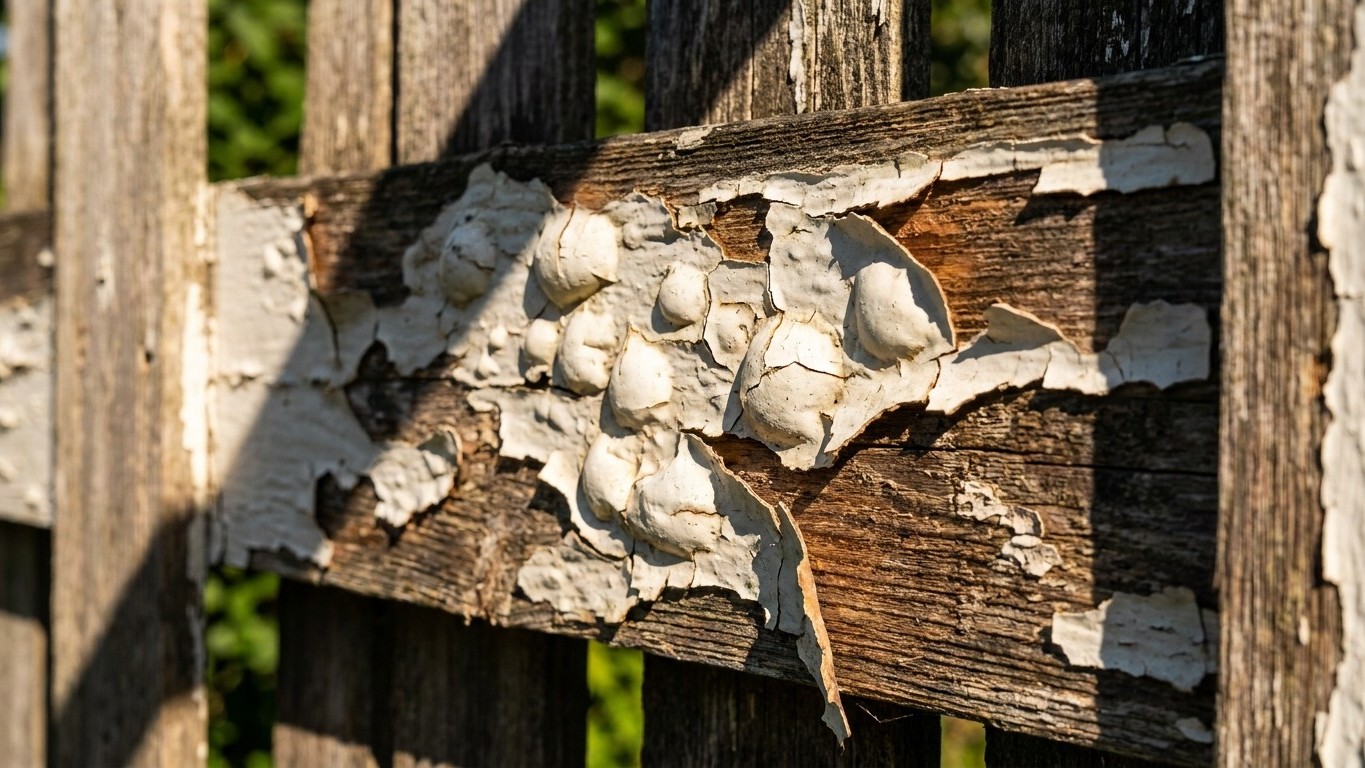
Blisters on painted wood happen when moisture trapped inside the timber turns to vapour under a hot, sun-baked surface and pushes the paint film upward before it’s had a chance to cure properly. That’s exactly what happened to my south-facing fence panels last July, and it took a chat with a painter and decorator friend to explain why my “get it done quickly” plan had backfired so spectacularly.
I’d picked the hottest week of the month on purpose. Sensible, I thought, dry wood, fast drying, job done in an afternoon. What I hadn’t reckoned with was the fence surface hitting temperatures well above the air temperature, which on a bright July day in the UK can easily mean the timber itself was sitting at 40°C or more by early afternoon. Paint applied to a surface that hot skins over within minutes on top, while underneath, moisture that was still working its way out of the wood, or solvent from the paint itself, gets sealed in with nowhere to go.
Key takeaways
- The sun creates a sealed trap on the paint surface while moisture underneath is still escaping
- Most DIY painters unknowingly follow the worst possible conditions for applying exterior wood coatings
- There’s a specific time of day and weather pattern that changes everything about how the job turns out
What was actually happening under the surface
My painter friend put it in terms I still think about: the paint film was setting like a lid on a pan before the contents had finished simmering. Wood is never bone dry, even after weeks of good weather, because it holds residual moisture deep in its fibres. When direct sun heats the surface faster than the paint can properly cure, that moisture (or trapped solvent from oil-based products) turns to vapour and expands. It pushes against the only weak point available, the skin of paint above it, and forms a bubble. A week later, some of those bubbles had dried into hard, hollow blisters that cracked the moment I pressed a fingernail against them.
He’d seen the same thing dozens of times, he said, always in high summer, always on fences and sheds facing south or west where the sun does the most damage in the hottest part of the day. Blistering isn’t really about the paint being poor quality. It’s about application conditions working against the product rather than with it. Most trade and DIY paint guidance recommends application in temperatures roughly between 10°C and 25°C, avoiding direct, intense midday sun, precisely because film formation needs a steady, moderate environment rather than a race against the heat.
The fix: stripping back rather than painting over
There’s no shortcut once blisters have formed. Painting a fresh coat over the top only traps more moisture and you’ll see the same bubbles return, often worse, within another week or two. My friend’s approach, which I now use as gospel, involves working back to sound, flat timber before anything new goes on.
He scraped off every blistered patch with a stiff paint scraper, then sanded the edges so there was no hard ridge between old paint and bare wood, using medium-grit sandpaper (around 120-grit) followed by a finer pass if the surface felt rough. Any powdery or flaking paint beyond the blister itself had to go too, because it was evidence that adhesion had failed there as well, not just where the bubbles were visible. Dust and debris got brushed away thoroughly, since paint applied over grit never sits flat and fails again faster.
The wood then needed a full day, ideally two, of dry weather to let residual moisture disperse before any primer or paint went back on. He tested this the old-fashioned way, pressing the back of his hand against the fence in the shade; if it felt cool or faintly damp, he waited. Only once it felt properly dry, and the air temperature sat in that gentler mid-morning range rather than full midday blaze, did he recoat.
Timing the job so it doesn’t happen again
The real lesson wasn’t about paint brand or thickness of coat. It was timing. Early morning, once overnight dew has evaporated but before the sun is directly overhead, gives the most forgiving working window in summer. Late afternoon can work too, provided there’s enough daylight left for a first coat to skin over before temperatures drop and dew returns overnight, which can be its own problem if humidity spikes.
Overcast, mild days are honestly the painter’s best friend, something my friend repeated more than once, half joking that fence painting is one of the few jobs where you should actively hope for a bit of grey British weather rather than blue skies. A study from the UK’s Building Research Establishment and general trade practice both point to the same principle: coatings need a stable, moderate temperature range to cure without stress, and rapid heating from direct sun is one of the most common causes of premature paint failure on exterior timber.
Two coats thinner rather than one coat thick also Matters More Than people expect. A heavy single coat traps more solvent and takes longer to cure right through, which is its own invitation to blistering even without extreme heat. Thin, even coats, left to dry fully between applications (usually 4 to 6 hours minimum for water-based fence paints, longer for oil-based ones, always worth checking the tin), give vapour far less chance to get trapped in the first place.
My fence looks respectable again now, though if you look closely at one corner panel you can still see a faint outline where the worst blistering was, a permanent little reminder etched into the grain. My painter friend said that’s fairly normal too, that heavily blistered timber sometimes keeps a ghost of the damage even after proper repair, simply because the wood fibres themselves got disturbed by the trapped moisture before anyone scraped anything back.