
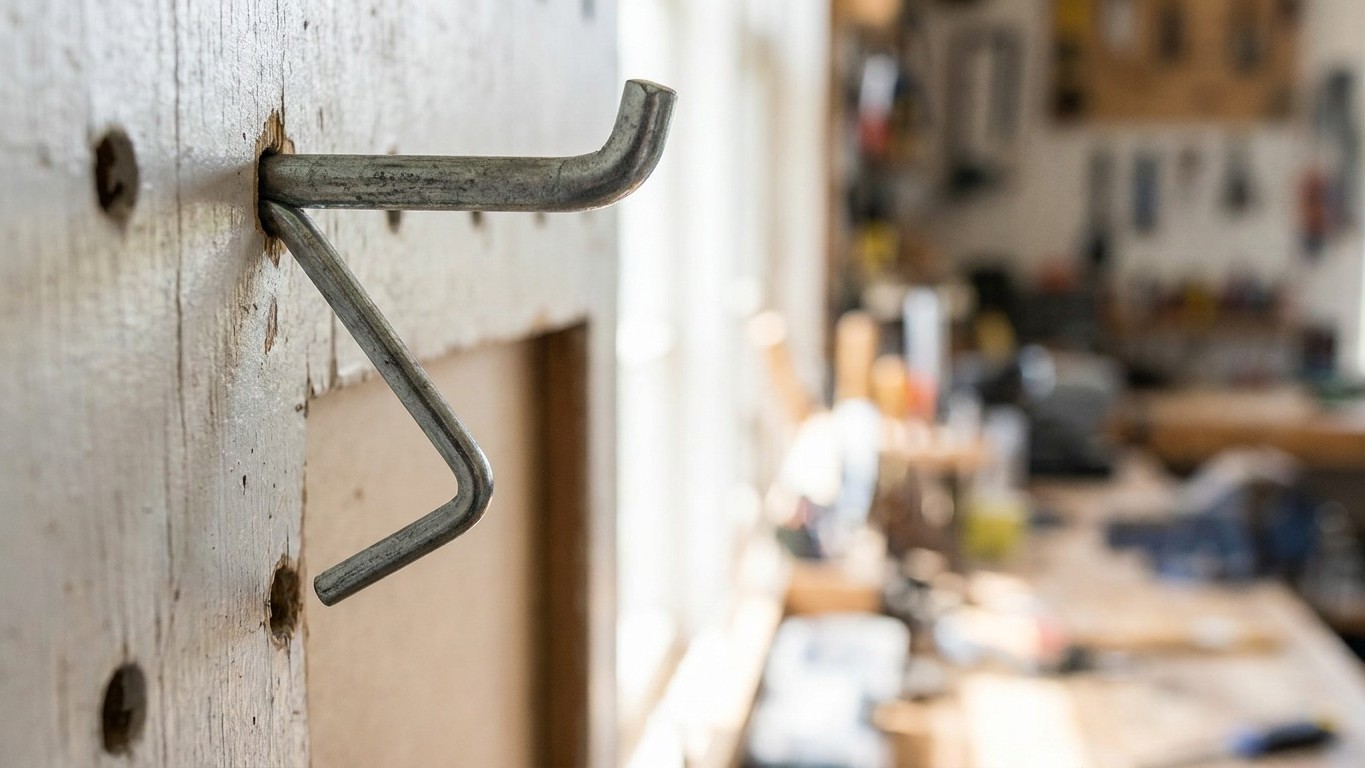
Screw a sheet of pegboard flat against the wall and you’ll spend the next hour wondering why every hook you push in just falls straight back out. The fix that professional shopfitters and workshop installers swear by is absurdly simple: a spacer, roughly 15mm thick, tucked behind each fixing point before a single screw goes in. That tiny gap is the difference between a pegboard that holds your spanners for years and one that dumps them on the floor the moment you walk away.
The reason comes down to how the hooks themselves are shaped. Standard pegboard hooks have an L-shaped tip that drops down behind the board, and if the panel sits flush against the wall, that tip has nowhere to go, so the hook either won’t insert or pops out under any weight. It’s not a design flaw in cheap hooks, it’s simply physics: the little metal leg needs somewhere to swing into, and a wall doesn’t offer that.
Key takeaways
- Every professional fitter uses one oddly simple trick that most DIYers overlook completely
- The reason standard hooks fail has nothing to do with cheap equipment or poor technique
- A gap so small you could hide it with your hand makes the difference between years of reliable storage and an expensive mistake
Why builders never skip the gap
Ask anyone who fits pegboard for a living and they’ll tell you this is the step that separates a tidy, functional wall from an expensive mistake. The number one mistake people make installing pegboard is screwing it flat against the wall, and without a gap behind the board, the hooks have nowhere to seat, so you end up with a panel that holds almost nothing. I’ve heard from more than one exasperated DIYer who’d bought a lovely sheet of pegboard, mounted it beautifully level, only to find every single hook dangling uselessly by teatime.
The clearance doesn’t need to be enormous. Aim for at least a 1/2-inch gap behind the pegboard, with 3/4 inch being even better for heavier hooks and accessories. Convert that to millimetres and you land somewhere between about 12mm and 19mm, which explains why the 15mm spacer has become something of an industry sweet spot. It’s generous enough for the fatter double-pronged hooks that hold power tools, yet it doesn’t leave the board sitting so far proud of the wall that it looks like an afterthought.
Some ready-made spacer kits go slightly thicker still. Rockler’s own version, for instance, friction fits into the pegboard’s holes and provides a 5/8-inch thickness, which is around 16mm, giving the clearance needed for hooks and accessories. Triton Products, who make the well-known DuraHook range, use steel spacers included in a kit with wood screws, plastic wall anchors and 3/8-inch steel spacers. That’s closer to 9.5mm, a reminder that there’s no single magic number, just a workable range most fitters settle into.
How to fit the spacer yourself, without breaking the bank
You don’t need to buy a fancy kit to get this right, though it does help. Commercial spacer packs are cheap and foolproof: you press the spacers into the holes on the back of the pegboard, position the pegboard on the wall and drive the screws, with no need to fuss over lining things up while juggling screws and driver. Some designs even let you space them out along the stud line in advance, which saves a fair bit of measuring and marking later.
If you’d rather save your pennies, plenty of home fitters have improvised with whatever thick washers, rubber grommets, or short offcuts of dowel they had lying in a drawer, and it works just as well provided the thickness is right and the material won’t crush flat under the screw. One American DIY blogger described her own trial and error fitting yarn storage pegboard, noting the boards needed to sit away from the plasterboard so the straight hooks holding her yarn could actually be inserted properly. The principle translates directly to any wall, anywhere: no gap, no grip.
For a sturdier, more permanent job, particularly if you’re hanging heavier items like power drills or a full set of garden tools, timber strips beat spacers every time. A common layout is to install one strip along the top, one along the bottom, and at least one vertical strip through the centre, adding more vertical strips every 16 to 24 inches on wider boards so the panel doesn’t flex when loaded. A few offcuts of 25mm by 50mm timber from a builder’s merchant will do the job for a couple of pounds and give a 3/4-inch standoff and a genuinely solid mounting surface.
Getting your fixings into something solid
None of this matters if your screws aren’t biting into something that can actually take the weight. Hitting studs is the gold standard because a single 2.5-inch screw driven into solid framing easily supports the load a fully loaded pegboard creates. In older British homes with a mix of masonry and stud partition walls, run a stud detector across the surface first and mark your fixing points before you even think about spacers. If you’re screwing into solid brick or block instead, proper wall plugs rated for the weight matter just as much as the spacer thickness.
Hole spacing on standard pegboard is fairly universal too, which is handy to know when buying hooks separately from the board. Most panels use a hole diameter of about 6mm with holes spaced 25mm apart, a 3/4-inch wall-to-wall gap being generous enough that hooks won’t scratch the wall behind. Match your hook style to that spacing and you’ll rarely have compatibility bother.
A last thing worth knowing before you start drilling: don’t be tempted to skip spacers on a small test section thinking you’ll add them “if needed” later. Without spacers or furring strips, your hooks simply won’t seat, so it’s worth building in that gap from the very first screw. Fit them properly the first time, and that pegboard will still be doing its job faithfully in a decade, hooks snug, tools exactly where you left them, no dramatic clatter to the garage floor at three in the morning.
Sources : walmart.com | amazon.com