The culprit, it turns out, had been staring me in the face every single time I picked up the roller. After years of decorated walls that looked more like a corduroy jacket than a smooth, professional finish, a decorator friend finally watched me work and pinpointed the problem in under thirty seconds. I wasn’t keeping a wet edge. That’s it. Two words that changed Everything/”>Everything I thought I knew about painting a room.
Key takeaways
- A two-word painting principle separates amateur walls from professional-looking results
- The most common DIY painting error happens in the moments you think you’re doing it right
- Professional decorators use a specific technique most people have never heard of—and it’s not complicated
Why roller marks appear in the first place
Those faint lines, flashing patches, or tramlines across what should be a smooth finish can ruin even the most beautiful colour. What’s particularly maddening is that they often appear after the paint is dry, when it’s too late to do anything about it. You go to bed quite pleased with yourself, and in the cold morning light, the wall looks like a relief map of the Lake District.
The most common reason roller marks show up is uneven paint distribution: too much paint and the roller leaves ridges or heavy bands; too little and the wall looks patchy. Both extremes lead to visible marks once dry. There are other culprits too. Roller marks are often caused by a painter putting a second coat of paint on the wall before the first coat has completely dried. And drying conditions also play a part: a room that’s too warm or sunny causes the edges of each section to dry before you’ve had a chance to blend them in, resulting in lap marks that show up under light.
The roller itself may also be working against you. Cheap rollers shed fibres or don’t hold enough paint, forcing uneven strokes, and using a long-pile roller on a smooth plaster wall leaves a stippled texture instead of a smooth coat. For most UK homes with standard smooth or lightly textured plaster, a short pile of 5–7mm is appropriate for flat, smooth walls, with medium pile for slightly textured plaster and long pile (12–15mm) for rough ceilings or artex.
The one mistake I’d been making for years
Here’s what I was doing wrong: I painted one strip of wall, let it sit for a few minutes while I had a cup of tea, then carried on from where I’d left off. Perfectly logical, I thought. Perfectly disastrous, as it turns out.
Roller marks often appear when you’re covering too large an area between reloads, meaning the roller gradually applies less paint, leading to uneven sheen and subtle colour shifts. But the deeper problem is the wet edge. Maintaining a wet edge, where each stroke overlaps slightly into still-wet paint, prevents visible lap lines. The moment that leading edge dries before you’ve overlapped it, you’ve created a seam. And once it’s dry, no amount of enthusiasm or extra coats will make it disappear cleanly.
The most important habit for smooth wall painting is: don’t let the paint dry between passes. Keep moving, overlap slightly, and don’t go back over drying areas. This means you need to work methodically across the wall in one continuous effort, rather than nipping off to answer the phone mid-section. If you stop for a break in the middle of a wall and then start painting after that section has dried, you’ll see a lap mark where the two areas join. To avoid this problem, you need to quickly cover a large area with paint, then return to smooth it out. A quick tip: wrap a plastic bag around the entire roller tray and seal it to keep your roller wet and ready for painting when you’ve finished your break.
The professional technique that makes all the difference
Once you’ve understood the wet edge, the next step is how you actually move the roller. Most of us go up, come down, up, come down, in neat parallel stripes. It feels orderly. The problem is it concentrates paint in bands and leaves the joins between strokes slightly lighter.
The tried-and-true method used by decorators is the “W” or “M” technique: the roller is applied to the wall in a zig-zag motion, covering a section, then smoothed out with vertical passes. This stops heavy paint bands from forming at the start and end of strokes. Working in sections of around a square metre helps you stay in control; each new section should overlap the last while the paint is still wet, which is what stops lap marks from showing once the surface is dry.
Pressure matters too, and this surprised me. Pressure should be consistent: a roller isn’t a scrubbing brush, and pushing harder doesn’t spread the paint further, it just squeezes ridges onto the wall. The answer is to reload the roller more often and let the sleeve do the work. Applying the wrong amount of pressure can cause paint to push out around the edge of the roller, creating a streak.
The paint and the tray setup deserve a mention here. Bargain tins often need more coats and dry faster, giving you less time to blend sections; a trade-quality emulsion provides better coverage and longer working time. Even how paint is loaded makes a difference: scuttles and grids give more consistent loading than shallow trays, which encourage overloading or patchy rollers.
How to fix roller marks that are already dry
The damage is done, the paint is dry, the marks are glaring at you from across the room. Don’t panic. Once the paint has dried completely, take a smooth piece of sandpaper and sand the paint down slightly until the surface is smooth. Use a fine grit, around 120 to 150, and work gently. You’re only levelling the surface, not stripping it back. Wipe away dust with a damp cloth, as any leftover particles will affect paint adhesion.
Repaint the surface and maintain a wet edge on your roller at all times. Move slowly, and don’t be afraid to use more paint. If you begin to see gaps on the wall as you roll, it’s time to refresh the paint on your roller. One coat done properly will almost always outshine two coats done in haste.
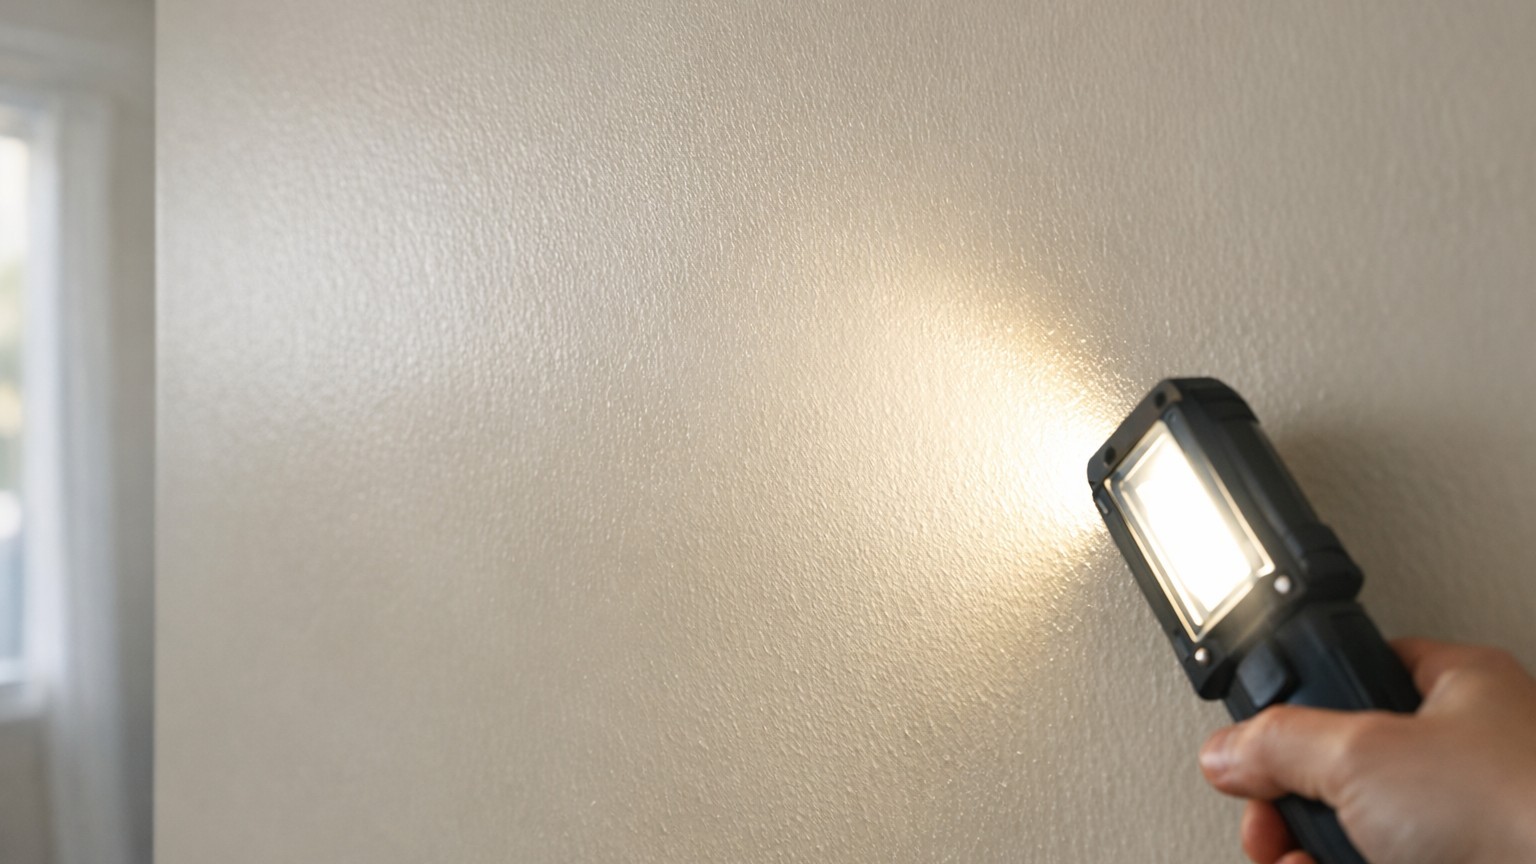
One last thing worth knowing: roller marks sometimes won’t be visible unless you see the walls in different lighting, so you might think Everything is going well until you open a curtain, daylight enters the room, and suddenly you’ve got streaks. Before you start painting any wall, bring in a bright lamp and rake the light across the surface. It reveals any existing imperfections in the plaster that will only be amplified under a fresh coat of emulsion. Good lighting during prep is underrated: a bright inspection lamp or daylight bulb will show flaws before they’re locked under two coats of colour. Sorting them before you open the tin is always faster than crying over them afterwards.
Sources : premierpaintingnw.com | reaproconstruction.com