A cocktail stick. That’s all it takes. If you’ve ever watched two pieces of wood refuse to sit flush no matter how carefully you position them before driving in a screw, the answer has been sitting in your kitchen drawer all along, and it costs next to nothing.
This is one of those tips that sounds almost too simple to be true, but once you Understand the woodworking principle behind it, you’ll wonder how you ever managed without it. The problem with misaligned boards isn’t usually your technique or your tools. It’s physics. The moment a screw begins to bite into the second piece of wood, it creates a pulling force that can drag one board slightly forward or sideways, leaving you with a frustrating step where you wanted a smooth surface. Woodworkers call this “screw creep,” and it happens to everyone from complete beginners to people who’ve been doing DIY for thirty years.
Key takeaways
- A household item you already own can solve a woodworking problem that frustrates beginners and pros alike
- The culprit behind shifting boards is a physics principle called ‘screw creep’—but there’s an elegantly simple defense
- This ancient workshop hack requires no special tools, no clamps, and works best when you’re working alone
Why boards shift, and what a cocktail stick actually does
Think of it like trying to hold two wet bars of soap perfectly aligned while pressing them together. The pressure that’s meant to join them is the same pressure that makes them slide. A screw drives down and forward simultaneously, and as it enters the second board, it tends to pull that board toward the first in an uneven way. The result is a tiny (or sometimes not-so-tiny) ridge along the joint.
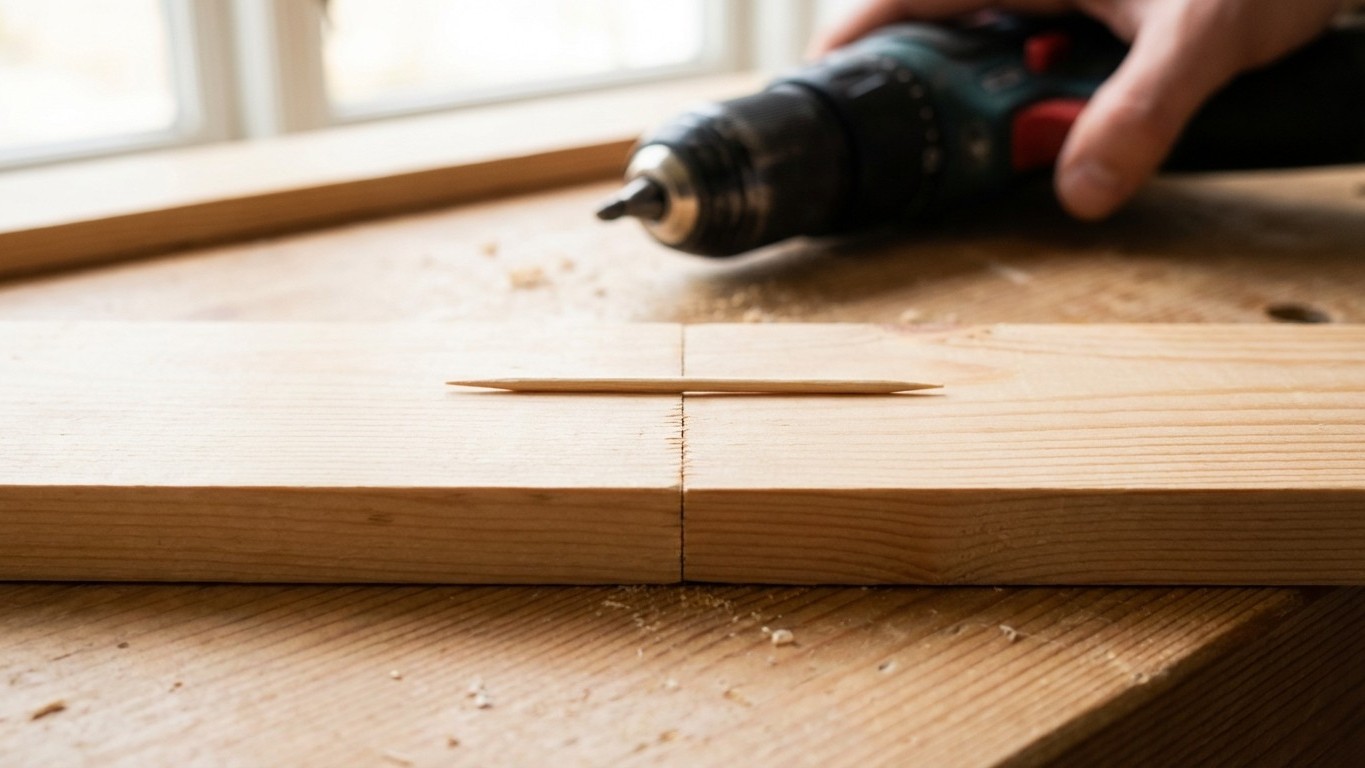
A cocktail stick, or a toothpick, if that’s what you’ve got, acts as a temporary physical stop. You place it flat between the two boards, right at the joint line, before you drive your screw. The stick prevents the boards from sliding toward each other unevenly. Once the screw is home and the joint is tight, you simply snap the protruding end off flush, or wiggle it free entirely if there’s enough movement. The wood closes around it, or it slides out cleanly. Either way, your boards are flush.
It’s a technique that’s been quietly passed around in carpentry circles for generations, the sort of thing a father shows a child over a workbench on a Saturday afternoon. There’s no patent on it, no clever product to buy. Just a splinter of bamboo and a bit of know-how.
How to do it properly, step by step
The method works best when you’re joining boards edge-to-edge (building a shelf, for instance, or fixing cladding) or when you’re attaching a face piece to a frame. Start by clamping or holding your boards in their intended position. Don’t skip the clamp if you have one, the cocktail stick helps, but it isn’t a substitute for keeping things roughly aligned to begin with.
Place one or two cocktail sticks flat across the joint, roughly in line with where your screw will go. You want them perpendicular to the joint line, poking out from both sides by about a centimetre. Now drive your screw slowly. If you’re using a cordless drill, drop the torque setting down a notch or two, you want control, not speed. As the screw draws the boards together, the sticks hold the surfaces level. When the joint is tight, snap or slide the sticks free.
For longer joints where you’re placing several screws, use a separate cocktail stick near each fixings point rather than relying on one stick to do all the work. The closer the stick is to where the screw enters, the more effective it is.
One small refinement worth mentioning: if the boards are very smooth or have been planed, a single stick sometimes slides around before the screw engages. In that case, place a tiny dot of wood glue on the stick itself, just enough to hold its position for thirty seconds while you drive the screw. The glue on the stick is irrelevant once it’s removed; it’s just there to keep things steady.
When this trick is most useful (and when it isn’t)
This technique shines when you’re working alone. Holding two boards flush with one hand while operating a drill with the other is a near-impossible juggling act, and clamps don’t always reach where you need them. The cocktail stick gives you a passive third hand, which is worth quite a lot in a small home workshop.
It’s also brilliant for repairs. Fixing a loose kitchen cabinet door, reattaching a skirting board section, or gluing-and-screwing a split drawer front back together, all situations where Everything looks aligned right up until the screw goes in and ruins it.
Where it won’t help is on very heavy structural work, where the forces involved are simply too great for a cocktail stick to resist, or where the boards are badly warped. If one board bows significantly along its length, you’ll need to clamp it flat before you even think about screwing. The cocktail stick trick assumes you’ve already got the boards roughly where you want them, it just stops them misbehaving in the final moment.
There’s something quietly satisfying about this kind of solution. No trip to the hardware shop, no specialist jig, no YouTube rabbit hole about which dowelling tool to buy. The kitchen drawer solves it. My own father kept a rubber band, a few cocktail sticks and a stub of candle wax in his toolbox for years, the wax for lubricating screws in hardwood, the rubber band for gripping stripped screw heads — and between those three items he seemed capable of fixing almost anything. Perhaps that philosophy of keeping small, simple things close to hand is worth reviving. What other fixes might be hiding in plain sight around your home?