
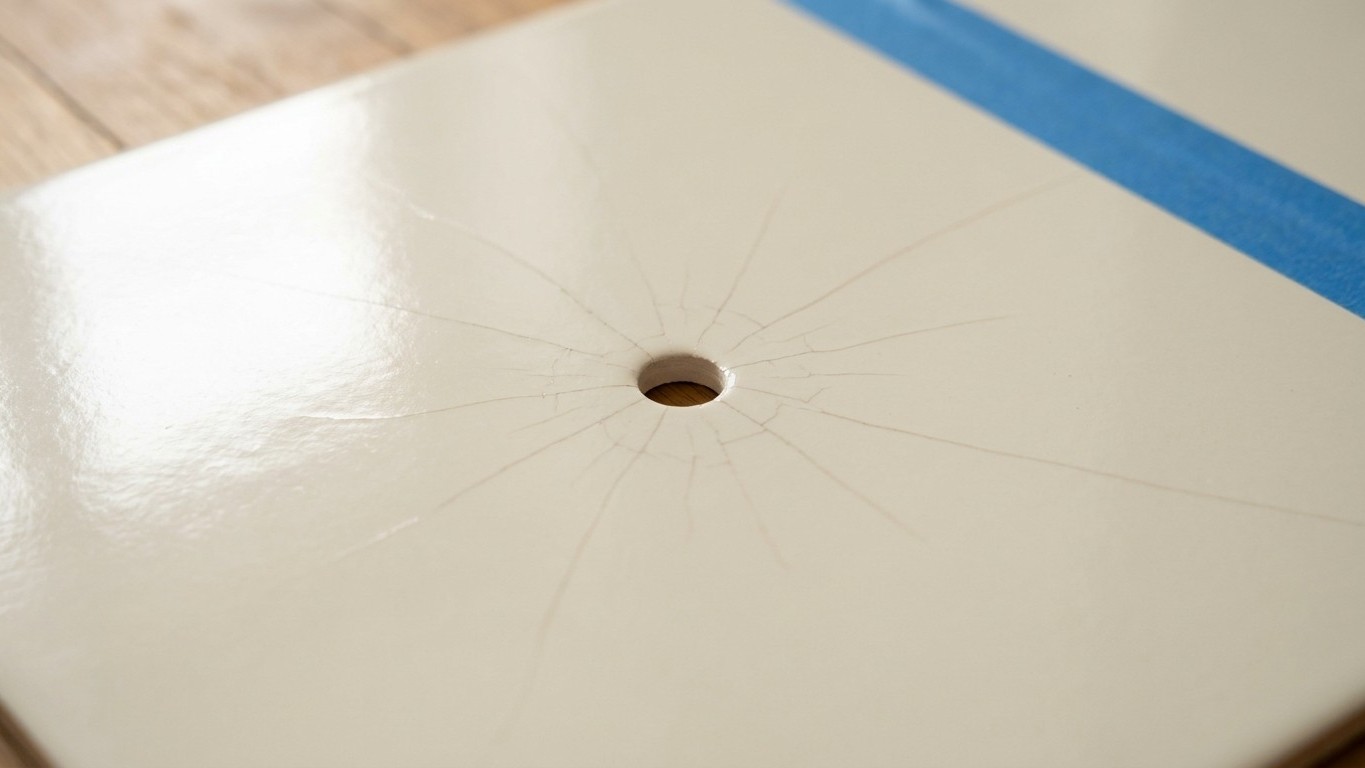
That starburst pattern radiating out from a fresh drill hole isn’t a manufacturing fault at all, and it isn’t bad luck either. It’s simple physics doing exactly what physics does to brittle materials under sudden, concentrated pressure. Ceramic and porcelain tile behave nothing like wood or metal, which can flex and absorb a knock. Ceramic, porcelain, and natural stone tiles are brittle materials, and unlike wood or metal, which can absorb and distribute stress, tiles fracture under concentrated pressure. The moment a spinning bit meets that hard, glassy glaze, the stress has nowhere to go except outward, and outward it goes in cracks that fan out like the points of a star.
My late father-in-law, a plumber who fitted more bathroom cabinets than he could count, used to grumble that every tile has a mind of its own the second you touch it with steel. He wasn’t far wrong. When your drill bit contacts the glazed surface, it creates intense localised stress, and if that stress exceeds the tile’s tensile strength, cracks propagate outward from the point of contact. Add heat into the mix, which builds fast as the bit spins against something so hard and unforgiving, and matters get worse. Friction generates temperatures that can weaken the material’s internal structure, and the glaze becomes particularly susceptible to thermal shock. That thin, shiny layer on top is doing most of the resisting, which is precisely why it’s also doing most of the shattering.
Key takeaways
- A spinning drill bit creates intense stress that tiles can’t absorb—unlike wood or metal, it radiates outward as cracks
- One household item costing pennies stops the bit from slipping and dramatically reduces chipping around the hole
- Most DIYers sabotage themselves by using the wrong drill setting, speed, and ignoring one quiet troublemaker that works against them
Why that little strip of tape earns its keep
Here’s where a humble roll of masking tape, the sort you’d use for painting the skirting boards, does something no fancy bit ever quite manages on its own. It isn’t magic. It’s grip. Glazed tile is slippery by design, meant to shrug off water and stains, which is wonderful in the shower and a nightmare the second a drill bit tries to find purchase on it. Applying masking tape over the mark prevents the bit from slipping during initial contact, absorbs minor vibrations, and reduces glaze chipping at the hole’s perimeter. That absorbing of vibration Matters More Than most people realise, since it’s the juddering skid of a bit hunting for a starting point that first cracks the glaze before the hole has even properly begun.
Several tile specialists suggest going further than a single strip. Sticking a cross of masking tape over the drilling point provides grip for the bit tip, prevents it from skating across the glazed surface, and reduces chipping around the hole edge. I like this trick because it costs pennies and takes seconds, which fits rather nicely with my general view that the best household fixes usually do. Mark your spot on the wall first with a pencil dot, then lay your tape, then re-mark the exact centre on top of it, so you haven’t lost your precision along the way.
The drill itself is often the real culprit
Tape alone won’t save a tile if the tool behind it is doing Everything wrong, and this is where I see most DIY mishaps happen. Combi drills default to hammer mode because that’s what makes light work of brick and masonry, but tile despises it. The hammer or percussion function must remain disabled, since hammer action transmits shock waves through tiles, almost guaranteeing cracking, so rotary mode only, always. Switch that dial before you go anywhere near the wall.
Speed matters just as much as mode. Racing in at full pelt is the quickest route to a ruined tile, whereas patience at the start costs you perhaps thirty extra seconds. Start drilling at a slow speed of around 400 to 600 RPM, applying light, steady pressure rather than forcing the bit through the tile, and once the bit bites through the glaze, you can increase the speed slightly. You’ll feel that shift in resistance yourself, a subtle give as the hard skin gives way to the softer body beneath, and that’s your cue that the dangerous part is behind you.
Heat is the quiet troublemaker throughout. Even with tape and the right speed, a dry bit grinding away can still cook the glaze from the inside. As you drill, friction builds, especially on dense materials such as porcelain or natural stone, and if the bit gets too hot, it can scorch the tile surface or cause microfractures that weaken it. A carpenter and construction trade consultant quoted by Homebuilding & Renovating put the whole approach rather neatly: “Run at low speed, keep it cool with water, and let the diamonds do the work rather than forcing it.” A plant mister filled with plain tap water, dribbled over the bit every few seconds, does the job perfectly well without any special kit.
Choosing your bit, and what to do if a crack still appears
Not every bit suits every tile, and this trips up plenty of confident DIYers. A tungsten carbide tip grinds through ceramic without the percussion that causes cracking, but you should not use it on porcelain floor tile, where it will skate and may shatter the glaze. For anything harder, porcelain especially, a diamond-tipped bit is worth the extra cost, since diamond particles abrade rather than cut, making them the only reliable option for hard porcelain. If you genuinely can’t tell what’s on your wall, reach for diamond regardless; it’s the safer bet across the board.
Should the worst happen anyway, don’t despair and don’t reach for the tile catalogue just yet. If the tile surface has a tiny chip or a thin crack around the hole, tile repair epoxy fills the damaged area, and paintable tile filler smooths the surface afterwards. Many small cracks vanish entirely once the fixture, whether that’s a towel rail or a soap dish, is screwed into place over them. It’s rather satisfying, actually, hiding your one mistake behind the very thing you were trying to hang. One last thought worth tucking away: professionals generally aim their hole somewhere near the centre of the tile rather than close to a grout line, since a crack starting near an edge has far less material to travel through before it reaches open air, and spreads all the further for it.
Sources : homebuilding.co.uk | stoneforensics.com