
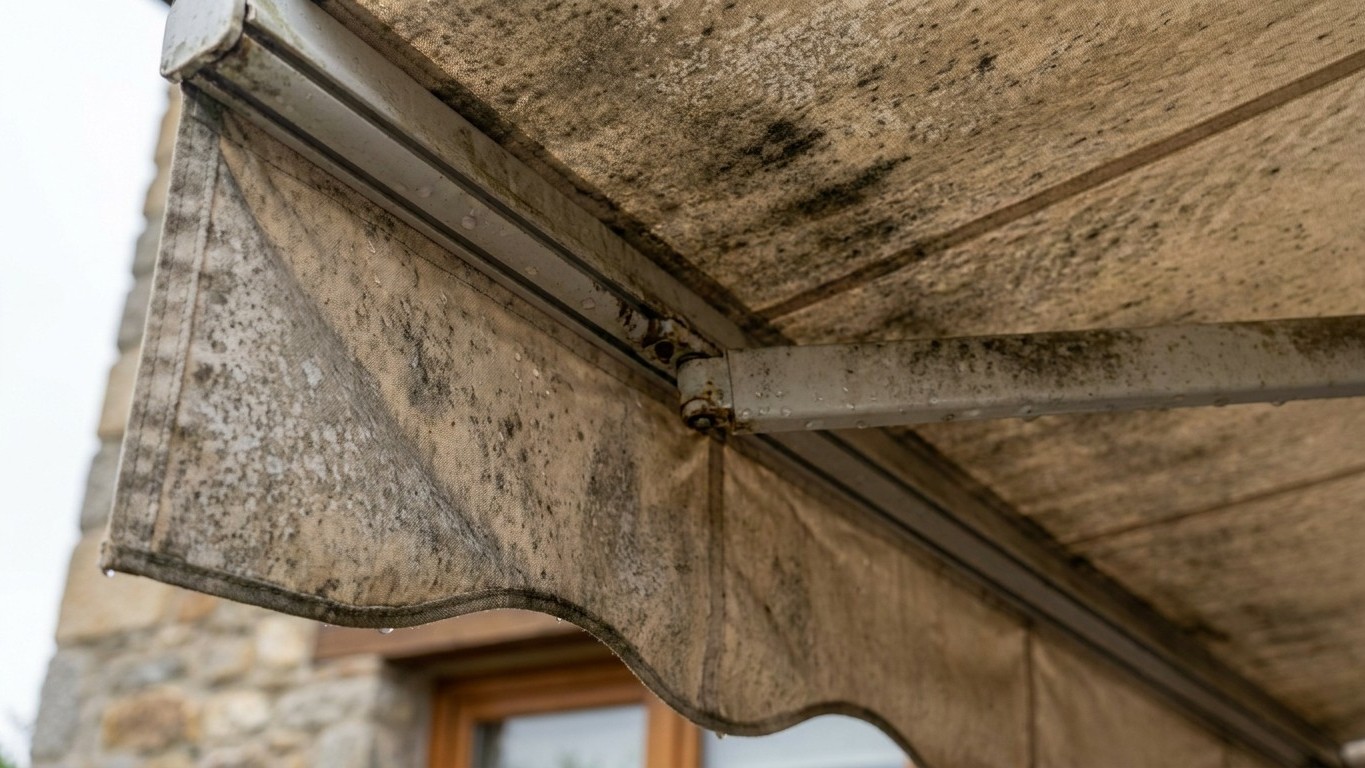
Three days is all it takes. Roll a soaked awning back into its housing to stop it thrashing about in the wind, and by the time you unroll it again you’ll likely find grey-white speckling clustered along the folds, or worse, dark fuzzy patches creeping across the fabric. That’s mould and mildew, and they move fast once conditions suit them.
The instinct to roll everything away during a storm makes sense. A flapping awning is noisy, it stresses the arms and brackets, and in a strong enough gust it can tear. But never rolling up a damp awning matters because trapped moisture creates a sealed, humid environment that’s perfect for mould to return, sometimes even worse than before. Fold that wet fabric onto itself and you’ve built a miniature greenhouse, dark, airless, and dripping, exactly what fungal spores are waiting for.
Key takeaways
- A soaked awning rolled away creates a dark, humid ‘greenhouse’ that mould loves—but three days of growth is still recoverable
- Seams and folds are where water pools longest and condensation forms first, making them ground zero for fungal spores
- Soft soap and water work first; bleach or vinegar solutions finish the job—but rinsing thoroughly matters more than the treatment itself
Why the folds are the problem, not the rain itself
Rain on its own rarely causes lasting damage to an awning. It’s what happens after that counts. Mildew or mould can grow if you roll up either canvas or vinyl while it’s still wet and dirty, and it’s more likely to grow in high humidity areas, which, let’s be honest, describes most of the British Isles for a good chunk of the year. Even fabrics with decent breathability struggle once they’re compressed. Acrylic weaves breathe well and dry quickly, which limits mildew issues, and vinyl has excellent native mildew resistance, but neither material is immune to mildew.
The seams and hems are the real culprits here. Water pools there long after the flat sections look dry to the eye, and when the whole thing is rolled up tight, that trapped dampness has nowhere to go. Putting an awning away while still wet makes it easier for mould and mildew to grow back, and folds, being the last part to dry and the first to trap condensation, are ground zero.
It’s worth knowing your enemy, too, since mould and mildew aren’t quite the same thing and they behave differently once established. Mould is darker in colour, fuzzy or slimy, while mildew is lighter, usually white or grey, but can turn black over time, and the most substantial difference is that mould grows within the fabric and is tougher to remove, while mildew usually sits on the surface. That greyish, salt-like dusting some people spot on darker awning fabric can be easy to miss at a glance. Mould can be difficult to spot because it grows in little white patches that look like salt grains, particularly on dark fabric.
Getting it out without wrecking the fabric
The good news is that a few days’ growth is very much recoverable, provided you don’t reach for anything too harsh. Start gently. A soft-bristled brush and a plain soapy water solution will shift a surprising amount before any specialist product comes near the fabric. For a basic mix, mild dish soap and warm water will do the trick for general cleaning, with about three tablespoons of dish soap to a bucket of warm water.
Where the mould has properly taken hold, most guides point towards a mild bleach solution as the reliable next step. A separate solution of 1 cup of bleach mixed with 1 gallon of water is effective in tackling mould and mildew. Working in metric, that’s roughly 60ml of bleach to 4.5 litres of water, applied with a soft brush rather than scrubbed aggressively. Leave it to work rather than attacking the fabric: apply the bleach solution directly on affected spots, let it sit for 5 to 10 minutes, then scrub gently using a soft bristle brush to remove the mould.
If you’d rather avoid bleach altogether, white vinegar is a respectable alternative for lighter cases, though it won’t do the whole job on its own. White vinegar will kill mildew and around 80% of mould species; pour undiluted white vinegar into a spray bottle or garden sprayer and spray down the entire awning. Hydrogen peroxide diluted with water is another gentler option some people prefer over bleach, particularly on coloured fabric where bleaching is a real worry.
Whatever you use, always test it first somewhere out of sight. Do not use vinegar on canvas long-term as the acidity will damage the awning according to some manufacturers, so patch-testing before a full application really does matter, and it costs you nothing but a few minutes.
Once you’ve treated the affected patches, rinse properly and thoroughly, don’t rush this bit. Rinse the awning from top to bottom using a hose spray until all soap suds disappear, using a brush to remove remaining dirt, paying extra attention to seams and hems where residue hides, and don’t forget the underside, continuing until the water runs clean. Skip this step and you’re left with soap residue that, ironically, feeds the very growth you were trying to remove.
Drying properly, and stopping it happening again
This is the step everyone skips because it’s tedious, and it’s the one that actually matters most. Let the awning dry completely before reattaching or storing it, since putting it away while still wet makes it easier for mould and mildew to grow back, so keep it fully extended in direct sunlight or a well-ventilated area with plenty of airflow. Sunlight isn’t just pleasant, it genuinely helps kill off lingering spores that a rinse alone might miss.
Pay particular attention to the parts you can’t easily see. Folds, stitching lines, and valances tend to retain water even after rinsing, so gently lift and shake out these areas, or blot them with a soft absorbent towel, paying extra attention here to avoid mildew regrowth in hard-to-see spots. A hairdryer on a cool setting works nicely for stubborn corners on a day when the sun isn’t cooperating, which, let’s face it, is most days in a British summer.
For next time a storm blows through, the honest answer is that a soaked awning genuinely does need a few dry hours before it goes back into its housing, even if that means leaving it extended slightly longer than feels comfortable while the wind rattles it about. If the flapping is your main worry, securing the arms with a simple strap or bungee cord while it finishes drying does the job just as well as rolling it away, without inviting mould to move in. Once it’s finally dry, a proper fabric protector spray reapplied once or twice a season keeps the water-repellent coating doing its job, so the next downpour beads off rather than soaking straight through the weave.
Sources : sauleda.com | venangoawning.com