A straight-cut nozzle feels logical. Tidy, symmetrical, almost professional-looking. For years, that’s how I prepared every tube of caulk before sealing around the bath or touching up the kitchen tiles. The results were, to put it charitably, mixed: blobs where I wanted beads, dragging where I wanted flow, and more masking tape than I care to admit. Then a tiler came to re-grout our bathroom, and within about forty seconds of watching him prepare his tube, I understood that I’d been making a completely avoidable mistake from the very start.
Key takeaways
- A straight cut fights gravity and pressure—an angle works with physics instead
- The size of the opening matters as much as the angle itself
- One small adjustment to your grip position determines success or failure
Why the angle of the cut changes everything
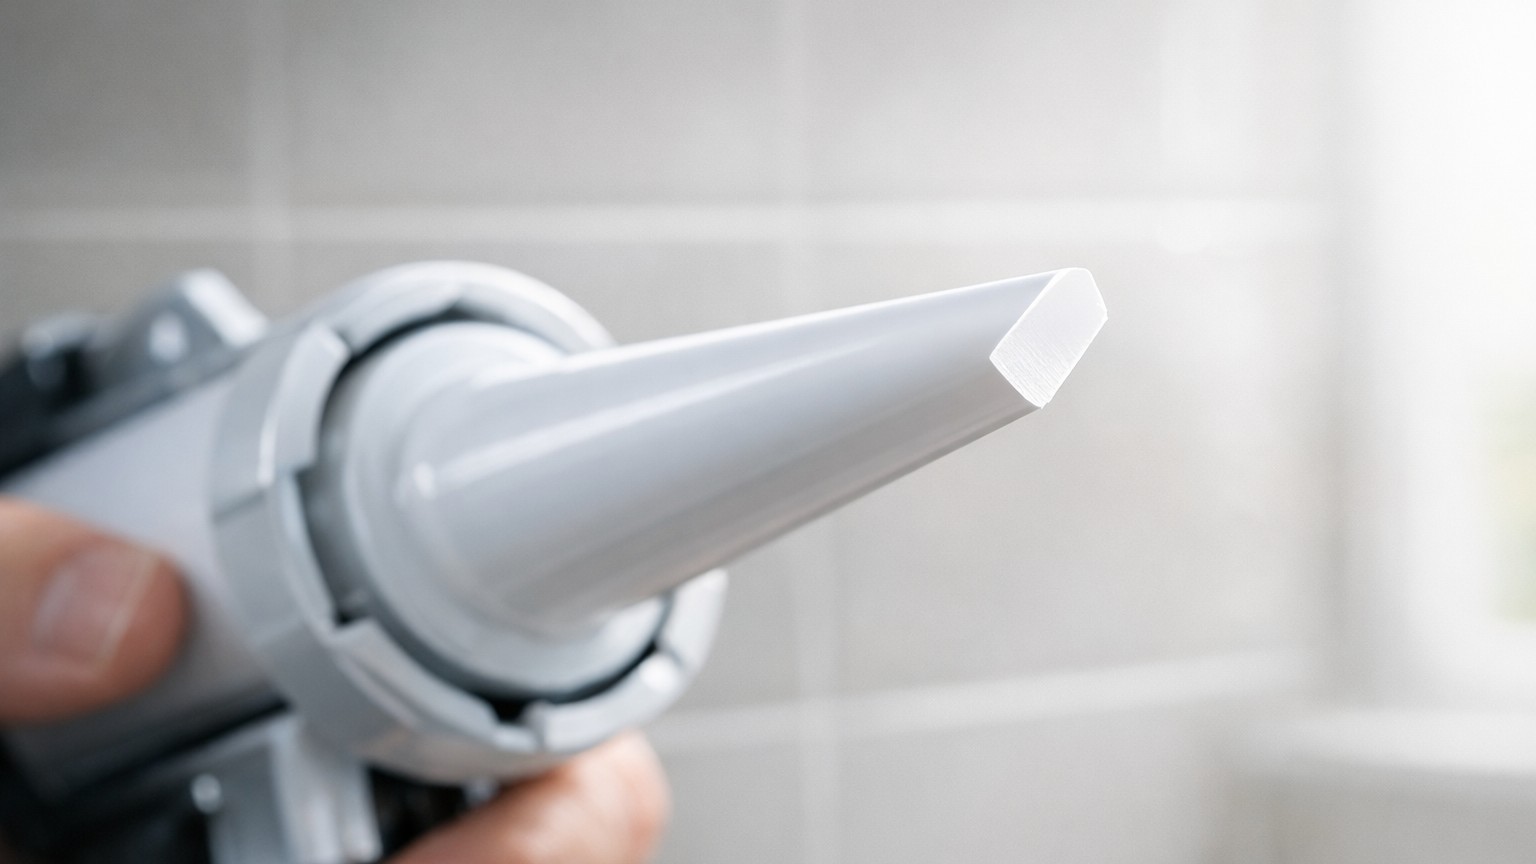
When you cut a caulk nozzle straight across, the opening faces directly forward. As you push the tube along a joint, the sealant has to fight its way out at a right angle to the direction of travel, which means pressure builds unevenly and the bead tends to mushroom outward rather than flow cleanly into the gap. You end up applying far more product than the joint actually needs, then spending ages trying to smooth it down with a wet finger.
Cut the nozzle at roughly 45 degrees, and the physics shift entirely. The angled opening acts a little like the nib of a fountain pen: one side of the cut sits slightly ahead of the other, guiding the sealant forward and downward into the joint as you move. The product feeds in the direction of travel rather than against it. A tiler once described it to me as the difference between pushing water with the flat of your hand versus cupping your palm, and that image has stayed with me ever since.
The size of the hole matters just as much as the angle. A common error is cutting too far down the nozzle, creating an opening much wider than the joint you’re filling. For most domestic bathroom or kitchen joints (typically 3 to 6 millimetres wide), cutting just the very tip off at 45 degrees gives you an opening of roughly 4 to 5 mm, which is ample. Start small. You can always widen the hole, but you cannot make it smaller once the cut is made.
The technique that follows from the cut
The angle of the nozzle only does its job if you hold the gun consistently. The tiler showed me that the cut side of the nozzle should face toward the joint, not away from it, so the sealant is being pushed into the gap rather than piled on top of it. Hold the gun at roughly 45 degrees to the surface and move at a steady, even pace. Too slow, and the joint overfills; too fast, and you get gaps and voids. Neither is easy to fix once the caulk has skinned over, which with most silicone products happens within ten to fifteen minutes in a warm room.
One practical trick worth knowing: pierce the inner foil seal (most nozzles have one, hidden inside) with a long thin nail or a piece of stiff wire before you start. A screwdriver tip rarely goes in straight and can partially block the nozzle. Getting a clean, unobstructed channel from the start makes a real difference to flow consistency, especially with thicker acoustic or fire-rated sealants.
Smoothing the bead is a separate skill, but the angled-cut method makes it considerably easier because you’re depositing the right amount of product in the first place. A dampened finger works perfectly well for standard silicone; a small amount of washing-up liquid mixed with water on your fingertip stops the silicone sticking and lets you draw it smoothly along the joint in one pass. Some tilers keep a small spray bottle of soapy water nearby for exactly this purpose. Running your finger along the joint more than once almost always makes things worse, pulling the sealant out of the gap rather than pressing it in.
Small adjustments for different jobs
Not every caulking job calls for the same cut. A narrow expansion joint around a basin pedestal might need just the tiniest tip removed, while filling a larger movement joint around a structural post might require cutting further down the nozzle for a wider bead. The principle stays constant (always at an angle), but the size adapts to the task. If you’re working overhead (around an extractor fan housing, say, or ceiling coving), a steeper angle of about 60 degrees can help control drips by slowing the flow rate slightly.
Colour matching is another thing nobody really explains. Most DIY stores carry white, magnolia, and occasionally grey or brown. If your grout is an unusual shade and the caulk doesn’t match, the joint will stand out regardless of how neatly it’s applied. It’s worth taking a tile or a photograph of the grout to the store rather than guessing. Some specialist tile suppliers stock a far wider range of caulk colours than the usual DIY sheds, and a small tube of the right colour is rarely expensive.
One last detail that tends to be overlooked entirely: the angle of your cut will gradually shift as you work, because the edges of an angled opening wear differently as the nozzle drags along the joint. On a long run of sealant, it’s worth pausing halfway and checking that the cut edge hasn’t curled or partially closed. A quick trim with sharp scissors restores the clean angle and keeps the bead consistent to the end. That particular observation came not from the tiler, but from a rather expensive lesson involving a full wall of new tiles and a bead that went ragged halfway along.