Applying fresh silicone directly over old sealant is one of those shortcuts that feels entirely logical in the moment. The old bead looks a bit grey, perhaps a little cracked, but it’s still broadly intact, so why not just run a new line on top and be done with it? Three weeks later, that familiar black mould is bleeding through the new layer, and you’re back where you started, only now you’ve got twice the mess to deal with. The frustrating truth is that silicone simply doesn’t bond to silicone in any meaningful way, and old mould spores hiding beneath the surface will push straight through a fresh bead given half the chance.
Key takeaways
- Fresh silicone cannot chemically bond to old cured silicone—it just sits on top, trapping water and mould spores beneath
- Black lines appearing through new sealant within weeks are existing mould colonies being fed by trapped moisture, not new growth
- Complete removal of old silicone using solvent and isopropyl alcohol is the only reliable fix—shortcuts guarantee repeat failure
Why layering silicone always fails
Silicone sealant is hydrophobic by nature, which is precisely what makes it so useful in wet areas. That same property, however, means a fresh application cannot form a proper chemical bond with a cured surface beneath it. The two layers sit against each other rather than fusing, leaving microscopic gaps along every edge. Water finds those gaps immediately. In a shower environment, where humidity is near-constant, those tiny channels stay damp for hours at a time, creating ideal conditions for Cladosporium and Aspergillus, the most common bathroom mould species, to establish themselves between the layers.
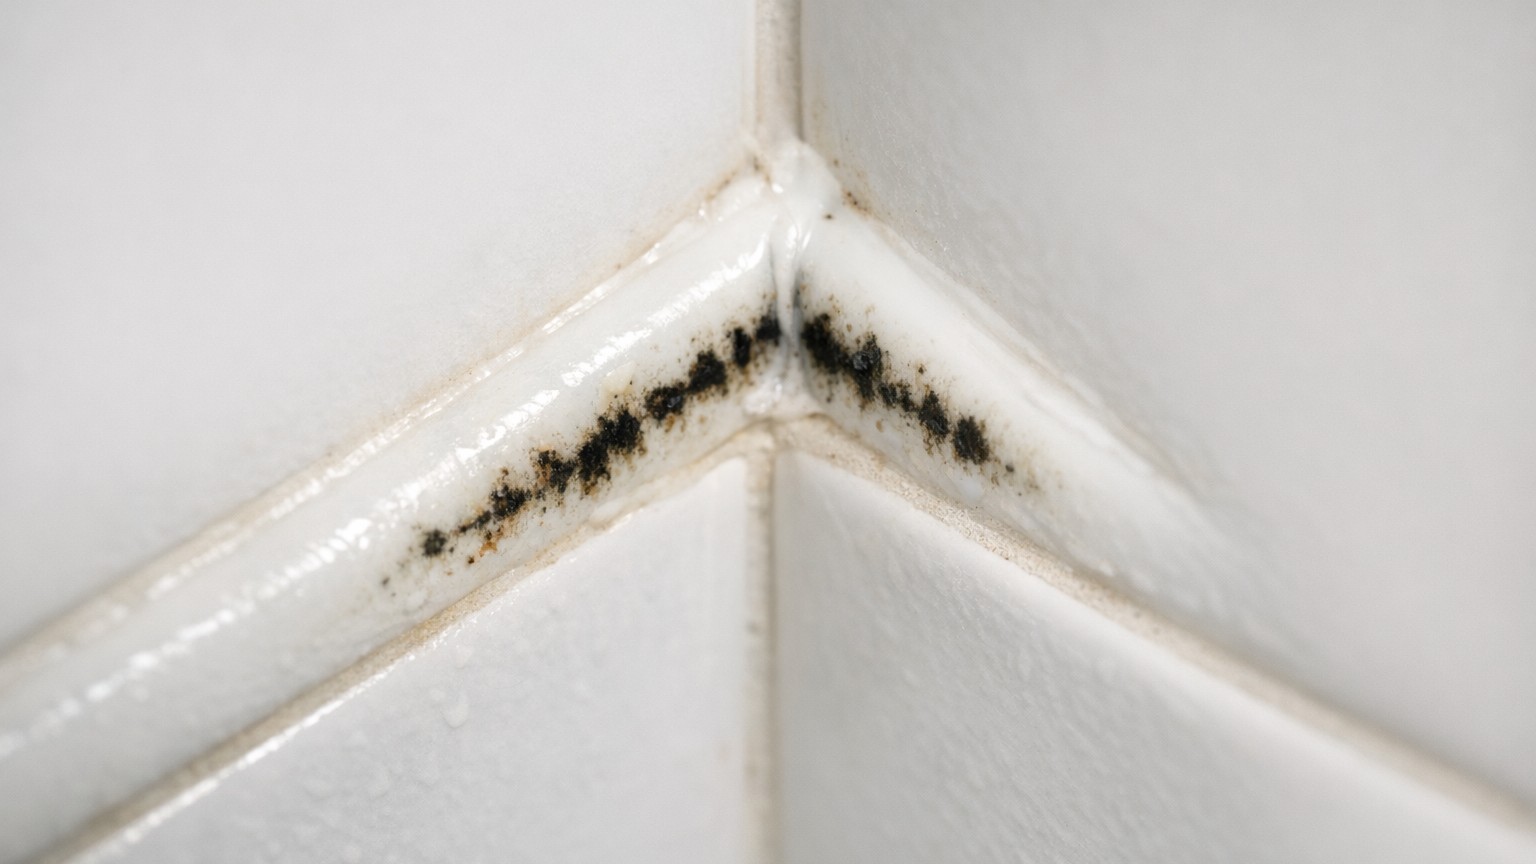
The black lines you see bleeding through after a few weeks aren’t fresh mould growing on the new silicone, they’re the existing colony beneath it, now fed by trapped moisture and actively pushing pigment upward through the flexible material above. Silicone is porous enough for this to happen faster than most people expect. Three weeks is actually a fairly typical timeline, and some people report visible discolouration within ten days in a poorly ventilated bathroom.
Removing old silicone properly (it takes longer than you’d think, but it’s worth every minute)
The only reliable approach is complete removal before any new product goes near the joint. Start with a purpose-made silicone remover solution, applied generously and left to soak for at least an hour. These products soften the cured material and make it far easier to lift cleanly. A plastic scraper is preferable to a metal one for most of the work, since metal tools can scratch tiles and leave tiny grooves that harbour future mould. That said, a thin-bladed Stanley knife is occasionally needed for the stubborn edge where the silicone has bonded tightly to glazed ceramic.
Once the bulk of the old bead is out, the real work begins. Run your finger along the joint and you’ll likely feel traces of silicone still clinging to both surfaces. These remnants must go. Leaving even a thin film behind gives the new sealant nothing solid to grip, and any mould embedded in the old material survives to cause problems later. A cotton cloth soaked in isopropyl alcohol (readily available from chemists and hardware shops) removes residue effectively without damaging grout or tile surfaces. Let the joint dry completely, ideally for 24 hours, before touching any new sealant.
A useful trick that professional decorators and tilers often use: fill the bath with cold water before applying the new bead. A fully loaded bath pulls the joint open slightly at its widest point. When the silicone cures in that position, it has a little flex in reserve for everyday use, which dramatically reduces the chance of cracking over time. Drain the bath only after the sealant has fully cured, usually 24 hours for most standard products.
Choosing the right sealant and keeping mould from returning
Bathroom silicone products broadly fall into two categories: standard formulations and those containing a fungicide. For a shower enclosure specifically, the fungicidal option is worth every extra penny. The fungicide is blended through the silicone itself during manufacture, so it works continuously rather than just sitting on the surface. A 300ml cartridge for a standard size shower typically costs somewhere between £3 and £8 depending on the brand, making it one of the more economical long-term fixes available to a homeowner.
Colour matters more than many people realise. Brilliant white sealant looks pristine on day one but shows any discolouration almost immediately. Soft white or off-white formulations are more forgiving and better suited to older bathrooms where the tiles themselves have mellowed over the years. Clear silicone is an underrated option in heavily patterned tile schemes, as it becomes almost invisible once cured.
Application technique has a genuine effect on longevity. Cut the nozzle at roughly 45 degrees and keep it at a consistent angle throughout the entire run, stopping and restarting mid-bead creates weak points. Smooth the fresh silicone with a wet finger or a purpose-made finishing tool (a dampened finger dipped in a solution of washing-up liquid and water gives a very clean profile and stops the silicone from dragging). Masking tape along both edges of the joint before application results in a crisp, professional finish and can be pulled away cleanly within a couple of minutes of smoothing.
Ventilation does more work than the sealant
Even perfect silicone in perfect condition will deteriorate quickly in a bathroom that stays steamy for hours after every shower. Running an extractor fan for at least 15 minutes after bathing removes the bulk of airborne moisture before it can condense on cooler surfaces. A small, inexpensive hygrometer placed in the bathroom gives a useful read on ambient humidity levels; anything consistently above 60% between showers suggests the ventilation needs improving, either through a more powerful fan or simply a habit of leaving the door ajar after use.
One thing that often surprises people: toothpaste splatter and soap film on grout lines create a thin organic layer that feeds mould just as readily as damp alone. A quick wipe-down of the surround with a damp cloth every few days keeps that food source away, and in practice extends the life of fresh sealant by months. The silicone itself is the final line of defence, not the first.