Buried terracotta pots, known as ollas (pronounced “oy-yahs”), have been quietly solving the watering problem for thousands of years, and your neighbour’s throwaway comment about burying something along your rows might just be the most useful advice you’ll ever receive on the allotment. The trick costs next to nothing, works while you’re at home having a cup of tea, and can cut the water your plot drinks by a startling amount.
Key takeaways
- An ancient watering system is being rediscovered by modern gardeners—and it costs less than £10 to build
- Your plants’ roots naturally gravitate toward these buried pots and draw exactly the water they need
- Water savings reach 90% compared to hosepipe watering, even without considering mulch efficiency gains
An Ancient Idea That Every Plot Holder Should Know
The use of low-fired clay ceramic vessels as irrigation tools is an ancient technique, first recorded in China and North Africa more than 4,000 years ago, before spreading throughout arid regions of the world. There is some debate about whether ollas originated in northern Africa or China, but burying clay pots for pitcher irrigation first appeared in ancient Chinese texts, in the world’s first agricultural science textbook, the Fan Sheng-Chih Shu, over 2,000 years ago. The Romans used them too. The fact that farmers separated by continents and centuries all landed on the same solution tells you something about how well it works.
The concept of using ollas as an irrigation system goes back thousands of years and has been used in countless cultures around the world. An olla watering system is essentially any type of unglazed clay pot that is buried beneath the soil with only a small amount sticking up above the surface, then filled with water. Though the material looks solid, terracotta’s structure is like a microscopic mesh that allows moisture to seep through. That slow seep is everything, the pot doesn’t flood the soil; it responds to it.
Unglazed terracotta is porous, so the water contained in the olla travels through the pot and into the surrounding soil. But this action is very, very slow. And it stops if the soil surrounding the pot is saturated with moisture. So an olla will never overwater your plants. Think of it as a plant listening to its own thirst, rather than being force-fed by a hose on a schedule.
How to Make One for Around a Tenner
Two small unglazed terracotta pots from any garden centre or hardware shop are all you need. The total outlay for a pair is typically well under £10. The pots must be unglazed, you can tell that a pot is unglazed because it will be that classic terracotta red colour with no shiny finish, glaze or paint. A glazed pot won’t let a drop through, so it’s worth checking before you buy.
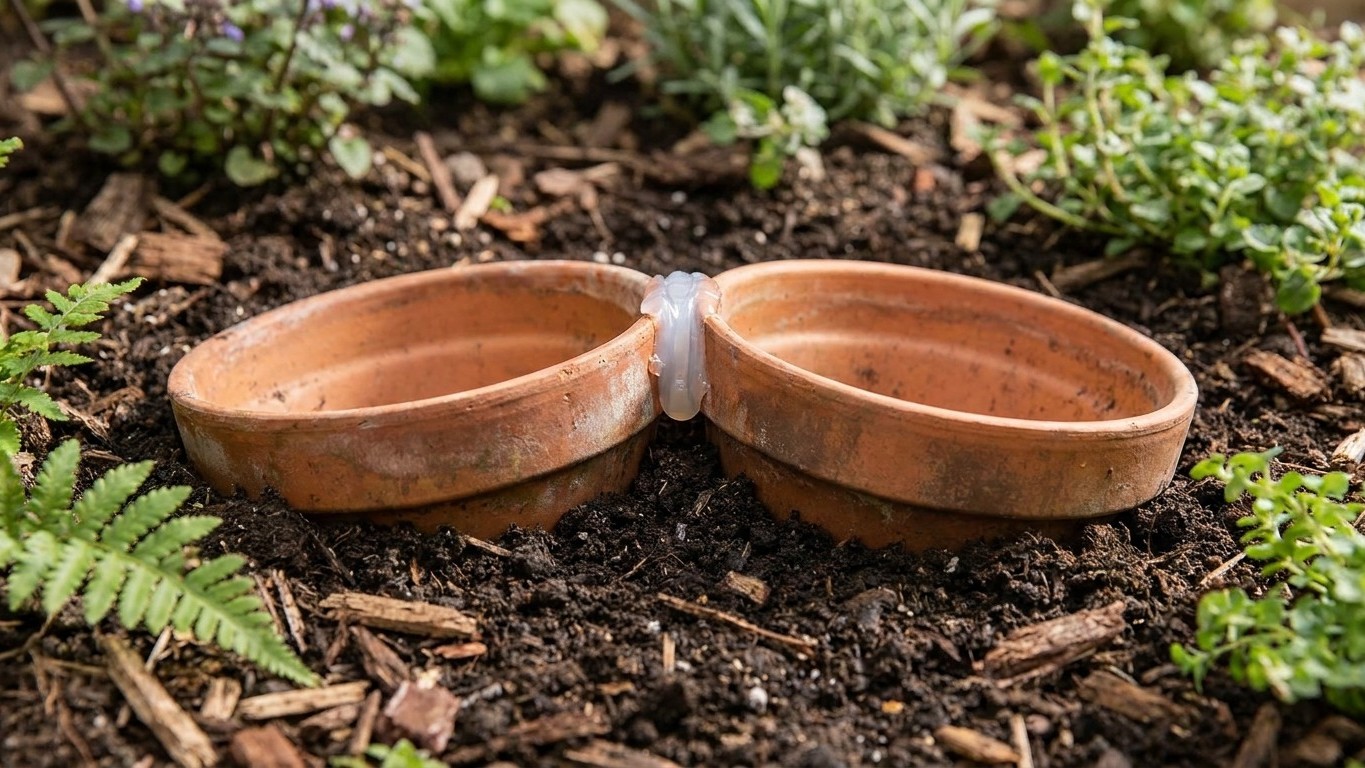
To build your olla, take one pot and seal its drainage hole using waterproof silicone sealant or a wine cork, whatever you have to hand. Apply a generous ring of silicone around the rim of the bottom pot, then press the top pot gently upside down at a marked alignment. Using a rubber glove, rub the excess silicone with your finger to fill any gaps and create a leak-proof seal between the two pots. Allow 24 hours for the silicone to fully cure. Before you bury it, fill the olla with water and leave it to stand for a few hours — a dry terracotta pot takes a little time to become fully porous, so give it a good soak first.
Dig a hole in your garden deep enough to bury the olla with only the top inch exposed. Leave 1–2 inches above the surface to prevent dirt and mulch from washing inside, and gently pack soil around the olla. Once it’s in, cover the opening with a terracotta saucer or a flat stone, covering the opening with a cap prevents evaporation, mosquito breeding, and soil intrusion.
Making It Work Along Your Rows
As a general rule of thumb, you should have one olla pot per four-by-four-foot area in your garden. The olla pot can water up to two feet away from where it is buried, which means even if your garden is just two feet wide by eight feet long you’d want two olla pots, one every two feet. For a standard allotment row of courgettes, tomatoes, or beans, spacing them every 60 cm or so along the row covers your plants neatly.
After burying the olla among your vegetables or plants, their roots will stretch towards the water source and attach themselves to the outside of the pot. This technique enables your plants to draw exactly the amount of water they need. Once filled, ollas work because plants sense sources of moisture and grow their roots towards it. When you dig up ollas from around tomato plants, the holes left are completely lined with roots, the plants’ roots get moisture from the soil around the pot, but also from the pot itself.
You only need to fill them every two to five days depending on your climate, hotter, drier conditions will be on the lower end of that spectrum — and it takes just one minute or so to fill the pot from a watering can, versus standing there for ages with a hose. Top them up from your water butt if you have one, and the whole system becomes even cheaper to run.
Ollas are best suited for watering large vegetable plants such as tomatoes, eggplants, and beans. Cucumbers, salad greens, kale, herbs, edible flowers, gourds, and melons all respond well too. One thing to bear in mind for British winters: if you live in a climate at risk of frost, remove the olla from the ground before the frost and bring it indoors, as the porous nature of the clay makes it susceptible to cracking or shattering in freezing temperatures. A quick pull-up in October, a clean, and they’ll be ready again come spring.
The Water Savings Are Genuinely Impressive
Watering gardens with ollas can cut water use by 90 per cent compared to surface irrigation. Ollas minimise water use by getting water to the plant as needed, with little or no loss to evaporation or runoff. Even on a more conservative estimate, pitcher irrigation with an olla is efficient because ollas are buried under the ground and release water directly to the roots of the plants, this practice reduces the amount of water lost to evaporation and can save as much as 70% of the water used.
With summers getting hotter and hosepipe bans becoming more common, many gardeners are looking for ways to use water more efficiently. An olla slots perfectly into that need. Pair it with a layer of mulch over your bare soil, a good layer of mulch can save 40 to 50 per cent of your water usage on the allotment — and you have a genuinely low-maintenance, high-efficiency watering system that costs less than a bag of compost to set up.
Liquid fertiliser can even be added to the olla to slowly release nutrients into the soil, just make sure it is truly a liquid form so as not to plug the pores of the clay. A weak feed of liquid seaweed every fortnight, delivered silently underground to the root zone, turns a simple irrigation trick into something rather clever. It’s the sort of thing that makes your neighbours wonder why your courgettes are twice the size of theirs.
Sources : oneplanetmatters.com | wildrevivalgardening.com