There is a joint detail so quietly effective that seasoned woodworkers almost never mention it, not out of secrecy, but because, after decades at the bench, it simply becomes second nature. It is the wedged mortise-and-tenon corner, and if you have ever watched a well-built raised planter hold its shape through five English winters while your neighbour’s screwed-and-glued box splays open at the seams by May, this is why.
Key takeaways
- Traditional screws fail in end grain under constant soil pressure and freeze-thaw cycles
- A hidden joint detail used by centuries-old Japanese temples solves the problem completely
- You need only basic hand tools and scrap wood to master this technique this weekend
Why raised planters fail, and it is never the wood’s fault
Most DIY raised planters are built with good intentions and the wrong logic. People reach for exterior screws, perhaps some waterproof PVA glue, and assume that what holds a bookshelf together will hold a garden planter together. The trouble is that soil is a living, breathing, constantly wet thing. A planter filled with compost can hold many litres of water after a decent rainfall, and that weight, combined with the freeze-thaw cycle that British winters deliver so reliably — pushes outward on the walls with extraordinary force. Screws in end grain, which is what you get at a corner, hold about as well as a drawing pin in wet cardboard over time. The joint does not fail dramatically; it creeps. A millimetre this winter, two more next spring, and by Easter you are staring at a rhombus where a rectangle used to be.
Old carpenters understood something that the modern era of power tools and composite decking has somewhat buried: end grain is the enemy of mechanical fasteners under sustained load. The fibres run lengthways through wood, and when you drive a screw into the end of a board, you are essentially threading it between those fibres rather than across them. The holding power is a fraction of what you get driving the same screw into face or edge grain. For a planter, where the outward pressure is constant and moisture swells and shrinks the wood repeatedly, this weakness compounds every single season.
The joint that changes everything
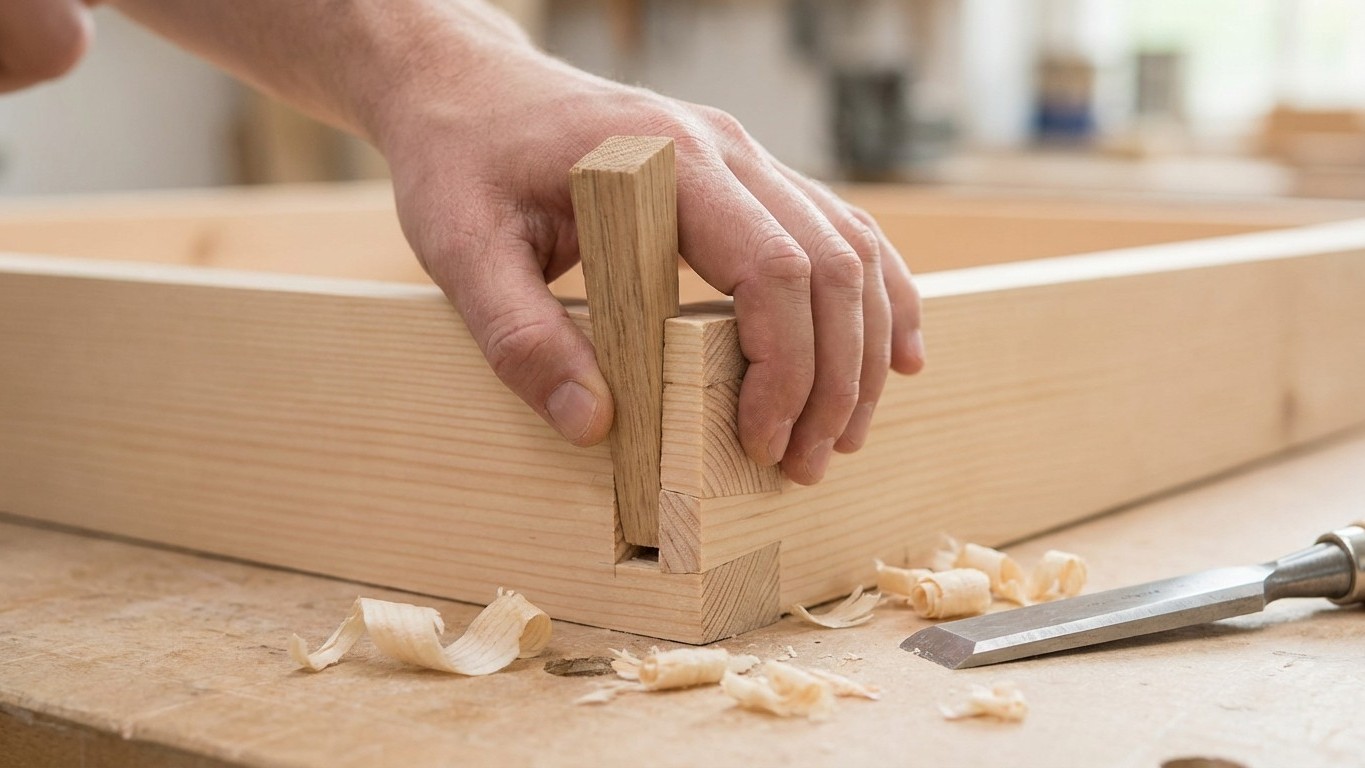
A wedged mortise-and-tenon is simpler than its name suggests. The tenon is a protruding tongue cut at the end of one board; the mortise is a matching slot cut through the receiving board. The tenon passes through the mortise and pokes out the other side by roughly 15 to 20 millimetres. You then saw two thin kerfs (slots) into the protruding end of the tenon, slip small wooden wedges into those kerfs, and tap them home. As the wedges tighten, the tenon expands inside the mortise, locking the joint mechanically. No screws. No glue required, though a smear of exterior-grade adhesive never hurts.
What makes this joint so perfectly suited to a raised planter is that the outward pressure from soil actually works in its favour. The more the walls try to splay, the harder the tenon is pulled against the mortise walls. The joint uses the force against itself, a principle that Japanese temple builders Understood and applied for centuries in structures that are still standing today. Your parsnips may not require quite that level of engineering, but the principle is sound.
For the practical details: if you are building with 25mm (one-inch) thick boards, cut your tenon to roughly 10mm thick and 40mm wide. The mortise should be a snug fit, aim for a gap of no more than half a millimetre on each face. The wedge kerfs should be cut about two-thirds of the way down the tenon length, and the wedges themselves are best made from a slightly harder timber than the main structure (oak wedges in a softwood frame work beautifully). Ash works well too. Tap them in with a mallet rather than hammering, feeling for the resistance that tells you the joint is fully seated.
How to work this into a practical weekend build
You do not need a Professional workshop to cut these joints. A sharp tenon saw, a decent chisel set, and a mallet will do the job. The mortise is the fussier of the two cuts : I always recommend drilling out the bulk of the waste with a flat-bit first, then paring the walls with a sharp chisel. Work from both faces of the board to avoid blowout on the back side, and test the fit frequently. A tenon that drops in under its own weight with the lightest of nudges is exactly what you are aiming for.
The corner posts deserve a mention here. Many carpenters build the corner as a solid post, say, 75mm by 75mm, with the side boards mortised into it. This gives you four clean faces to work with and means your mortises go into face grain, which is far easier to cut cleanly and holds far better under load. The posts also double as feet if you cut them slightly long; sitting the planter on those post ends lifts the floor boards off the ground, which dramatically extends the life of the timber.
One detail that tends to get skipped even by people who bother with the joinery: the bottom boards of a raised planter should never be glued or fixed tightly. Leave a gap of 6 to 8mm between each floor board. This allows drainage without needing a membrane (though one is still a sensible idea), and crucially, it lets the boards swell and shrink seasonally without buckling. A buckled floor pushes the walls apart just as efficiently as saturated soil does.
The quiet satisfaction of a thing built properly
There is something rather gratifying about pulling a wedged joint apart years later, if you ever need to, and finding that it disassembles cleanly, the wood surfaces still fresh and pale beneath where they were joined. A screwed joint pulled apart after five winters usually tells a grimmer story: rust streaks, crushed fibres, sometimes rot concentrated exactly where the metal sat. Raised planters are not small investments of time or money, and the compost, the seeds, the hours of tending, all of that deserves a structure that will genuinely last.
The real question, perhaps, is not whether you have the skills for this joint (you almost certainly do, after a practice run in scrap timber), but whether we have got out of the habit of asking how the old ways worked before we reach for the drill. Some Saturdays, the slower method is the one that saves you trouble every spring for the next decade.