Those dark, dingy lines between your bathroom tiles have a way of making an entire room look grubby, no matter how thoroughly you’ve scrubbed everything else. The good news is that you don’t need a bottle of bleach to tackle them. With a handful of inexpensive cupboard staples, you can clean grout naturally, get genuinely impressive results, and keep your family, your pets, and your tiles safe in the process.
Why Bleach Is Worth Avoiding on Grout
Health and environmental concerns
Bleach is a powerful disinfectant, and that’s precisely the problem. In a small, poorly ventilated bathroom, the chlorine fumes it releases can irritate the lungs, eyes, and skin, and prolonged exposure is a real concern for anyone with asthma or respiratory sensitivities. Children and animals, who spend time low to the ground where fumes concentrate, are especially vulnerable. When you rinse bleach down the drain, it reacts with organic compounds in wastewater to form chlorinated by-products, some of which are persistent in the aquatic environment. For a regular cleaning task you might do every few weeks, that’s a significant chemical load for very little extra benefit over natural alternatives.
What bleach actually does to your grout
There’s a cruel irony hidden in bleach’s popularity as a grout cleaner. Yes, it whitens on contact, but repeated use gradually degrades the cementitious binders in standard grout. The surface becomes porous and crumbly, which means it traps more dirt, more moisture, and more mould spores than it did before. You end up needing to clean more often, and eventually, the grout cracks or crumbles entirely, requiring an expensive re-grouting job. Natural methods work more gently, preserve the structural integrity of the joints, and often perform just as well for everyday grime and even moderate mould.
The Natural Ingredients That Actually Work
Bicarbonate of soda: the quiet workhorse
Bicarbonate of soda (baking soda) is mildly alkaline, which makes it effective at breaking down greasy residues and organic stains. Its fine crystalline texture provides gentle physical abrasion without scratching tiles or gouging the grout surface. A small tub costs very little and lasts for months of regular use. One precaution worth remembering: bicarbonate is not antifungal on its own. It can lift mould staining, but if the mould colony is well established, you’ll want to pair it with something with stronger antimicrobial properties.
White vinegar: powerful but not universal
White vinegar’s acidity cuts through soap scum, light mineral deposits, and surface grime with satisfying efficiency. The catch is that acid and cement are not natural friends. On standard cement-based grout, occasional use is fine, but soaking the joints in neat vinegar repeatedly can gradually etch the surface. More critically, never use vinegar on natural stone tiles such as marble, travertine, or limestone; it will etch and dull the surface permanently. On glazed ceramic or porcelain tiles with standard grout, diluted white vinegar used periodically is entirely safe and very effective.
Hydrogen peroxide, lemon, savon noir, and salt
Hydrogen peroxide (available from pharmacies at 3% concentration, labelled as 10 volumes) is the star ingredient for naturally whitening grout and tackling mould. It has genuine antifungal and antibacterial properties, it breaks down into water and oxygen, and it leaves no harmful residue. Lemon juice offers similar mild bleaching through its citric acid content, though it’s gentler and better suited to freshening up lightly soiled grout than to tackling blackened joints. Savon noir (black soap) is a traditional French and British cleaning staple that emulsifies grease beautifully and adds a pleasant natural fragrance. Coarse salt can be used as an additional abrasive in any paste recipe when you need a bit more scrubbing power.
How to Clean Grout Naturally: Step by Step
Preparation and tools
Before you mix anything, clear the area and give the tiles a quick wipe with a damp cloth to remove loose dust and surface debris. Dry grout absorbs cleaning pastes more evenly than wet grout. You’ll need a stiff-bristled brush; an old toothbrush is perfect for bathroom grout lines, while a slightly wider grout brush or even a recycled nail brush works well on larger floor areas. Have a spray bottle of plain water, a few old cloths, and a small bowl ready. Good ventilation matters even with natural products, so open a window if you can.
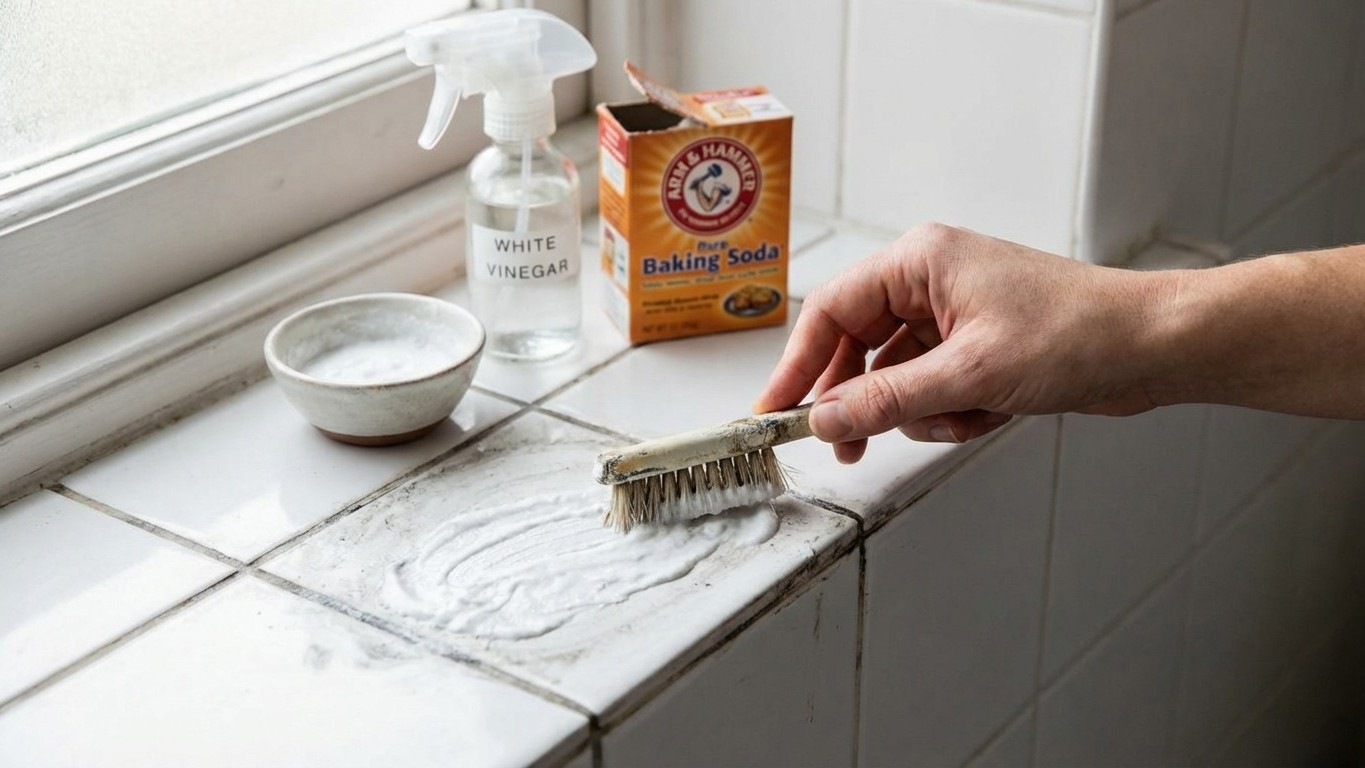
Recipe one: bicarbonate and vinegar paste (for regular maintenance)
This is the classic combination, and it works well for grout that’s dull and grimy but not heavily stained. Spoon three tablespoons of bicarbonate of soda into a small bowl and add white vinegar drop by drop, stirring as you go, until you have a thick paste. The fizzing is normal and harmless; it simply indicates the acid-alkaline reaction. Apply the paste directly to the grout lines with an old toothbrush, working it in with small circular strokes. Leave it to sit for ten to fifteen minutes, then scrub again firmly before rinsing with clean water. The combination of physical abrasion and the brief chemical reaction lifts everyday grime very effectively.
A word on proportions: you want a paste, not a liquid. If it becomes too runny, add more bicarbonate. The paste needs to cling to vertical grout lines on wall tiles without sliding off.
Recipe two: hydrogen peroxide and bicarbonate (for stained or blackened grout)
For grout that has gone noticeably dark or shows visible mould spotting, this is the recipe to reach for. Mix two tablespoons of bicarbonate of soda with enough 3% hydrogen peroxide to form a thick paste, roughly one to two tablespoons. If you like, add a small squirt of washing-up liquid or savon noir for extra degreasing power. Apply generously to the affected grout lines and leave for twenty to thirty minutes; longer for stubborn staining. Scrub with a stiff brush, then rinse thoroughly.
Hydrogen peroxide can lighten coloured grout, so always test in a hidden corner first if your grout is grey, beige, or any colour other than white. On white or near-white grout, it’s transformative.
When mould is deeply embedded
For joints that are heavily encrusted or where mould has been present for a long time, a single treatment rarely suffices. Apply the hydrogen peroxide paste, cover the treated area loosely with cling film to prevent it drying out too quickly, and leave it for up to an hour. Scrub thoroughly, rinse, and repeat after twenty-four hours if needed. Sometimes two or three treatments over a week produce better results than one aggressive session. Patience genuinely pays off here.
Keeping Grout Clean for Longer
Dry it out and air the room
Mould on grout is almost always a moisture problem first and a cleaning problem second. A bathroom that dries out quickly between uses is a bathroom where mould struggles to establish itself. Running an extractor fan during and for at least fifteen minutes after showers makes a tangible difference. If you don’t have one, opening a window is the next best thing. A quick squeegee of the tiles after showering takes about thirty seconds and dramatically reduces the moisture available to mould spores.
Natural prevention tricks worth trying
A weekly spray of diluted white vinegar (one part vinegar to three parts water) on shower grout, left to air dry without rinsing, creates a mildly acidic environment that discourages mould growth. Tea tree essential oil diluted in water (roughly ten drops per 200ml) has well-documented antimicrobial properties and can be used in the same way; the smell fades as it dries. A small bowl of bicarbonate placed in a corner of the bathroom absorbs ambient moisture and odours between uses, needing replacement only every few weeks.
Common Questions and Honest Limitations
Mistakes people make with natural cleaning
The most frequent error is mixing vinegar and bicarbonate and expecting the fizzing itself to do the work. The reaction is mostly cosmetic; the real cleaning comes from the residual bicarbonate’s alkalinity and the gentle abrasion of scrubbing. Another common mistake is using neat lemon juice on natural stone tiles, which is just as damaging as vinegar. And rushing: natural methods generally need a few minutes of contact time to work properly. Apply, wait, then scrub.
Where natural methods have their limits
Very old, cracked, or heavily porous grout that has been neglected for years may be beyond the reach of any cleaning method, natural or otherwise. If scrubbing reveals crumbling or gaping joints, re-grouting is the only real solution. Similarly, black mould that has grown deep into the grout body (rather than sitting on the surface) may require professional treatment or replacement. Natural cleaning is excellent maintenance and very effective for moderate problems, but it isn’t a substitute for repair where repair is genuinely needed.
Going Further: A Naturally Clean Bathroom from Floor to Fitting
Clean grout is just one piece of a genuinely fresh bathroom. If limescale on your taps and showerhead is the next irritant to tackle, our guide on how to remove limescale naturally from taps and shower covers the full process with the same cupboard-friendly approach. For an overview of everything from tiles to mirrors and beyond, the natural bathroom cleaning hacks guide brings all the room’s cleaning challenges together in one place. Don’t overlook the toilet bowl either; our dedicated page on the natural way to clean toilet bowl has specific recipes that deal with limescale rings and bacterial build-up without harsh chemicals.
If the natural cleaning bug has well and truly taken hold (it tends to, once you see the results), the wider collection of natural cleaning hacks covers every room in the house, from the kitchen to the utility room, with over forty tried-and-tested recipes.
There’s something quietly satisfying about realising that the cleanest, safest home is often the one that relies least on products sold in warning-labelled bottles. Your grout, your tiles, and the small people and animals in your house will all be rather better off for it. And once you’ve got the hang of making your own cleaning pastes, you might find yourself wondering what else in the cleaning cupboard you can quietly retire.