
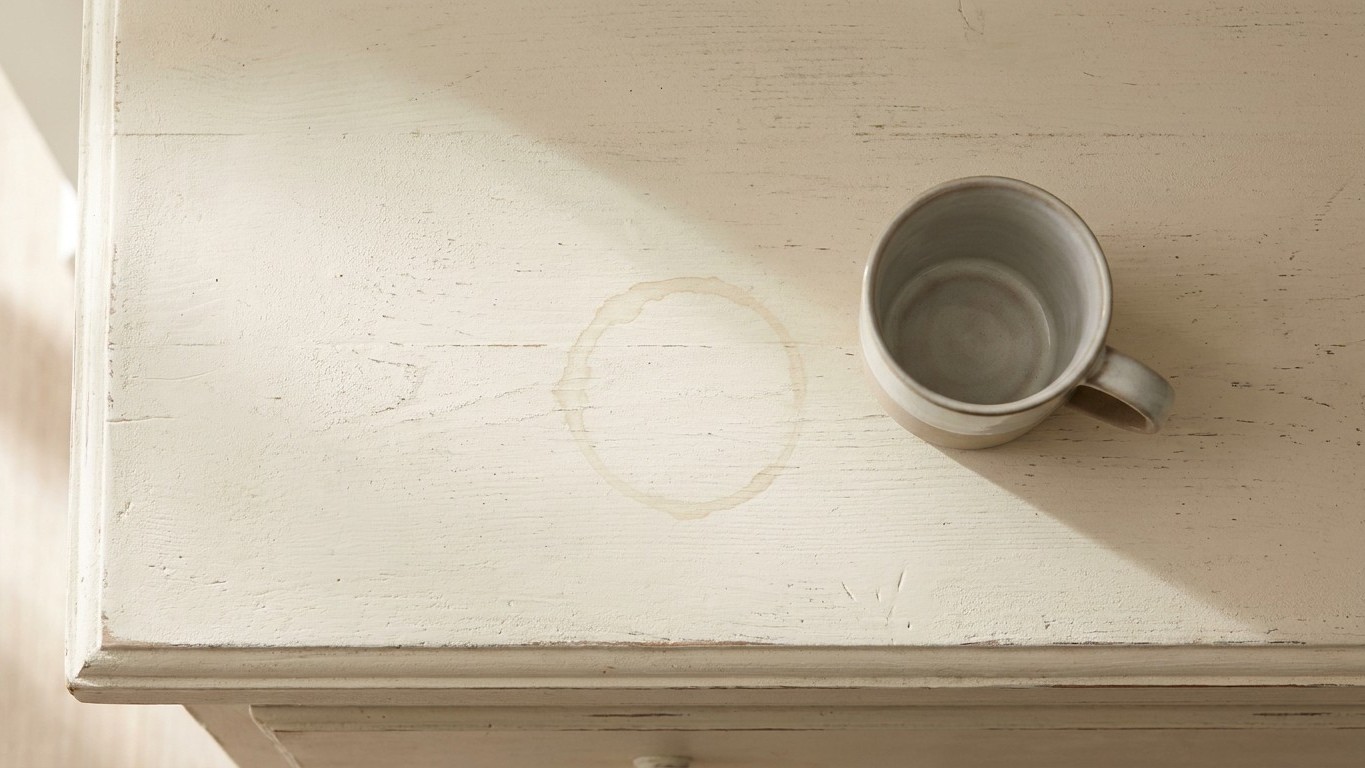
That pale ring on top of my chest of drawers wasn’t dirt. It was two weeks’ worth of tea, coffee and the odd wet glass, soaked straight into the paintwork like ink into blotting paper. I’d bought the chest for a few pounds at a car boot sale, given it a lick of chalk paint because the finish looked so fashionably chalky and soft, and never once thought about what happens when something soft meets something wet. The answer, as I discovered rather crossly, is that it drinks it up and holds onto it forever.
Key takeaways
- A seemingly perfect chalk-painted chest became a cautionary tale when liquid marks appeared mysteriously on the surface
- The ‘velvety’ texture that makes chalk paint so appealing is actually full of air pockets that drink up moisture like blotting paper
- There’s a right and wrong way to seal chalk paint—and skipping this step costs way more than the few minutes it takes to do it properly
Why that matt top drank in every mark
Chalk paint gets its lovely velvety look precisely because it’s full of tiny air pockets and mineral particles rather than the plastic-like resins in ordinary emulsion or gloss. That’s marvellous for a soft, aged appearance, but dreadful for durability. Chalk paint is very porous, so without a protective wax coat it’s going to be much more challenging to keep your painted surface clean, and anything painted with chalk paint is more likely to absorb dirt and pick up small stains. My chest hadn’t been vandalised. It had simply been left bare, and bare chalk paint behaves rather like a flannel left on the draining board, soaking up whatever touches it.
Chalk paint is very porous and will pick up stains and look a mess in no time if you don’t seal it with something. I’d read the tin, admired the colour, and skipped straight past the small print about finishing. It’s an easy mistake, and I suspect half the junk-shop revival projects on Pinterest have the same secret shame lurking under a nice bowl of fruit.
Wax or poly: what actually stops the drinking
There are really two camps here, and both have their merits, so I won’t pretend one is universally right. Traditional soft wax, the sort that goes hand in hand with proper chalk paint, gives the loveliest result if you want to keep that chalky, lived-in look. Applying a coat of clear wax over chalk paint will deepen the colour of the paint and create a beautiful, matt finish, protecting against fingermarks and stains, and it’s also water-repellent, so you can wipe marks away with a damp cloth. The catch, and there’s always a catch with anything nice, is timing and heat. Curing is a process that can take between five days to two weeks, depending on the climate, so a mug set down too early is asking for trouble. Worse still for a piece that sees a lot of hot drinks, your hot cup of coffee could melt the wax, and beeswax or carnauba waxes simply don’t compare to polyurethane or varnish for real protective quality.
For a chest of drawers, sideboard or anything that gets handled daily, a water-based poly (sold as polycrylic or a water-based topcoat) is the more sensible choice, even if it lacks some of wax’s romance. These finishes provide great protection from stains, fingerprints, water drops and rings, and scratches, and unlike oil-based varnishes they won’t turn your soft white or dove grey a nasty custard yellow over time. One word of warning from painters who’ve learned the hard way: regular water-based poly over black paint can sometimes appear milky, so your best bet over dark colours is often an oil-based poly instead. Test a small patch on the underside first. It costs you nothing but five minutes, and it can save an entire piece.
Putting my chest right (and getting it right this time)
Rescuing a stained, unsealed chest isn’t as grim as it sounds. First I gave the top a gentle sand with fine paper, just enough to knock back the worst of the staining without cutting through to bare wood. Where the ring stubbornly remained, I dabbed on a thin coat of clear wax first, because applying a thin layer of clear wax before any darker product helps keep stains from bleeding further into porous chalk paint and gives you more control over the finish. Then, once that had dried properly, I brushed on two thin coats of a flat water-based topcoat, sanding lightly between coats with the finest paper I had in the shed.
If you’re starting a project rather than rescuing one, save yourself my embarrassment with a quick test before you trust a piece to daily life. Leave a glass of ice water on a test surface for a few hours to overnight; if a water ring shows up, the surface isn’t entirely sealed. It’s such a simple check, and I genuinely can’t think why more of us don’t do it before parking a hot mug on our handiwork. For anything that will only be admired rather than used, say a decorative frame or an occasional table tucked in a corner, you may get away without sealing at all. Chalk-painted furniture may not need sealing at all if it’s a piece that is rarely used, such as a sideboard in the corner of the room that holds champagne flutes and other items you don’t necessarily use every day. But anything that meets a mug, a plate or a set of keys most mornings needs proper protection, full stop.
One small thing I wish I’d known from the start: if you paint a whole dresser in chalk paint but only wax the top, the rest of the dresser won’t have the protective finish it needs, so don’t be tempted to seal just the surface you think will get the most wear. Damp fingers, spilled tea and dragging drawers reach every part of a piece eventually, and mine has the faded corners to prove it.
Sources : arayofsunlight.com | lostandfounddecor.com