
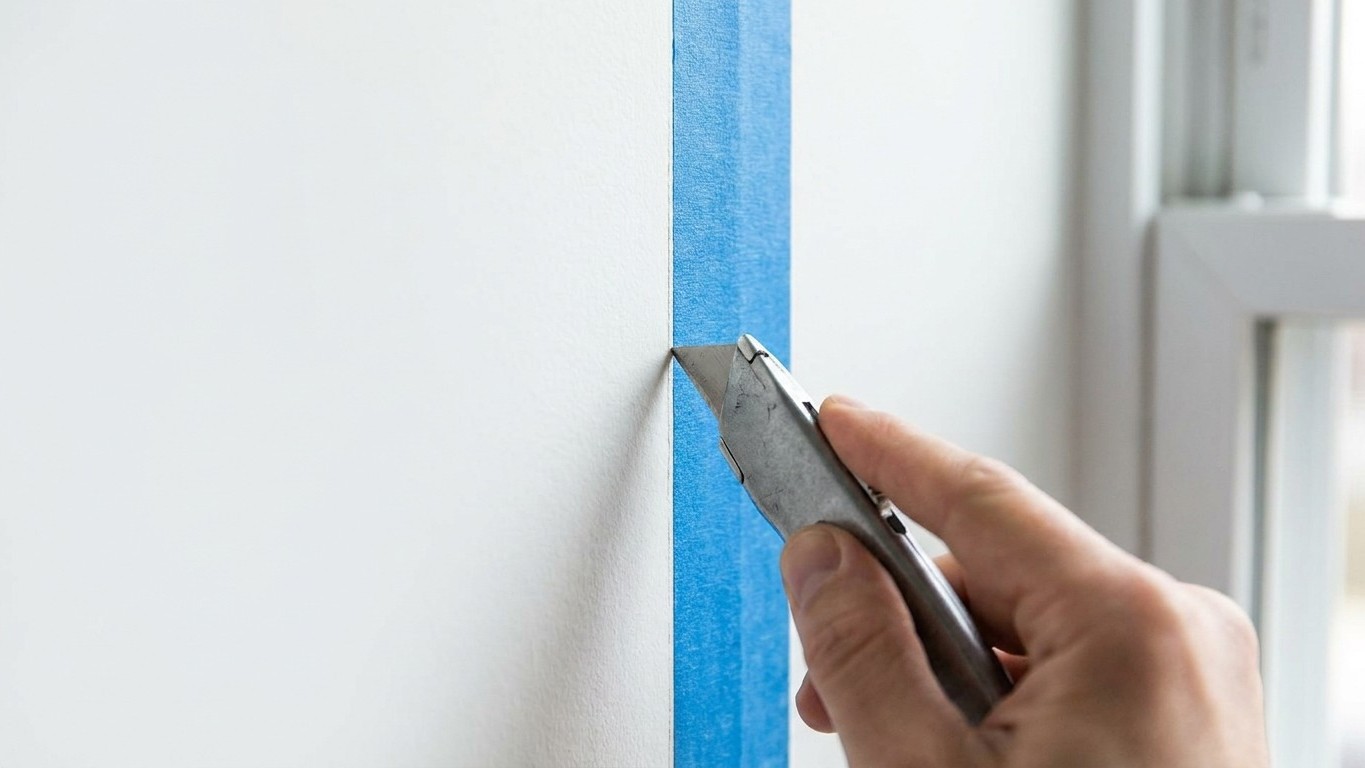
Your neighbour isn’t obsessive, he’s simply avoided the single most common paint disaster in DIY: watching a perfect line ruin itself the moment the tape comes off. Running a blade along the edge of painter’s tape before removal is called scoring, and it has nothing to do with keeping the line straight (the tape already does that). Its job is to break the physical bond that’s formed between the paint film and the tape itself, so that when you peel, you’re lifting only tape, not a thin ribbon of your fresh paintwork with it.
Key takeaways
- Paint forms a hidden hinge between the wall and tape as it dries—something most people don’t realize until it’s too late
- There’s a narrow window of time when tape removal works best, and missing it changes everything about how you should remove it
- A simple blade technique used by professionals costs seconds but prevents the frustrating damage that leads to visible seams
What’s Actually Happening Under That Tape
Paint doesn’t stop neatly at the tape’s edge the way you might imagine. It creeps ever so slightly onto the tape surface and, as it dries, forms a continuous skin that bridges the gap between wall and tape. Without it, the paint bleeds under the edges of the tape, producing a fuzzy or varied line, which is precisely why tape gets pressed down firmly in the first place. But that same firm seal becomes a liability at removal time. Once the paint has properly dried, that thin skin acts like a hinge connecting the two surfaces, so pulling the tape away can tug at the paint film rather than simply lifting the tape off cleanly.
A scoring blade cuts through exactly that hinge. Using a putty knife or razor blade to score along the edge of the tape prevents paint from being pulled up with the tape and from cracking along the paint line. Think of it like scoring a piece of card before you fold it: without that clean cut, the fold tears raggedly; with it, everything separates along a crisp, deliberate line. Several tape manufacturers put this step front and centre in their official guidance rather than treating it as an optional extra, which tells you how often the alternative goes wrong. Scoring breaks the seal between the tape and the paint, preventing the paint from lifting with the tape and ensuring the edges of your paint line remain crisp and clean.
Timing Matters Just As Much As The Blade
Here’s where a lot of otherwise careful decorators come unstuck. Removing tape too early, while paint is still wet, causes bleeding and smudging. Removing it too late, once the paint has fully hardened, is what actually creates the peeling problem your neighbour is guarding against. The rule of thumb is to remove the tape before the paint has fully dried, with optimal removal typically around an hour after application, when paint is dry to the touch but not completely hardened. Miss that window and the paint has had time to properly key into the tape’s surface, making a clean peel far less likely without help.
If you’ve left decorating for a few days, perhaps waiting for a second coat or simply because life got in the way, scoring stops being a nice-to-have and becomes essential. If the paint has fully dried, do not just rip the tape off. Use a sharp utility knife to lightly “score” the edge where the tape meets the paint. One trade tip worth borrowing: work in short stretches rather than tackling an entire skirting board in one go. It’s best to work in one-foot sections to remove painter’s tape, allowing you to focus on peeling slowly and at 45 degrees. Rushing a long strip is exactly when paint starts lifting unexpectedly.
The angle of the pull deserves a mention too, since it works alongside scoring rather than instead of it. Pulling the tape back on itself at a 45-degree angle creates a shearing action that slices through the paint film cleanly rather than pulling it away from the surface. If the tape still resists, don’t force it. If the painter’s tape doesn’t want to cooperate, like when it sticks too much to the surface, try a 90-degree angle instead. And if you feel any resistance whatsoever partway through, that’s your cue to stop and reach for the blade rather than yanking harder. Slow, steady movement beats speed every single time; a hurried pull is far more likely to shock the paint than a careful one.
Getting The Technique Right Without Damaging The Wall
Scoring sounds simple, and it is, but a heavy hand undoes the benefit entirely. You’re not trying to cut through plaster or plasterboard, only through the thin paint film sitting on the tape’s edge. A standard box cutter, craft knife, or even a putty knife with a decent edge will do the job. Run the blade along where tape meets wall, following the line rather than pressing into it, using barely more pressure than you’d use to draw a line with a pencil. Take a sharp hobby blade or utility knife and slice the paint, but don’t use too much pressure, or you’ll risk damaging the surface you painted.
Skirting boards, window frames, and anywhere with layered or textured paint benefit most from this step, since these are the spots where paint tends to build up thickest along the tape edge. Flat matt finishes are more prone to lifting than eggshell or gloss, so if you’ve painted a feature wall in a chalky matt shade, treat the scoring step as non-negotiable rather than optional. It costs you thirty extra seconds per metre of tape. Compare that to the alternative: dabbing in touch-up paint along a jagged line, waiting for it to dry, and hoping nobody notices the join. Your neighbour, it turns out, has simply worked out that a cheap blade is far better value than a tin of touch-up paint and a Saturday afternoon spent fixing what the tape undid.
Sources : q1tapes.com | custompaintinginc.com