One wrong line with a jigsaw and a perfectly good worktop becomes expensive firewood. The cardboard scribing trick that joiners have relied on for generations means you never have to guess where an uneven wall ends and your new surface should begin, and the whole thing costs you nothing more than a flattened cereal box.
Key takeaways
- What if you could copy an uneven wall’s exact shape without touching your expensive worktop?
- Why a flattened cereal box is worth more to a joiner than a laser level
- The one wooden block trick that prevents thousand-pound mistakes
Why walls are never as straight as they look
Every house settles, every plasterer has a bad day, and every wall you’ve ever stood next to is probably bulging, dipping, or leaning in ways your eye simply refuses to register until a rigid piece of material sits against it. A kitchen worktop, a bathroom shelf, a fitted wardrobe panel, the moment something flat meets something that isn’t, the gap tells the whole story. Some sections sit flush, others leave a chasm you could lose a teaspoon down. Filling that gap with silicone is a solution, of course, but it’s the solution of someone who’s already made a mistake. The joiner’s approach is to transfer the exact shape of that wall onto the material before a single cut is made.
The principle is called scribing, and while specialist scribing tools exist, the cardboard method is something anyone can do on a Sunday morning with no training whatsoever. My neighbour’s husband, a retired joiner who spent forty years fitting kitchens across the North West, used to say that half the skill in his trade was simply not rushing. The cardboard gives you that pause. It forces you to measure twice, cut once, in a very literal sense.
How to make your cardboard template
Start by cutting a piece of stiff cardboard slightly smaller than the worktop section you’re fitting. A large cereal box, a packaging box from an appliance, or even the back of a notepad will do. The key word is stiff — flimsy card will flex and lie to you. You want something that holds its shape when you push one edge gently against the wall.
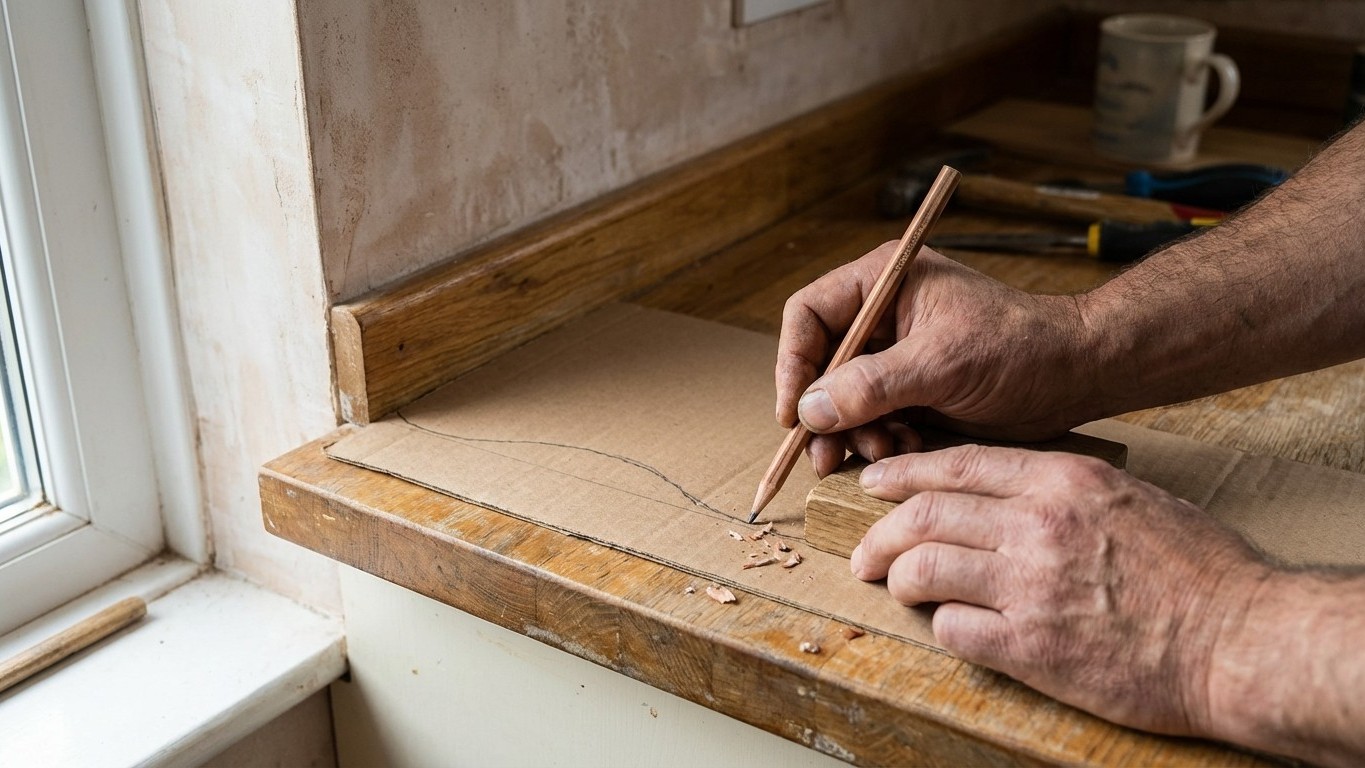
Slide the cardboard into position roughly where your Worktop will sit, leaving a deliberate gap of about two to three centimetres between the cardboard edge and the wall. This gap is your friend; it stays consistent throughout the whole process. Now take a block of wood or a short offcut, it just needs to be exactly as wide as that gap you’ve left. Hold this block flat against the wall and rest a pencil against its other edge. Then run the block slowly along the entire length of the wall, keeping it in contact with every bump and dip, letting the pencil draw that exact profile onto the cardboard beneath.
What you’re left with is the wall’s true shape, transferred faithfully onto the card. Every bulge, every hollow, every awkward corner is now a line on your template. Cut carefully along that pencil line, and when you press the cut edge back against the wall, it should sit flush, or very close to it. If there are small discrepancies, a quick pass with sandpaper or a block plane sorts them out. The template is forgiving in a way that an expensive worktop never is.
Taking the template to your worktop
Once your cardboard template fits the wall to your satisfaction, lay it on the worktop and trace around the shaped edge with a pencil. This is the line you cut to. The relief of doing it this way rather than measuring and marking directly onto the worktop is hard to overstate, you’re working on card that cost nothing, not on a piece of laminated oak that cost considerably more than you’d like to admit.
A jigsaw does the cutting, and going slowly matters here. Let the blade do the work rather than pushing it, keep your line on the waste side, and have someone hold the offcut as you near the end of the cut so it doesn’t drop and splinter the good edge. Laminates in particular are spiteful about this. Some fitters put masking tape along the cut line first, which reduces chipping on the surface, a trick worth borrowing.
When you offer the worktop up to the wall, the fit should be remarkably close. A thin bead of sealant along the back edge, where worktop meets wall, handles the tiny remaining variation and keeps moisture out. That sealant line looks intentional, Professional, neat. It’s doing a very different job from the thick wobbly bead that tries to bridge a gap nobody measured properly.
Where else this same trick earns its keep
The cardboard scribing method travels well. Bathroom vanity units, window seats, alcove shelving, a piece of timber flooring that needs to fit around an old stone fireplace, anywhere a rigid material meets an imperfect surface, the same logic applies. The block width changes depending on the gap you need to account for, but the principle stays constant.
Flooring fitters use a version of this when cutting boards to fit around doorframes, scribing the profile of the architrave onto the board rather than attempting a series of measured cuts from scratch. Tilers do something similar when marking tiles for awkward cuts around pipes or uneven skirtings. Once you understand what scribing is actually doing, you start seeing the need for it everywhere.
There’s something rather satisfying about a method this old still being the right answer in a world of laser levels and digital measuring tools. A flat piece of cardboard, a pencil, and a small wooden block. The gap between craft and competence has always been thinner than people imagine, and usually what separates a professional-looking result from a frustrating one is simply knowing which step to add before the irreversible one.