
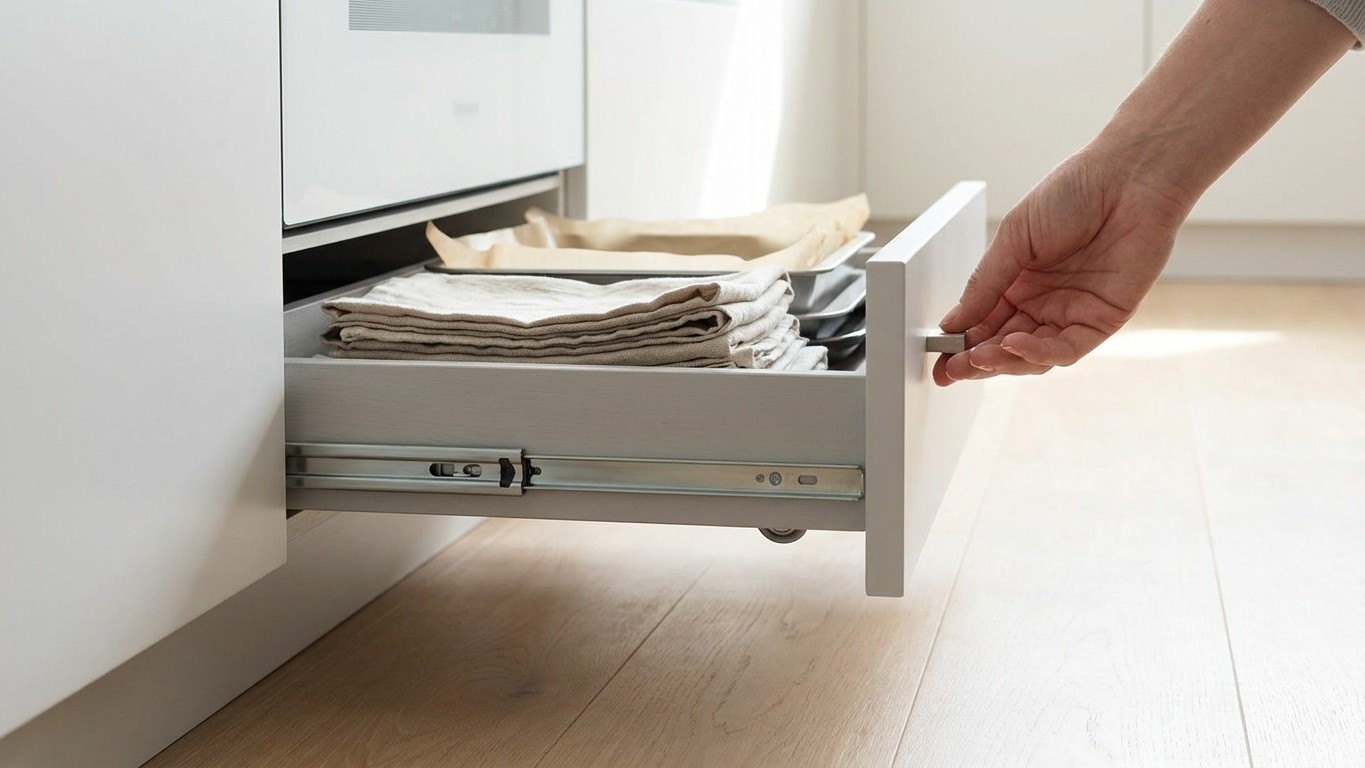
Eight years of shuffling that little strip of plastic trim back into place after mopping, and I never once wondered what was actually behind it. Then last week, elbow-deep in flour dust and stray Weetabix, I unclipped the plinth under my kitchen units to give the floor a proper going-over, and the gap staring back at me made me fetch my tape measure. What I found was roughly 12 to 15 centimetres of height and a good 40 centimetres of depth, running the entire length of my kitchen, doing precisely nothing except collecting dust bunnies and the odd lost fork.
That gap is called a toe kick, or a plinth space if you’re being properly British about it, and it exists so you can stand close to your worktop without stubbing your toes on the cabinet base. Fair enough. But the traditional toe kick means storage space underneath the cabinet is wasted, and in a kitchen the size of mine, that’s not a small oversight.
Key takeaways
- A standard kitchen plinth hides 12-15cm of height and up to 40cm of depth running the entire length—space that’s been collecting dust bunnies instead of storing anything useful
- British kitchens make this trickier than you’d think, but ready-made retrofit kits and DIY solutions both exist and actually work
- Not everything belongs down there—but seasonal dishes, baking trays, and linens fit perfectly; just avoid storing food after one homeowner discovered an unwelcome rodent problem
The Space You’ve Been Sweeping Dust Into
Kitchen fitters will tell you this recess is dead space by design, not by accident. A toe kick is a recessed area between your base cabinet and the floor that allows you to move closer to be more comfortable as you work on the countertop above. Nobody ever tells you it could be doing double duty. Anyone with a small kitchen knows there’s literally no room for wasted space, yet plenty of spaces go underused, and this one hides in plain sight because it’s below eye level and, frankly, nobody wants to crouch down and look.
The numbers surprised me more than I expected. According to one specialist UK supplier, a plinth box system running the width of an 800mm unit gives you roughly 736mm of internal width, 414mm of depth, and 90mm of usable height once fitted, and that’s before you’ve touched the units either side. A 500mm wide unit yields an internal width of 236mm, an internal depth of 414mm and 90mm of internal usable height. Multiply that across a run of six or seven base units and you’re looking at a shelf’s worth of storage that’s simply been sitting there, gathering fluff, since the day the kitchen was fitted.
Why Most of Us Never Bother
There’s a reason plinth drawers haven’t taken over every kitchen in the country, and it isn’t laziness. British kitchen carcasses typically stand on adjustable plastic legs rather than a solid plinth board, which changes the engineering. As one experienced DIY forum contributor put it bluntly, fitting a full-width drawer is awkward because UK kitchens have legs under all the units so it’s hard to see a full width drawer working, unless all the cabinets were made to hang off the wall. You either build individual boxes between the leg supports, or you fit a proper retrofit kit designed for exactly this problem.
Height matters too, and it’s worth checking before you get your hopes up. You need a minimum plinth height of 12cm, but it’s worth it for the extra storage, according to one homeowner who fitted them years ago and still swears by the result. If your plinth sits any lower than that, you’ll be looking at a drawer barely deep enough for a tea towel, which rather defeats the point.
Ready-Made Kits Versus a Saturday Afternoon
You’ve got two honest routes here, and neither requires ripping your kitchen apart. The first is buying a ready-made unit that slides straight into the gap once you’ve cut the plinth board to size. Several UK specialists sell these as complete boxes on castors or slides, sized to fit standard unit widths, and one supplier notes their box can hold up to 30kg and uses the maximum space for storage, fitted either from inside the base unit or straight from underneath. Installation, by most accounts, comes down to sliding the box into position, attaching it to the floor, and reusing your existing plinth as the drawer front.
The second route is building your own, which suits anyone who already owns a saw and doesn’t mind an afternoon of fiddling. The basic method involves removing the existing plinth, building a shallow box on low-profile castors, and fitting it back with the same trim as a front. The first job is to remove the existing plinth from under the base unit to expose the area where you’ll build the drawer. It’s not difficult joinery, but do measure twice. One frustrated forum poster who’d actually built several warned that problems arise because you’re often left with only 5 to 6 inches once you subtract the drawer base thickness, so there’s little margin for error.
What Actually Belongs Down There
I won’t pretend this space suits everything. It’s shallow, it’s low, and if your knees complain about kneeling, you’ll want to reserve it for things you rarely need rather than the pans you reach for daily. Baking trays, spare tablecloths, seasonal serving dishes and instruction manuals for appliances all fit nicely, and these drawers suit oversized, hard-to-store items like baking sheets and cutting boards, plus seasonal items and linens that would otherwise clutter your everyday cupboards.
One word of caution worth passing on, courtesy of a Mumsnet thread I stumbled across while researching this: a Victorian terrace owner found mouse droppings turning up in her plinth drawer despite none appearing elsewhere in the kitchen, and now avoids storing food-related items there. She’d noticed droppings in the drawer before but no droppings in other cupboards, so she wouldn’t recommend it for food related items. Given how close that space sits to the floor, and often to an exterior wall, I’d say that’s sound advice regardless of how tidy your kitchen otherwise is. Store your tea towels there with a clear conscience, but keep the biscuits upstairs.
Sources : ukkitchendoors.com | youtube.com