For years, my kitchen cupboard was home to a small graveyard of wood filler tubs, dried-out rims, cracked lids, that thin crust you always have to poke through before getting to the usable paste inside. I’d buy a new one, use a teaspoon’s worth to fill a nail hole or patch a scuffed skirting board, and then watch the rest slowly solidify. What a waste of money. It wasn’t until I got chatting with the owner of a small hardware shop near me that I discovered what seasoned woodworkers and old-fashioned carpenters have apparently known for generations: the best wood filler often isn’t a wood filler at all. It’s a bottle of plain PVA glue mixed with sawdust — two things you almost certainly already have, or can pick up from the supermarket for next to nothing.
Key takeaways
- Professional carpenters have been using a homemade filler method for generations that actually outperforms store-bought products
- The color-matching problem that plagues commercial wood fillers disappears completely with one unexpected supermarket staple
- This method costs almost nothing and produces virtually zero waste compared to dried-out tubs of expensive filler gathering dust in cupboards
Why Shop-Bought Filler So Often Disappoints
Cracks, divots, holes, or rot can crop up on wooden surfaces due to ordinary wear and tear and accidents, or during DIY projects. We’ve all been there, haven’t we? A quick look at what’s lurking in most tubs of commercial wood filler tells a surprisingly mixed story. Store-Bought wood fillers are usually either wood flour mixed in a binder, epoxy glue, or auto body fillers, and whilst they’re perfectly serviceable for many tasks, they come with a persistent problem that every frustrated DIYer knows well: colour matching.
You could reach for a tube or container of wood filler, but it often doesn’t match the wood and the fix sticks out. This is almost a universal complaint. Commercial wood fillers work well, but it is difficult for these product manufacturers to provide exact colour matches to all kinds of wood. Sometimes you will only manage to get a close match rather than an exact match. On a painted surface that might not matter enormously, but on a stained floor, a varnished shelf, or a piece of furniture with any natural finish, it matters enormously. The repair announces itself.
Then there’s the waste. Most domestic jobs require a small blob of filler. The rest dries out in the tub within a few months, however carefully you press cling film over it. Store-bought products can be expensive, and sometimes you want to experiment with cost-effective alternatives. And this is precisely where the PVA-and-sawdust method steps in, quietly and brilliantly.
The Supermarket Staple: PVA Glue and Sawdust
PVA glue, that white, slightly watery glue you’ll find in every supermarket, craft shop, and hardware aisle in the country — is the star of the show here. PVA glue comes from polyvinyl acetate and is the most commonly used wood adhesive for DIY projects. It dries quickly, is colourless and odourless, and can be used for both interior and exterior projects. Mixed with fine sawdust from the very piece of wood you’re repairing, it creates a paste that’s tailored perfectly to your project in a way no off-the-shelf product ever could be.
The genius of this trick, and I use that word carefully, because it’s so obvious in hindsight — is that harvesting the sawdust from the workpiece the wood filler will be used on allows you to exactly match the colour and so makes the area where the wood filler is used as inconspicuous as possible. Think about it: the commercial filler is foreign to the wood whereas the sawdust was already part of the wood before being sanded off.
If you plan to stain your project afterwards, homemade wood filler typically takes up the stain very similarly to the actual wood. That’s the detail that genuinely surprised me. Commercial fillers, even the ones marketed as “stainable”, rarely absorb stain evenly. The repair often ends up a shade darker or lighter. Most wood fillers aren’t as smooth as alternatives and some have bits of wood dust in them which make it hard to get a smooth, even fill. Wood filler also doesn’t cure or harden well enough in many cases.
How to Make It: The Simple Method
You’ll need fine sawdust (the word “fine” matters here, more on that in a moment), PVA glue, a small piece of cardboard or a scrap of wood to mix on, and either your finger or a small putty knife to apply it. That really is the whole shopping list.
The sawdust must be genuinely fine. What you’re looking for is wood dust rather than actual sawdust. Sawdust contains larger particles that are often different sizes and too large to use. The best place to collect wood dust is from an orbital sander. Not only is the wood dust extremely fine, it is almost always from the wood you are working with. No sander handy? Run a piece of medium-grit sandpaper over a hidden part of the surface you’re repairing, and collect what you scratch off.
For the mixing, start with a ratio of roughly 2 parts sawdust to 1 part wood glue. You can adjust this ratio as you mix. The target consistency is a firm, slightly sticky paste, somewhere between marzipan and toothpaste. If it’s too dry and crumbly, add a little more binder. If it’s too wet and sticky, add a little more sawdust. One practical tip worth underlining: only mix small batches. You don’t need very much under normal circumstances, and you don’t want it to dry up anyway.
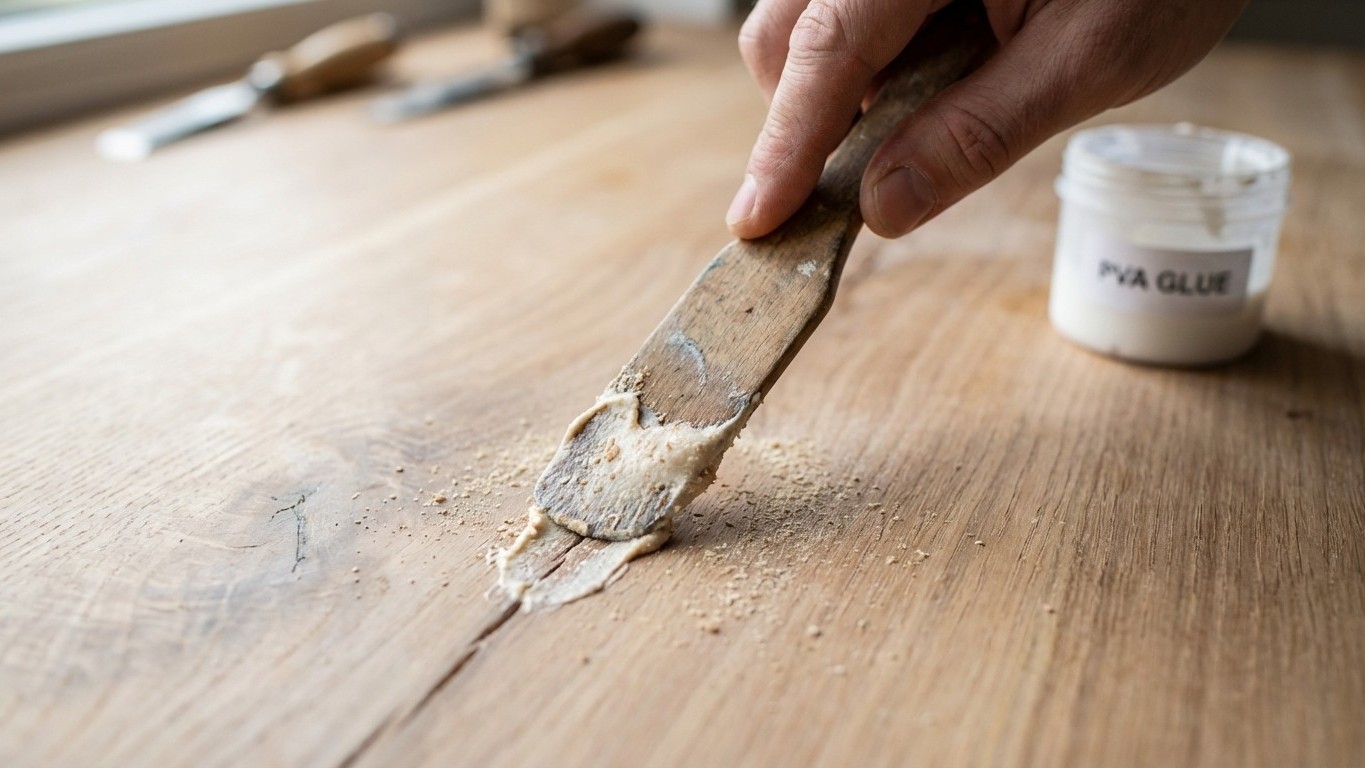
When applying the mixture, use a putty knife or a similar tool to press the filler firmly into the hole or crack, ensuring it’s fully packed without air bubbles. Overfill the repair slightly to compensate for any shrinkage during the drying process. Once it’s thoroughly dry, give it a good few hours, or overnight to be safe, sand progressively, starting coarse and finishing at 180–220 grit, then clean away the dust before applying your chosen finish.
One important warning for anyone working with oak or other tannic woods: the mix can turn dark if prepared using a metal implement or in a metal container. Use a thin offcut as a spatula and mix in a plastic pot. Apply with a wooden spreader too. This catches a lot of people out the first time.
When to Choose Something Different
The PVA-and-sawdust method is splendid for nail holes, shallow cracks, surface dents, and small gaps, the everyday repairs that represent probably 90% of what most of us actually need to fix around the home. For small nail holes and shallow dents, PVA mixed with fine Sanding dust is the ideal choice. It sands beautifully, accepts paint and stain, and costs almost nothing.
For something more serious, a rotted section of window frame, a structural crack, a deep gouge in an external door — the picture changes. Epoxy repairs are some of the strongest, most long-lasting ways to patch wood. They are structural, so they can be used anywhere and are usually not troubled by water issues like other wood fillers. A two-part epoxy filler is worth the extra investment when durability in damp or exposed conditions is the priority. For interior projects, water-based fillers are often sufficient, especially if you plan to paint the surface. However, opt for solvent-based or epoxy fillers that offer better water resistance and durability for exterior repairs or areas exposed to moisture.
There’s also a clever upgrade for the PVA method worth knowing: for increased durability, consider adding a small amount of epoxy to the sawdust and glue mixture. This will enhance the adhesive properties and provide a stronger, longer-lasting repair, especially in high-stress areas. A hybrid approach, if you like, the colour-matching virtue of sawdust with a little extra backbone.
My hardware shopkeeper friend also mentioned something he swears by for very deep repairs on sanded wooden floors: separating your sawdust into three piles and mixing batches using different types of carpenter’s glue, with the consistency of about the thickness of cake batter, creamy but not runny. Test each patch on a scrap of the same wood before committing, then compare them when dry. It’s old-fashioned, methodical, and it works.
Perhaps the most satisfying thing about all of this is the idea that if you like the look, you pretty much have free wood filler for the rest of your life at this point. The next time you sand a piece of wood, save the dust in a small labelled container. Oak dust, pine dust, walnut dust, a little collection organised by species turns out to be one of the most quietly useful things in any home workshop. The shopkeeper was right. Sometimes the best tricks aren’t new ones at all.