Discovering hollow or cracked tiles in your home can be disheartening. The thought of replacing them often conjures images of hefty expenses and cumbersome tools. However, there’s good news: you can repair these tiles yourself without resorting to heavy equipment or incurring high costs. Let’s explore how to restore your tiles to their former glory with some straightforward DIY methods.
Key takeaways
- Is replacing damaged tiles really your only option?
- What simple steps can instantly stabilize hollow tiles?
- How can you restore cracked tiles without full replacement?
Understanding the Issue
Tiles can become hollow or cracked due to various reasons, including poor initial installation, substrate movement, moisture infiltration, or simply the passage of time. Hollow tiles often produce a distinct sound when tapped, indicating a lack of adhesion beneath. Cracks, on the other hand, can range from superficial hairline fractures to more significant splits. Addressing these issues promptly can prevent further damage and maintain the aesthetic appeal of your flooring.
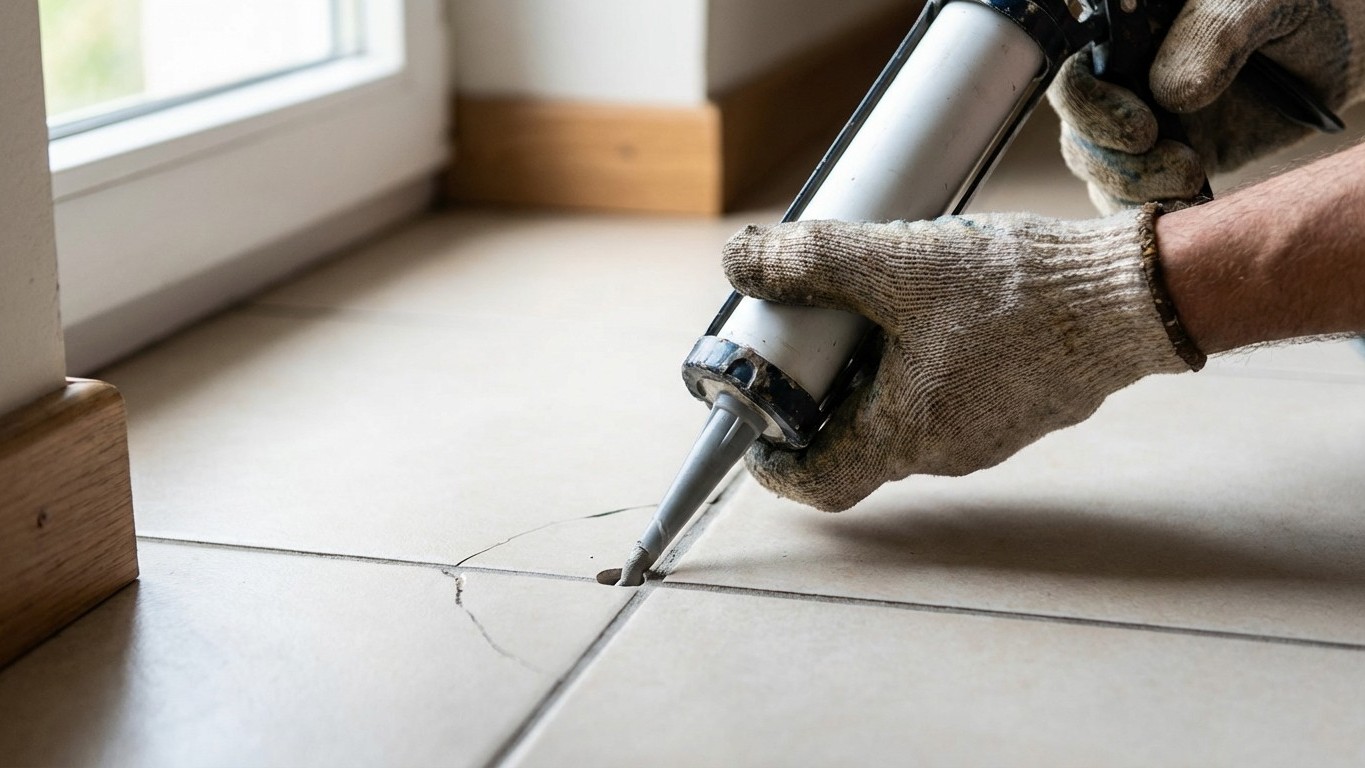
Repairing Hollow Tiles Without Removal
One effective method to fix hollow tiles without removing them involves using a specialized adhesive designed to re-bond the tile to the substrate. Products like Fix-A-Floor offer a solution that allows you to inject adhesive beneath the tile, filling voids and eliminating movement. Here’s how you can do it:
1. **Identify the Hollow Areas**: Gently tap the tiles with a wooden dowel or your knuckles to locate hollow spots.
2. **Drill Access Holes**: Using a masonry drill bit, carefully drill small holes into the grout surrounding the hollow tile. This provides entry points for the adhesive.
3. **Clean the Area**: Remove any dust or debris from the drilled holes using a vacuum or brush.
4. **Inject the Adhesive**: Load the adhesive into a caulking gun and inject it into the holes until the void beneath the tile is filled.
5. **Apply Pressure**: Place a weighted object, like a bucket of water, over the tile to ensure proper bonding.
6. **Allow to Cure**: Let the adhesive cure for at least 24 hours.
7. **Re-grout the Holes**: Once cured, fill the drilled holes with matching grout for a seamless finish.
This method is both cost-effective and minimally invasive, allowing you to repair your tiles without the need for removal or replacement. fixafloor.co.uk
Fixing Cracked Tiles Without Replacement
For cracked tiles, especially those with superficial damage, repair is often a viable option. Here’s a step-by-step guide:
1. **Clean the Crack**: Ensure the crack is free from dirt and debris by cleaning it with a mild detergent and allowing it to dry completely.
2. **Apply Epoxy Filler**: Use a two-part epoxy adhesive suitable for tiles. Mix according to the manufacturer’s instructions and apply it into the crack using a putty knife or a similar tool.
3. **Smooth the Surface**: Wipe away any excess epoxy with a damp cloth before it sets to ensure a smooth finish.
4. **Allow to Cure**: Let the epoxy cure as per the manufacturer’s guidelines, typically 24-48 hours.
5. **Re-grout if Necessary**: If the crack extends into the grout lines, reapply grout to those areas once the epoxy has cured.
This approach restores the appearance of your tiles. Also, reinforces their structural integrity. learn.diywithhelp.com
Preventive Measures and Maintenance
To prolong the life of your tiles and prevent future issues:
– **Ensure Proper Installation**: If you’re installing new tiles, ensure they’re laid correctly with adequate adhesive coverage.
– **Control Moisture Levels**: Use sealants in moisture-prone areas to prevent water infiltration.
– **Regular Inspections**: Periodically check your tiles for signs of movement or cracking and address issues promptly.
– **Use Protective Pads**: Place pads under heavy furniture to distribute weight evenly and reduce stress on tiles.
By taking these preventive steps, you can maintain the beauty and functionality of your tiled surfaces for years to come.
In conclusion, dealing with hollow or cracked tiles doesn’t necessarily mean facing a daunting and expensive replacement process. With the right tools and techniques, you can undertake these repairs yourself, saving both time and money. Embrace the DIY spirit, and your tiles will thank you for it.