Introduction
If your cleaning cupboard is starting to look like a chemistry set, a simple homemade spray can be a real relief, for your wallet, your air quality, and your peace of mind. A good DIY all purpose Natural cleaner recipe does not need a long list of ingredients, or any fancy kit. It needs the right balance of acidity (to cut limescale and soap scum), gentle surfactants (to lift grease), and sensible safety rules (to keep your household, pets included, comfortable and well).
I’m all for practical tradition, the sort that works on a rainy Tuesday when you have guests coming and the kitchen tap is showing every fingerprint. Below you’ll find a reliable, everyday multi-surface spray, plus the little “don’ts” that stop homemade cleaning from Turning into a sticky, streaky disappointment.
Why adopt a natural all-purpose spray?
Health and environmental benefits
Many commercial sprays are perfectly legal and widely used, yet they can still feel harsh in a small British kitchen with the windows shut in February. A homemade spray lets you control what goes into the air and onto your worktops. Less fragrance is often a blessing for anyone prone to headaches, asthma, eczema flare-ups, or just a sensitive nose.
Environmentally, the biggest wins tend to be:
- Less packaging, because you reuse one sturdy bottle again and again.
- Fewer unnecessary additives, especially heavy perfumes and dyes.
- Shorter ingredient lists, which makes it easier to avoid problem combinations.
In 2026, plenty of households are also paying closer attention to indoor air quality. Keeping scents light and ventilation sensible can make everyday cleaning feel less like a “fume event” and more like simple housekeeping.
Comparison with industrial sprays
A homemade all-purpose spray can be very effective for day-to-day grime, grease splashes, light limescale, and sticky marks, especially if you let it sit for a minute before wiping. Where commercial products often pull ahead is heavy-duty disinfection claims, mould remediation, and specialist surfaces (like delicate stone). That is not a failure of natural cleaning, it is simply different tools for different jobs.
My view is straightforward: use your homemade spray for routine cleaning, and keep one or two purpose-made options for the rare jobs that truly need them. Your cupboards stay calmer, and your cleaning stays realistic.
Essential ingredients for an effective DIY natural cleaner
White vinegar
White vinegar is a gentle acid. In practical terms, that means it helps dissolve limescale and breaks down some soap scum. It also helps deodorise kitchens and bins, though it will not “perfume” a room like a commercial spray, and that can be a good thing.
Choose plain white vinegar (often sold as “distilled” or “white”), not malt vinegar, unless you want your kitchen to smell like the chippy. If you want a deeper dive on ratios and surfaces, this guide is handy: homemade natural cleaning spray vinegar and water.
Bicarbonate of soda
Bicarbonate of soda (baking soda) is mildly alkaline and gently abrasive. It shines when used as a paste or sprinkled for scrubbing, but it is not ideal inside a spray bottle with vinegar, because they react with each other. The fizz looks satisfying, yet the reaction neutralises both sides, leaving you with mostly salty water and less cleaning power than you expect.
Use bicarbonate as a separate step for stuck-on mess, grout, and sinks. If you want ideas that really work in the real world, keep this page bookmarked: natural cleaning hacks with baking soda.
Essential oils (optional, with precautions)
Essential oils are optional. They can add a pleasant scent, and some have mild antimicrobial properties in lab settings, but in a household spray they should be treated mainly as fragrance. The practical considerations matter more than the marketing:
- Pets, especially cats, can be sensitive to certain oils, so skip them if you have animals that share surfaces or sleep in the rooms you clean.
- Children and anyone with asthma or allergies may react to scented products, even natural ones.
- Surface safety, oils can mark some finishes if used too heavily.
If you do use them, keep quantities small. More drops do not mean “more clean”, they mean “more residue and more risk”.
Castile soap or a natural Washing-up liquid
For an all-purpose spray that actually tackles greasy fingerprints and cooking splatters, you want a little surfactant. Castile soap is a traditional favourite, but a mild, unperfumed washing-up liquid can also work. The trick is to use a small amount so you do not leave streaks.
One warning from my grandmotherly corner: do not mix soap and vinegar in the same bottle. The acidity can cause soap to curdle, leaving stringy bits and a film on surfaces. If you want an all-in-one spray, choose either a vinegar-based formula (better for limescale) or a soap-based formula (better for grease). I’ll give you both, so you can pick what suits your home.
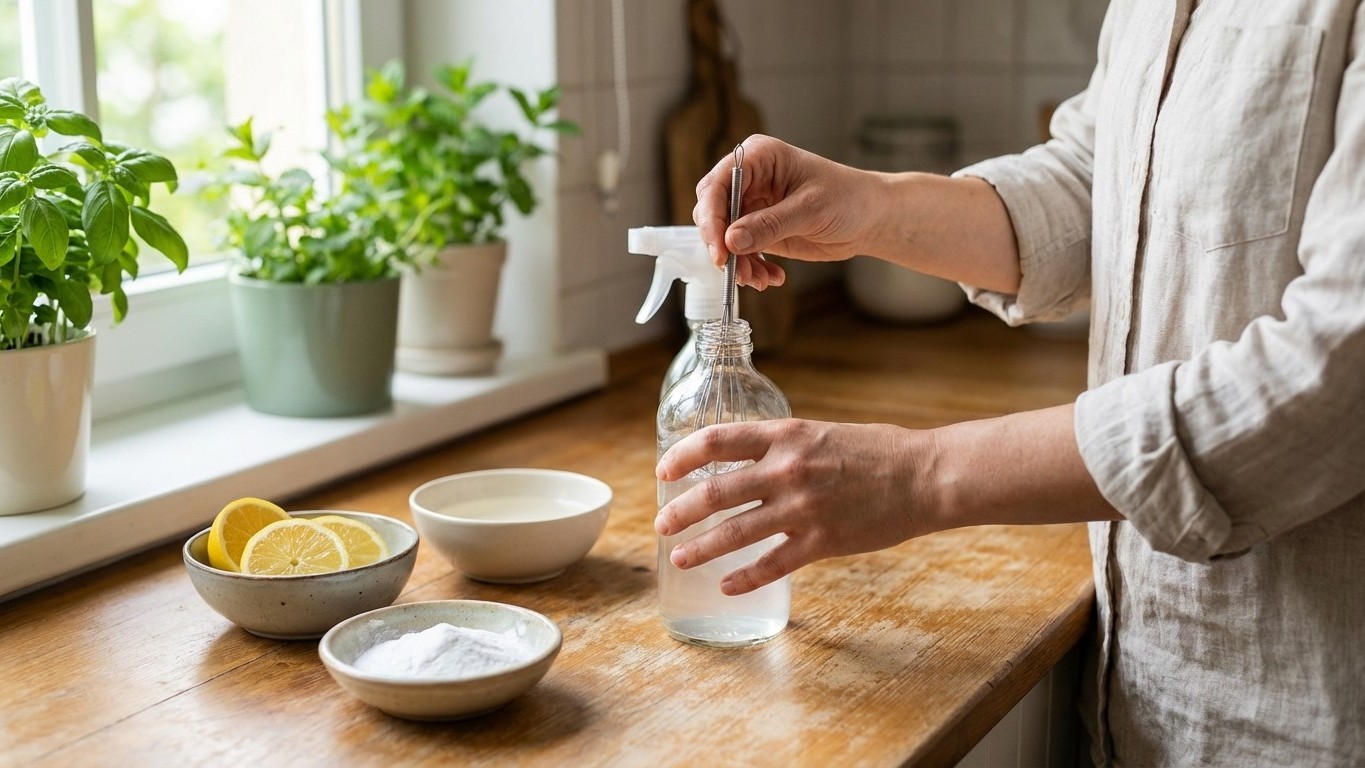
Step-by-step DIY all purpose natural cleaner recipe
Equipment you’ll need
- 1 clean spray bottle (500 ml is a very practical size)
- Measuring jug
- Measuring spoon (teaspoon)
- Funnel (optional, but it saves a lot of muttering)
- Microfibre cloths or clean cotton cloths
Reliable measurements and foolproof tips
Below are two “base” recipes. Pick one and stick with it. Mixing and matching is where most DIY sprays go wrong.
- Vinegar-based: best for bathrooms, taps, tiles, and general deodorising.
- Soap-based: best for kitchen grease, fingerprints, painted doors, and everyday wipe-downs.
Use warm water, not boiling. Boiling water can warp some plastic bottles and can push fragrance into the air too quickly.
Detailed preparation steps
Recipe A: Vinegar-based all-purpose spray (500 ml)
- 250 ml warm water
- 250 ml white vinegar
- Optional: 5 to 10 drops essential oil (skip if pets or sensitivities)
Steps:
- Wash the spray bottle with hot, soapy water, rinse well, and let it dry.
- Pour 250 ml warm water into the bottle (a funnel helps).
- Add 250 ml white vinegar.
- If using essential oils, add 5 to 10 drops.
- Screw the top on and gently tip the bottle back and forth to mix. Avoid vigorous shaking if you added oils, as it can create a foam head and encourage leaks.
- Label it clearly: “Vinegar spray, not for stone”.
Recipe B: Soap-based all-purpose spray (500 ml)
- 480 ml warm water
- 1 teaspoon mild liquid soap (castile or gentle washing-up liquid)
- Optional: 5 drops essential oil
Steps:
- Pour 480 ml warm water into the bottle.
- Add 1 teaspoon liquid soap.
- Add essential oil only if suitable for your household.
- Gently swirl to combine, shaking creates too many bubbles and makes you think you have added “not enough”. You have.
- Label it: “Soap spray, not for heavy limescale”.
Which surfaces can you use this spray on? Possibilities and limits
Compatible surfaces (worktops, tiles, bathroom, kitchen)
Used sensibly, these sprays are good for routine cleaning on many everyday surfaces:
- Sealed laminate worktops and sealed composite worktops (wipe and dry)
- Stainless steel sinks and splashbacks (apply, wipe, then buff dry for fewer marks)
- Ceramic tiles and most grouted areas (soap-based for grease, vinegar-based for soap scum)
- Bathroom fixtures, showers, and taps (vinegar-based for limescale, but rinse well)
- Painted woodwork and doors (soap-based, use a damp cloth and do not soak)
- Fridge shelves and kitchen bins (soap-based, rinse after and dry)
For anything food-contact, my habit is to wipe once with the cleaner, then wipe again with a clean damp cloth, then dry. It keeps residues down and makes the finish look nicer.
Surfaces to avoid (natural stone, raw wood, etc.)
This is where natural cleaning needs a steady hand. Avoid vinegar on:
- Marble, granite, limestone, and other natural stone (acid can etch and dull)
- Terrazzo that contains marble chips
- Unsealed grout or damaged grout (it can worsen weak spots over time)
- Raw or unsealed wood (it can raise the grain and leave marks)
- Cast iron and some delicate finishes (risk of corrosion or spotting)
Soap-based spray is gentler, but still do not drench wood or leave any cleaner sitting. When in doubt, test on a small hidden patch, wait for it to dry fully, and check in good daylight.
Usage and storage tips for your homemade multi-purpose spray
Safety precautions (pets, children, allergies)
Homemade does not automatically mean harmless. A few sensible habits keep everyone safe:
- Store sprays out of reach of children, just as you would any cleaner.
- Keep essential oils out of pet areas, and consider skipping them entirely if you have cats, small animals, or birds.
- Ventilate when cleaning bathrooms, even with mild products, because warm water and scrubbing can still irritate airways.
- Never mix vinegar with bleach-based products. That combination can release harmful chlorine gas.
- Do not mix vinegar with hydrogen peroxide in the same bottle. They can form irritating compounds, and the mixture is not stable for storage.
If someone in the home has allergies or eczema, go fragrance-free first. You can always add a drop or two later, but you cannot easily remove a scent that is making the household miserable.
Boosting effectiveness (dose, dwell time)
A common mistake is spraying and wiping immediately, then complaining it “does nothing”. Give it a little time to work:
- For greasy marks (soap-based): spray, wait 30 to 60 seconds, wipe, then buff dry.
- For limescale spots (vinegar-based): spray, wait 2 to 5 minutes, wipe, then rinse and dry.
- For stubborn grime: use a two-step method, spray first, then a bicarbonate paste for scrubbing, then rinse and dry.
If your water is very hard, common in many parts of the UK, you may notice more residue. In that case, reduce the soap slightly, and finish with a clean damp cloth.
FAQ and frequent mistakes to avoid
Common problems and solutions
- “How do you make an all purpose natural cleaner at home?”
Pick either the vinegar-based or soap-based recipe above, measure carefully, and label your bottle. Use vinegar for bathrooms and taps, soap for kitchen grease and painted surfaces.
- “Is homemade natural cleaner as effective as commercial cleaners?”
For everyday dirt, grease, and light limescale, yes, it can be. For heavy mould, deep disinfection requirements, or specialist materials, commercial products may be more suitable. Think routine cleaning versus specialist treatment.
- “Can you use homemade all purpose spray on wood or marble?”
Skip vinegar on marble and other natural stone. On wood, use a soap-based spray sparingly and never soak the surface. Unsealed wood should be cleaned with a barely damp cloth instead.
- “What ingredients should you avoid mixing in DIY cleaners?”
Avoid vinegar with bleach, avoid vinegar with hydrogen peroxide in the same bottle, and avoid vinegar mixed with soap if you want a clear spray. Keep bicarbonate for scrubbing, not for mixing into a vinegar spray.
- “How long does homemade all purpose cleaner last?”
Vinegar and water keeps well for several weeks in a clean bottle, often longer. Soap-based spray is best used within 2 to 4 weeks for freshness and performance. If it smells “off”, looks cloudy in an unusual way, or the bottle has been contaminated by a dirty cloth, pour it away, wash the bottle, and mix a fresh batch.
- Streaky finish on glass or shiny worktops
Use less soap, wipe with a clean damp cloth, then buff dry. Microfibre helps, but it must be clean, a greasy cloth just smears.
- Sticky feeling after cleaning
You have likely used too much soap. Reduce to 1/2 teaspoon per 500 ml and always finish with a damp wipe on food areas.
- Sprayer clogging
This happens when people add bicarbonate, thick soap, or infusions with bits of herb or peel. Keep sprays simple and strain anything you infuse, though I recommend skipping infusions entirely in a spray bottle.
Connect with other homemade recipes
Other targeted sprays: windows, bathroom, tiles
A multi-purpose spray is your everyday workhorse, but a couple of targeted mixes can make chores quicker. For a simple vinegar and water approach with clear compatibility notes, see homemade natural cleaning spray vinegar and water. For scrubbing jobs, especially sinks, ovens, and grout touch-ups, keep bicarbonate ideas close by here: natural cleaning hacks with baking soda.
Linking to sister pages in the natural cleaning guide
If you are building a full routine, start with the fundamentals and ingredient logic in natural cleaning hacks, then browse a room-by-room collection here: natural cleaning hacks. It is often easier to keep one core spray, one bathroom helper, and one gentle scrub, rather than trying to invent a new potion every weekend.
Conclusion
A dependable DIY all purpose natural cleaner recipe is mostly about calm consistency: accurate measuring, the right formula for the right surface, and a cloth that is genuinely clean. Mix a 500 ml bottle today, label it, and try it for a week on the everyday messes, kitchen handles, bathroom sink, dining table splashes, then tweak only one thing at a time if you want a stronger degrease or a lighter scent.
If you fancy taking it one step further, would your home benefit more from a separate bathroom limescale spray, or from a bicarbonate scrubbing routine for the stubborn bits that a spray will never quite persuade?