Drilling through ceramic or porcelain tiles is one of those jobs that looks straightforward right up until the moment you hear that awful crack. A single tile ruined, money down the drain, and a repair job that somehow needs to look invisible. The culprit, nine times out of ten, is not the drill bit, not the speed setting, and not even bad luck. It is starting to drill without controlling the bit’s initial contact with the glazed surface.
Key takeaways
- A tiny detail at the moment you first touch the tile determines success or failure—and it has nothing to do with the drill speed
- Porcelain tiles are unforgiving in ways that ceramic isn’t, but the same fix works for both
- Heat builds up silently during drilling and can cause hidden micro-cracks that appear days later
Why Tiles Crack at the First Touch
Glazed tile has a hard, slippery outer layer that a standard twist drill bit simply cannot grip. The moment you press the bit against that smooth surface and switch the drill on, the tip skates sideways before it can bite in. That sideways force, even over a fraction of a millimetre, creates a small stress fracture in the glaze. Sometimes you see it immediately as a spider-web crack. Sometimes it hides and the tile shatters days later when someone leans on the wall fitting you’ve just installed. Either way, it is a preventable disaster.
Porcelain is particularly unforgiving here. It is denser than standard ceramic, fired at higher temperatures, and the glaze is bonded so tightly to the body that any localised stress spreads fast. I have seen experienced decorators groan when they realise they are drilling into rectified porcelain for the first time without adjusting their technique. The drill skates, the glaze cracks, and a tile that costs several pounds gets wasted in under three seconds.
The Proper Fix: Controlling That First Contact
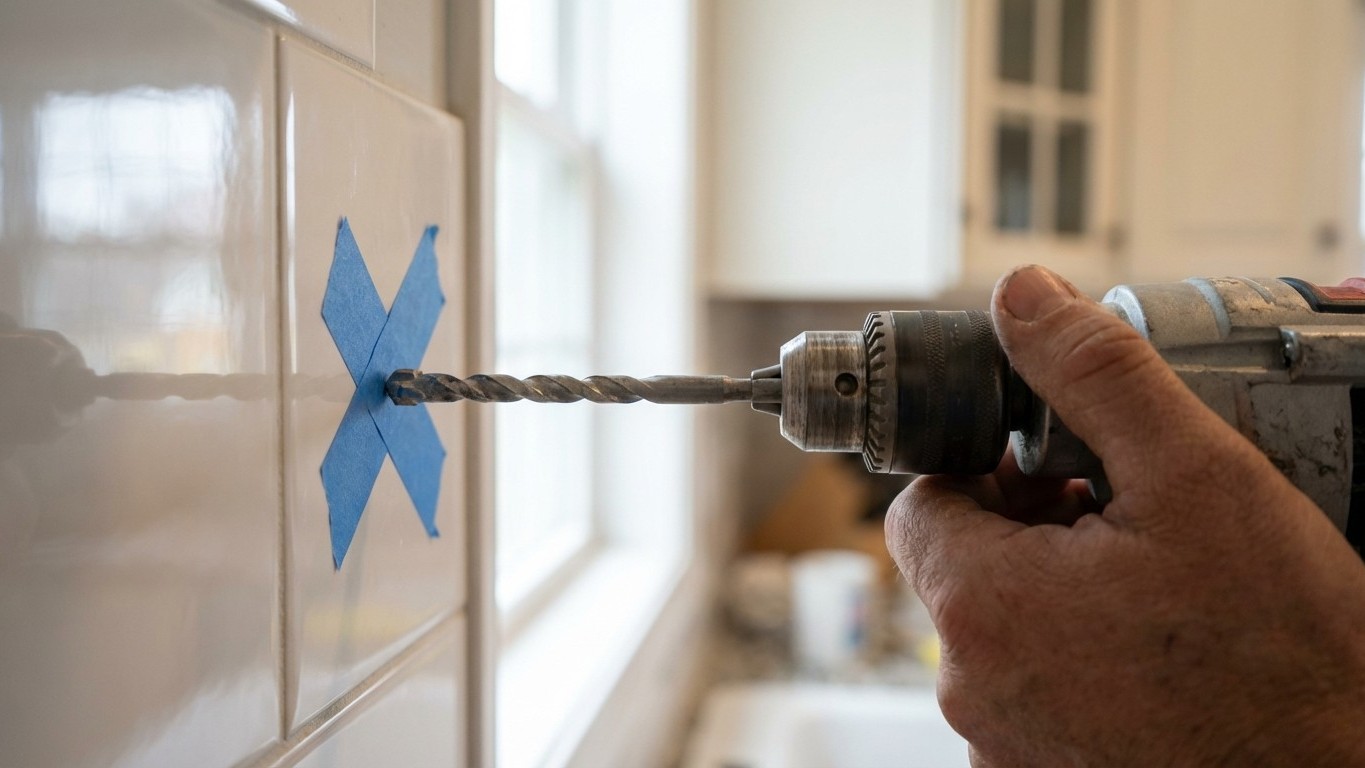
The solution is beautifully simple, and you probably have everything you need already. Before you even think about switching the drill on, you need to stop the bit from skating. The traditional method, still as reliable today as ever, is to stick a small piece of masking tape over the drilling point. Two crossed strips work even better. The tape gives the bit just enough texture to grip on first contact, keeping it exactly where you marked, and it costs almost nothing.
Once the tape is in place, mark your drilling point with a felt-tip pen right on the tape. Then, and this is the part most people rush, start the drill at the very lowest speed with zero hammer action. The hammer setting, that percussive function that punches through brick and concrete beautifully, is catastrophic on tiles. Switch it off completely. You are not breaking through rock; you are coaxing your way through a hard, brittle surface that needs rotation, not impact.
Apply gentle, steady pressure and let the drill bit do the work at low revs for the first few seconds. Once you have created a shallow depression, maybe two or three millimetres deep, the bit is seated and stable. At that point you can increase speed slightly, though never to the aggressive setting you would use on masonry. Keep the pressure firm but not forceful. Think of it less like drilling and more like carving.
A Word on Drill Bits
The masking tape trick solves the skating problem, but using the wrong drill bit will still cause trouble. For ceramic tiles, a carbide-tipped masonry bit works adequately for occasional jobs, though a purpose-made tile bit with a spear-shaped tungsten carbide tip is noticeably easier to control. For porcelain, a diamond-core drill bit is the proper tool. The diamond coating grinds through dense porcelain rather than trying to chip through it, and the difference in finish is considerable. Diamond bits cost more than standard ones, but a single ruined porcelain tile will cost you more still.
Keeping the Tile Cool as You Drill
Heat is the second great enemy of tiles during drilling, and it sneaks up on you. As the bit grinds through ceramic or porcelain, friction generates heat that can cause micro-cracking even when your technique is otherwise perfect. On long holes, particularly through thick porcelain, you want to keep things cool.
The simplest method is to pause every ten seconds or so and let the bit cool naturally. Pulling the bit in and out of the hole, “pecking” as some call it, also helps clear dust and reduce heat build-up. For larger holes, a small blob of plumber’s putty or even a ring of child’s modelling clay built up around the drilling point can hold a few drops of water, creating a tiny reservoir that cools the bit continuously. It sounds faintly ridiculous, but it genuinely works.
Never press harder when the drilling slows down. That instinct to push through resistance is understandable but wrong. Slow progress usually means the bit is blunt or overheating, and more pressure at that point almost guarantees a crack. Ease off, cool the bit, and if it is still struggling, accept that a fresh bit is cheaper than a new tile.
The Small Habits That Save Big Money
Good tile drilling really comes down to patience. The jobs that go wrong are almost always rushed, whether that is skipping the masking tape because it feels fussy, leaving the hammer action on because switching it off means an extra thirty seconds, or pushing through a slow patch rather than stopping to cool down. None of these shortcuts save meaningful time. They just shift the cost from effort to materials, and tiles are not cheap.
Worth keeping in mind as well: even after a clean drill-through, always use a wall plug sized correctly for the tile thickness and the wall material behind it. An oversized plug forced into a tight hole transfers exactly the kind of lateral stress that cracks tiles weeks after the drilling is done, long after you have moved the furniture back and forgotten about it. The hole survives the drill, then the fitting undoes all your careful work.
Once you drill one tile successfully with these techniques, that satisfying clean hole becomes the benchmark you hold everything else to. It makes you wonder how many cracked tiles across the country trace back to thirty seconds of impatience at the very start.