Sanding. That’s the step. I know, I know, you’ve heard it mentioned before, but I’d wager good money that most people don’t understand which sanding matters, when to do it, and why skipping it turns a weekend project into a months-long regret. A freshly painted room should feel like a reward. Instead, far too many people find themselves staring at a finish that shows every brush stroke, peels at the edges, or catches the light at the most unflattering angle imaginable. The culprit is almost always what didn’t happen before the first drop of paint was opened.
Key takeaways
- One overlooked step causes flashing, peeling, and visible brush strokes in freshly painted rooms
- Your walls look smooth to the eye but become brutally honest under fresh paint—revealing every micro-imperfection
- A simple sanding technique that takes hours prevents months of regret and repeat painting attempts
Why Your Walls Are Never as Smooth as They Look
The human eye is brilliantly deceptive in certain lighting conditions. Under the flat, forgiving glow of a living room lamp, a wall that’s had a few screws removed, a patch filled, or simply lived through a few years of family life can look perfectly smooth. Paint, however, is merciless. The moment you apply a fresh coat, especially in eggshell or satins finishes, which have a slight sheen — every tiny ridge, bubble from old paint, and edge from a repair patch becomes visible. It’s as if the paint is pointing a finger directly at your preparation shortcuts.
What’s happening is simple physics. Fresh paint fills the smallest depressions but also catches on any raised surface, drying slightly thicker in some spots and thinner in others. The result is an uneven sheen that shifts as you walk past the wall. Decorators sometimes call this “flashing,” and once you’ve seen it, you cannot unsee it. A light sand before painting, even on walls that look fine to the naked eye, levels these micro-variations before they become a permanent feature of your room.
The Right Way to Sand Before You Paint (It’s Simpler Than You Think)
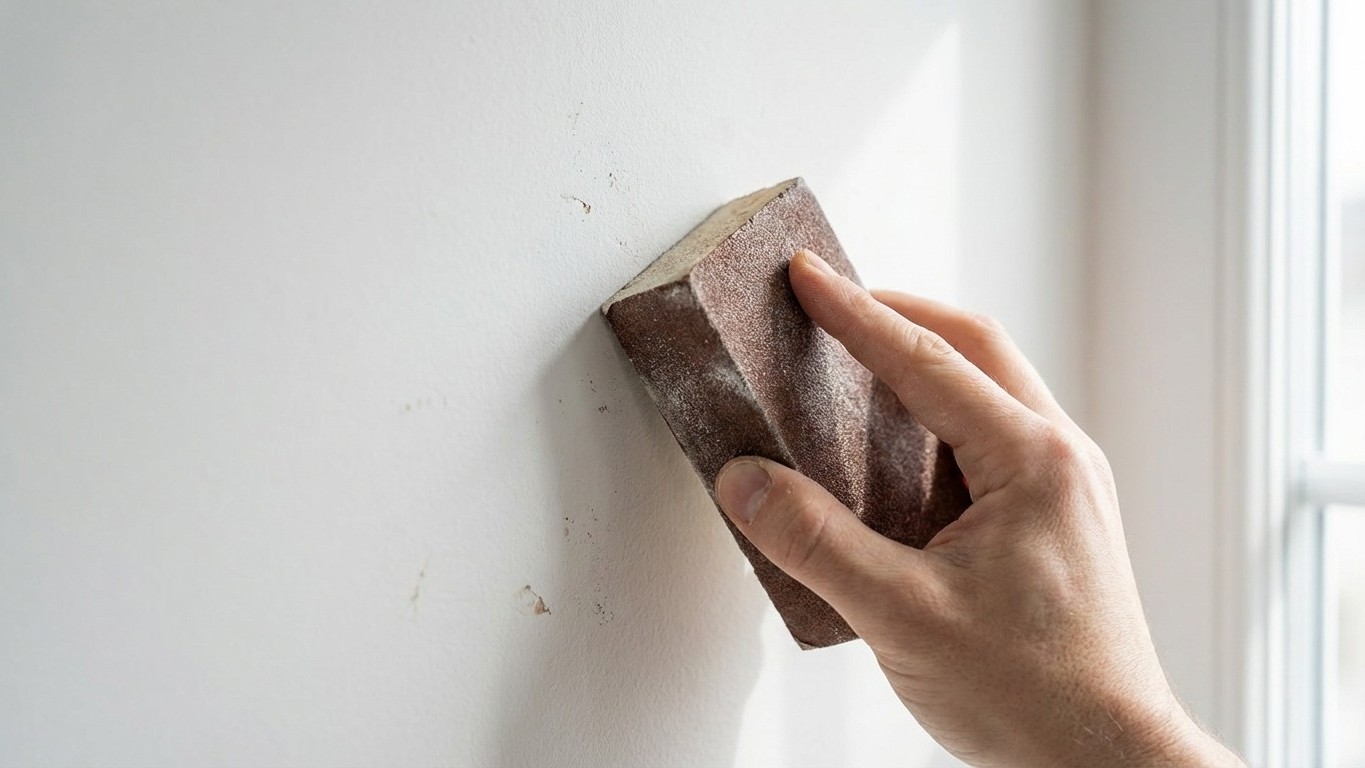
The good news is that this isn’t heavy-duty woodwork. You’re not stripping back to bare plaster. For most walls that have already been painted and are in reasonable condition, you want fine-grit sandpaper, somewhere around 120 to 150 grit works well for general preparation. A sanding block or a pole sander (the long-handled kind that reaches the ceiling without a stepladder) makes the job far less tiring and keeps the pressure even across the surface.
Work in small sections, using gentle circular motions or a cross-hatch pattern. You’re aiming to scuff the existing surface rather than remove it entirely. This “keying” of the surface gives the new paint something to grip onto, which is the other half of the equation that most people miss. Paint doesn’t just sit on top of a wall, it needs a slightly rough surface to bond properly. Glossy old paint in particular is almost slippery to new coats, which is why repainting a kitchen or bathroom often goes wrong. A quick sand solves this entirely.
Patches and filled areas deserve special attention. Any filler, whether fine surface filler or a heavier decorator’s filler for deeper holes — will dry slightly proud of the surrounding surface if you’re not careful. Once dry, these spots need sanding flush with fine-grit paper, then a wipe with a damp cloth, and ideally a thin skim of fresh filler if any low spots remain. Jumping straight from filling to painting produces a visible ghost of every repair you made, no matter how many coats go over the top.
The Step That Comes After Sanding (and Before Paint)
Here’s where a second common mistake hides. After sanding, the wall is covered in a fine dust, sometimes a surprising amount of it. Painting directly onto that dust is rather like trying to stick a plaster onto a sandy arm after a day at the beach. The paint simply doesn’t adhere properly, and you may find the finish feels slightly gritty or begins to flake in spots within months.
Wipe down every sanded surface with a barely damp cloth, microfibre cloths are excellent for this, and allow it to dry fully before proceeding. Some people use a dry “tack cloth,” sold in decorating sections of hardware shops, which is slightly sticky and lifts dust without adding moisture to the surface. Either method works. The point is that your wall should be clean, dry, and free of debris before a single brushstroke appears.
A mist coat or a proper primer also belongs in this conversation. Freshly skimmed plaster, or any area where the surface has been significantly repaired, is porous and will drink paint unevenly, leaving dull patches called “suction marks.” Thinning your first coat slightly with water (check your paint tin’s guidance, as modern water-based paints vary) or using a dedicated primer allows you to build up coverage evenly. This is the foundation that makes everything else work.
What a Difference It Actually Makes
I once watched a neighbour repaint her dining room three times over two years, convinced she was buying the wrong brand of paint. The colour never looked quite right. The finish always seemed slightly streaky. On the fourth attempt, she sanded properly, primed the worst patches, and used the same make of paint she’d been using all along. The room looked transformed. She rang me almost baffled, saying it felt like a different house.
That’s the thing about preparation: it’s invisible when done correctly. Nobody walks into a beautifully painted room and thinks “goodness, they must have sanded thoroughly.” They simply think the room looks wonderful. The work disappears into the result, which is Exactly as it should be. A few hours of patient preparation, an investment in decent sandpaper and perhaps a pole sander, and you create the conditions for paint to behave exactly as it’s meant to.
So before you reach for that tin next weekend, ask yourself honestly: have you really looked at the surface, in raking light, from different angles? Pull up a lamp close to the wall. You might be surprised what it reveals, and what a bit of fine-grit paper, quietly and methodically applied, can smooth away before you’ve opened a single pot of paint.