There’s one mistake that turns up again and again in poorly hung shelves, wobbly towel rails, and stripped screws that won’t budge, and most people have no idea they’re even making it. Using the wrong drill speed for the job. That’s it. No special technique required, no expensive gadgets to buy. Just understanding those little numbers and symbols on your drill’s collar, and you can transform your results almost overnight.
Key takeaways
- There’s one drill setting most people never change—and it’s destroying their screws, cracking tiles, and splitting wood
- The mysterious numbers on your drill collar aren’t decoration; they control something that decides success or failure
- A neighbour blamed his ‘cheap drill’ until one small adjustment fixed everything—here’s what he learned
The Speed Setting You’ve Been Ignoring
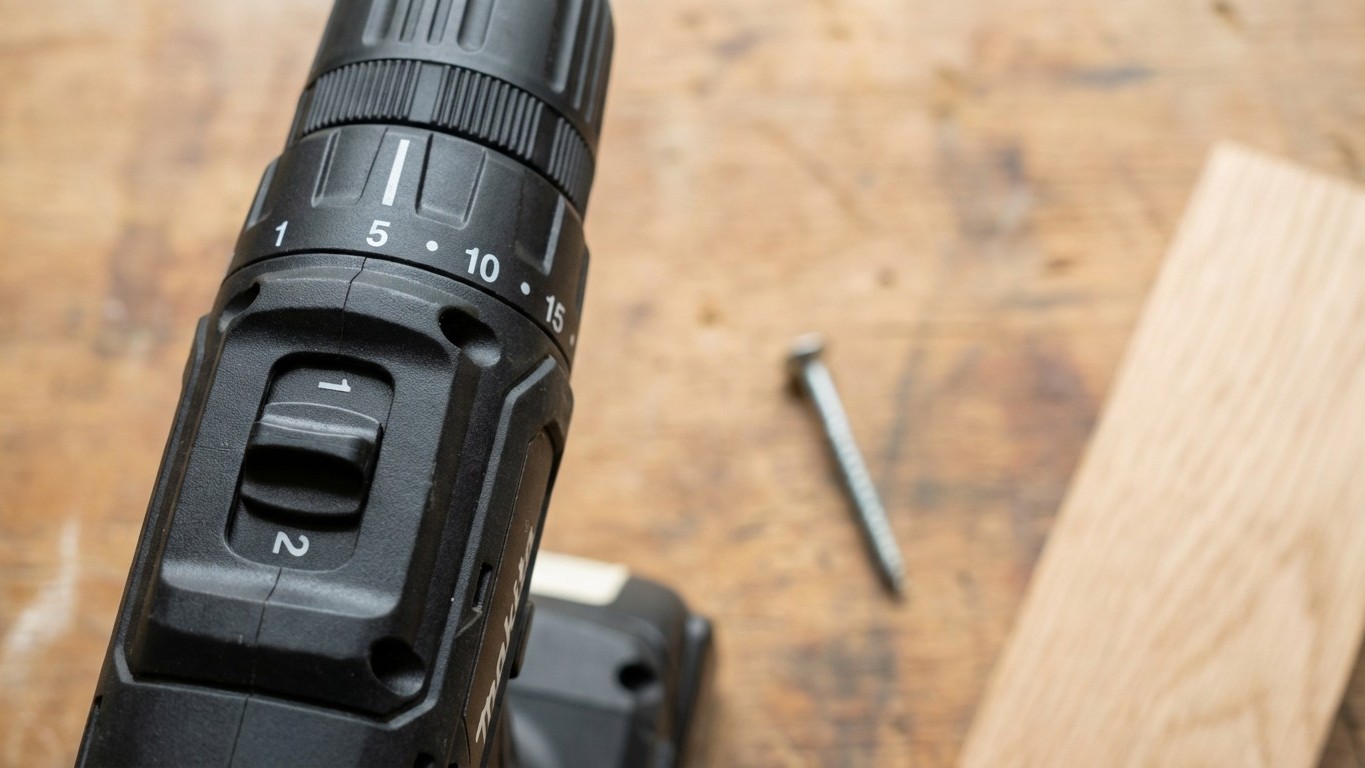
Most cordless drills sold in the UK have a gear selector on top, usually a small switch marked “1” and “2”, sometimes “1”, “2” and “3”. A surprising number of people leave this on the highest setting permanently, treating it like a car stuck in fifth gear from the moment they pull out of the driveway. The results speak for themselves: screws driven so fast they snap, pilot holes that skitter across tiles, and wood that splits right along the grain.
The low gear (marked “1”) gives you more torque and less speed. This is what you want for driving screws, especially into dense materials like hardwood or thick plasterboard. The high gear (marked “2”) spins faster with less torque, which is exactly right for drilling clean holes through softwood, thin MDF, or sheet metal. Mixing them up is the root cause of more ruined projects than almost anything else. My neighbour once blamed his drill for “being cheap” when three successive screws snapped off in his decking. A quick gear change later, and he was through the job without a single problem.
The clutch ring, that collar with numbers around it (typically 1 through 18 or 1 through 25, depending on the drill), adds another layer of control that most beginners treat as decoration. Each number represents a torque limit. When the drill reaches that resistance level, the clutch disengages and you’ll hear that satisfying ratcheting click. Set it low for delicate work like assembling flat-pack furniture, and you simply cannot over-drive a screw. Set it to the drill symbol (bypassing the clutch entirely) only when boring holes, never when driving fixings. Ignoring this one collar has stripped more screw heads in British kitchens than any other single error.
Matching Your Speed to Your Material
Masonry is where the confusion really deepens. When you’re drilling into brick or concrete, you need hammer mode (the little hammer symbol or “SDS” label) engaged, and you need steady, moderate pressure rather than brute force. The hammering action does the work, not your bodyweight. Leaning heavily into the drill doesn’t speed things up, it overheats the bit and wears it out in a fraction of its normal lifespan. Worse, pressed unevenly against a wall, the drill can wander, leaving you with an angled hole that no rawlplug will ever grip properly.
Tiles deserve their own special caution. Ceramic and porcelain should be approached at the drill’s lowest speed with no hammer mode whatsoever, using a proper tile or diamond-tipped bit. Fast speeds generate heat, and heat cracks tiles. Start with a small piece of masking tape over the drill point to stop the bit wandering on the glazed surface, a trick so simple it feels almost too obvious, yet half the tiles cracked in UK bathrooms every year could probably be saved by it.
Metals sit somewhere between wood and masonry in terms of approach. Use a slow to medium speed with cutting fluid or even a drop of ordinary washing-up liquid to reduce heat and friction. High speeds on metal don’t drill faster; they simply blunt your bits faster and leave rough, ragged holes.
Pilot Holes: The Step Most People Skip
There is something deeply optimistic about a DIYer who believes a fat screw will drive cleanly into timber without a pilot hole. Optimistic, and usually wrong. Driving without a pilot hole pushes the wood fibres sideways under enormous pressure, creating internal stress that can split a board instantly, or, more insidiously, leave a crack that only opens up weeks later when the shelf is Finally loaded.
The right pilot hole is slightly narrower than the screw’s core (the solid shaft, ignoring the thread). For a standard 4mm wood screw, a 2.5mm pilot hole is a solid starting point. In softwood you have a little more latitude; in oak or ash you want to be precise. The drill speed here should be moderate, with the clutch set mid-range so you can feel any resistance building. Two minutes spent drilling a pilot hole saves the kind of frustration that ends a Saturday afternoon project in colourful language.
Countersinking is the often-forgotten companion step. A countersink bit, inexpensive and widely available in any hardware shop, allows the screw head to sit flush or just below the wood surface. Skipping this step leaves proud screw heads that catch on things, look untidy, and suggest the whole job was done in a hurry. In furniture making or any painted finish, it’s the difference between a professional result and one that needs explaining.
A Small Investment in Technique, Not Equipment
There’s a tendency in DIY circles to assume that better results require better (and pricier) tools. A new drill won’t fix bad habits, but understanding the one you already own absolutely will. Take ten Minutes to read through your drill’s manual, yes, the slim booklet that went straight into a drawer, and test each gear setting on a scrap piece of wood before your next real project. Feel the difference between gear 1 and gear 2. Experiment with the clutch settings. It costs nothing and changes everything about how the drill behaves in your hands.
The best DIYers aren’t necessarily the ones with the most tools; they’re the ones who’ve made enough mistakes to understand why a job went wrong. And perhaps that’s the most useful perspective of all: every stripped screw and cracked tile is just information, pointing quietly towards better technique next time.
Sources : quora.com | mscdirect.com