For years, pulling weeds from between paving stones felt like a seasonal ritual, tedious, never-ending, and frankly futile. You’d crouch down with a hand fork on a Saturday morning, yank out dandelions and grass tufts, and by the following spring they’d be back, cheerful as ever. The mason who laid a neighbour’s new patio said something that stopped me in my tracks: “The weeds aren’t your problem. Your joints are.” He was right. The one step most DIY layers skip, proper jointing, is the single reason those plants keep returning.
Key takeaways
- Most people skip the one step that actually stops weeds—and it’s not what you think
- Loose sand between pavers is basically a five-star resort for weed seeds
- The mason’s solution costs less than a year of weeding and works for a decade
Why weeds treat your paving like a free allotment
Weeds don’t grow from the bottom up; they grow when the sand washes out, allowing seedlings to fall from the top and into the spaces between your joints. Think about that for a moment. Every time it rains, every time you drag the garden hose across the path, a little more of whatever is sitting between those slabs disappears. What’s left is a loose, crumbly channel, warm in summer, slightly moist, full of airborne dust and organic matter. For a weed seed, that’s paradise.
A paved area is a long-term investment, and nothing undermines that investment faster than weeds pushing up through the joints. Beyond the appearance, weeds that establish themselves between pavers accelerate joint erosion and can eventually compromise the stability of the surface itself. So this isn’t merely a cosmetic bother. Left long enough, those roots quietly heave slabs, create trip hazards, and cost real money to put right.
When joints are filled with loose sand, wind, rain, and regular use can gradually remove that sand from the gaps between the pavers. Once this happens, the pavers begin to lose lateral support, and individual units may start shifting, creating uneven surfaces or gaps that compromise both the appearance and the structural integrity of the installation. The mason wasn’t being dramatic. He was describing basic physics.
The step everyone skips: proper jointing from the start
Traditional builders used a sharp sand and cement mix brushed into the joints dry and then lightly dampened. It works, but it can crack in frost, and once it cracks, weeds find those hairline gaps within a season. The modern alternative, and the one professional landscapers now reach for almost automatically — is polymeric jointing compound.
Polymeric sand is a mixture of coarse-grained sand, polymers, and binding agents which is swept into the joints dry and activated with water after the joints are filled. Once it cures, the result is something quite different from ordinary sand. Once activated, the sand begins to harden and form a semi-rigid joint structure, a joint that remains flexible enough to accommodate small movements in the paver system while still providing strong resistance against erosion and displacement. That flexibility matters enormously in a British climate, where ground heaves gently through winter and settles back in spring.
Because polymeric sand hardens after activation, it forms a dense joint structure that makes it much harder for seeds to penetrate and establish roots. Although no jointing system can Completely-bracket-free/”>Completely eliminate weeds, polymeric sand significantly reduces the conditions that allow them to grow. And for existing patios already suffering from weed invasion, the good news is that you can retrofit this solution entirely yourself.
How to do it properly, whether your paving is new or old
The preparation stage is where most people go wrong, and it’s more important than the product itself. Make sure all of the paving stones are clean and free of debris. Kill and remove any weeds that may be present, and sweep up or blow away any excess sand that may already be in place. A thorough sweep and washing is recommended to ensure a clean surface for jointing.
For an existing patio, this means getting down to basics. Use a pressure washer to remove the existing materials from the joints, this will remove all rooting zones and existing jointing sand. Be sure not to disturb the bedding layer that the paving stones are resting on. Once the joints are clean and, this part matters, completely dry, you’re ready to fill them.
You must ensure that the pavers and joints are completely dry before installing polymeric sand. If there is any moisture present, it will cause the polymers to prematurely activate, leaving a haze on the surface or the sand won’t set up properly. In our damp climate, that usually means waiting for a dry spell of at least two or three fine days, a small exercise in patience that pays off handsomely.
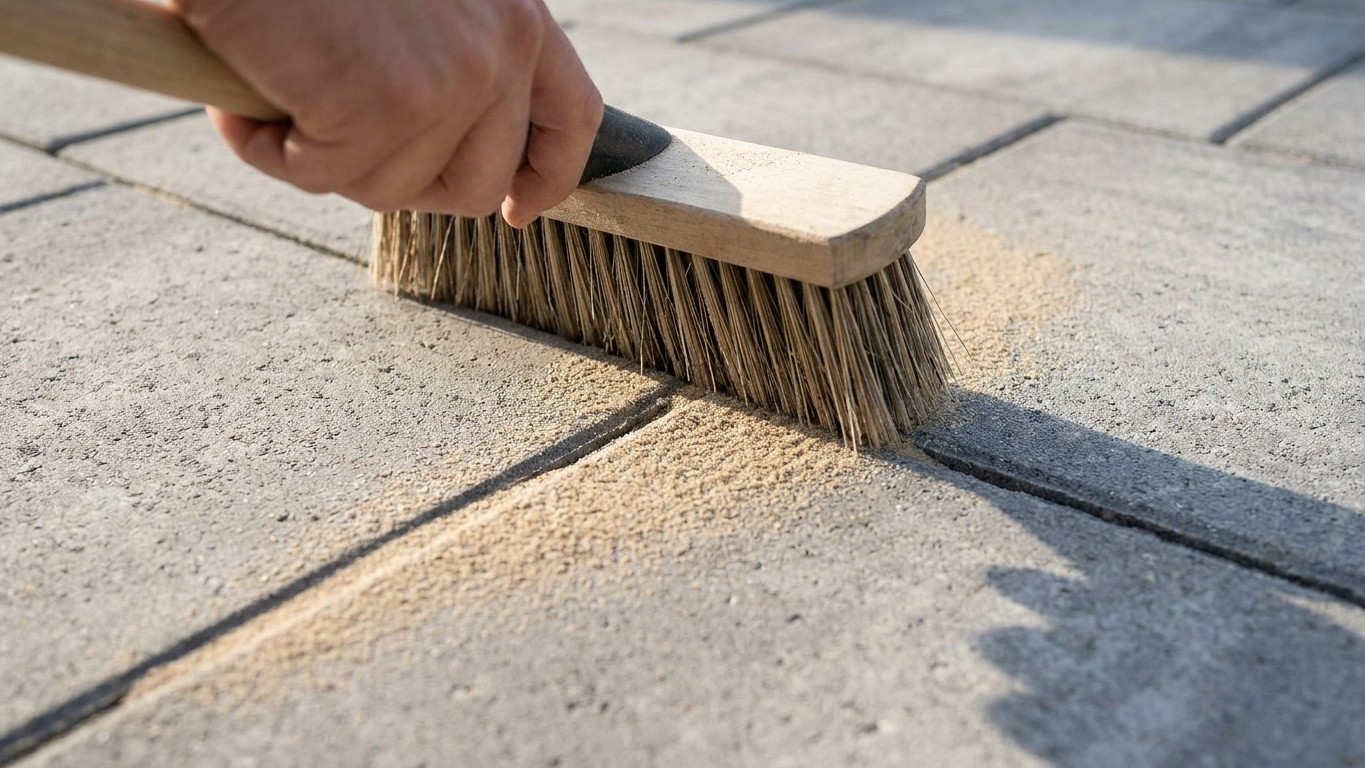
Once dry, evenly distribute the sand all over the surface of the paving stones, then use a clean push broom to disperse the sand evenly, ensuring all the joints are filled. Pay special attention to tight spaces and double-check when finished to make sure all joints are filled. Then, and this is the step the mason demonstrated to my neighbour, the one that genuinely changes Everything — keep joint sand approximately 1/8 inch below the paver surface. Remove any excess sand from the surface of the pavers and from within the joints by thoroughly sweeping the area and using a leaf blower to blow the area clean.
That last blow-down with a leaf blower is the detail most amateurs skip. If polymeric sand is activated and then allowed to dry on top of, rather than between, pavers, this problem can be made even worse and harder to fix if you then apply sealer on top of the sand-crusted pavers, enhancing the rough texture and haze. Five minutes with the blower saves an afternoon of scrubbing.
Now for the activation. Use a fine mist instead of a heavy stream of water when activating the polymeric sand. It’s better to lightly spray the area until the sand is damp rather than soaking it. Misting multiple times, each after the previous water application has absorbed into the joints, can help activate the polymeric sand through the entire paver joint. After that, let the polymeric sand cure for at least 24 hours without disturbing the surface.
Keeping your paving weed-free long term
Polymeric jointing does the heavy lifting, but a little ongoing care keeps the results looking their best. Regular cleaning is essential to stop weeds from taking hold. Sweep your paving weekly to remove leaves, soil, and debris that can trap moisture and create a seedbed. It takes two minutes on a Sunday morning, far less than an hour’s weeding ever did.
Once the jointing compound has fully cured, sealing the surface adds another layer of protection. Paver sealer does more than enhance the appearance of the surface, it reduces the porosity of both the brick faces and the joint material, making it significantly harder for weed seeds to find purchase and germinate. A penetrating sealer fills the microscopic voids in the paver surface and joint sand, reducing moisture absorption and creating conditions that are less hospitable to weed and moss establishment. Reapplication every couple of years is all it takes to maintain that protection.
One thing worth knowing: when appropriately applied, polymeric sand can last up to 10 years, though a typical span is three to five years, depending on the environment. British winters, with their repeated freeze-thaw cycles, sit at the harder end of that range. Inspect the joints each spring, and top up any that look thin before the growing season begins. Catch it early, and you’ll never need to crouch over a hand fork again.
Sources : jointit.com | outbacklandscapeinc.com