Every time I’ve redecorated a room, I went through the same little ritual. Screwdriver in hand, I’d crouch beside each socket and switch plate, wrestling out those two tiny screws, carefully setting the plastic cover aside, painting round the edges, then screwing everything back on. Job done. Proper job. Or so I thought. Turns out there’s a far quicker way to get a cleaner result, and most experienced decorators have been using it for years.
Key takeaways
- Most DIYers have been overcomplicating socket preparation for decades
- One small adjustment changes everything about how quickly you can paint around fixtures
- There’s a right way and wrong way to handle the paint finish on covers themselves
The habit we all learned, and why we stuck with it
Fully removing socket covers before painting does make logical sense, to be fair. You get access to the wall behind the plate, there’s nothing to mask over, and you avoid that tell-tale ridge of paint build-up around the edge of a fitting. Switch plates that were painted while still on the wall will never have a clean, crisp edge again, so the instinct to remove them isn’t wrong, exactly. It’s just unnecessarily fiddly when you compare it to what decorators Actually do.
The trouble is that fully unscrewing a cover plate carries its own small risks. Sometimes screws have been cross-threaded in the back box, which can turn a simple job into quite a headache. And if the room has been painted several times before, pulling the plate away can lift old paint from the wall surface along with it, leaving you with more repair work than you started with. There’s also the matter of safety: it’s best to switch off the electrics before you attempt to unscrew any plates, and some would say you ought to get an electrician to isolate the sockets properly. All that, just to paint a couple of millimetres behind a bit of plastic?
The simpler trick that actually works
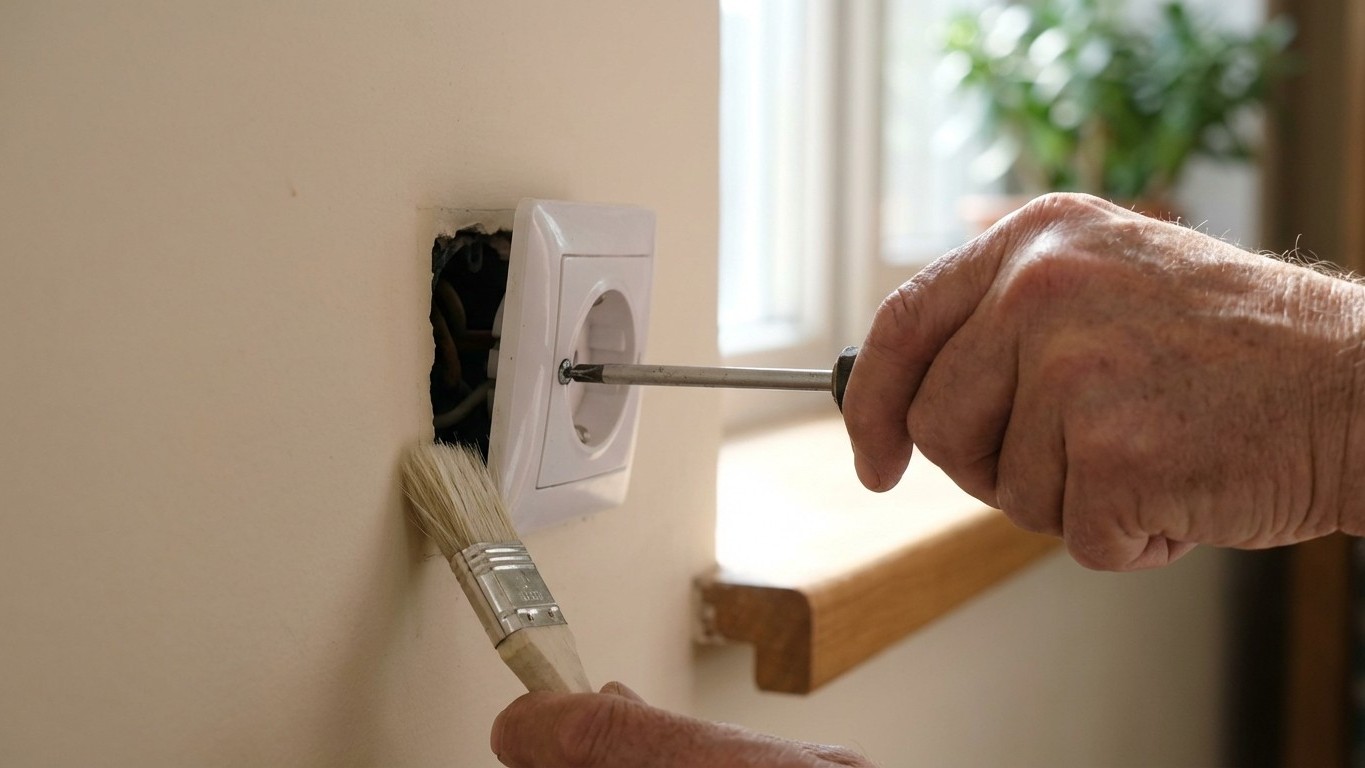
Here it is, and it’s almost embarrassingly obvious once you hear it: simply loosen the screws rather than removing them. Loosening the two screws just enough to ease the cover plate away from the wall gives you plenty of room to paint behind it cleanly, no need to detach the plate entirely. The plate stays attached, the wiring stays undisturbed, and you can slip your brush right in behind the fitting for a neat finish. Gently pulling the outlet or switch plate forward, without detaching any wires, allows you to paint behind it slightly for a cleaner result.
Think of it like loosening a picture frame slightly away from the wall to dust behind it, rather than taking it down entirely. A two-second adjustment, not a two-minute operation.
Of course, even this small manoeuvre deserves a moment of common sense. Before you start, make sure the power is off at the mains to avoid any accidents. This is non-negotiable, whatever method you choose. Once the power is off, loosen those screws by one or two turns, gently tilt the plate forward, and paint behind with a small angled brush. A small, high-quality angled brush gives you the most precise application when painting around light switches and other hard-to-reach fittings. Press the plate back against the wall, re-tighten the screws once the paint is completely dry, and you’re done.
What to do when the whole socket needs painting
Some rooms call for a bolder approach. If you’re committing to a deeply saturated, colour-drenched look where the walls, woodwork, and every surface share the same shade, those bright white switch plates will glare out at you like a lighthouse. After painting everywhere a dark colour, the bright white sockets and light switches really stand out, and not in a good way.
In that case, painting the cover plates themselves (off the wall, properly) is a perfectly reasonable route. The key is preparation. Unprimed plastic finishes will not allow paint to adhere well, and often result in the paint beading and separating on the surface, particularly on shiny finishes. A light Sanding and a coat of suitable primer before your top coat will make all the difference to how long the finish lasts. Lots of thin coats are far better than one thick one, three coats, with a light sand between each one, gives the most durable result.
One thing to bear in mind: unless you have an incredibly steady hand, keeping paint away from the mechanical switch itself can be tricky, one wrong move, and paint seeping into the narrow gap between the plate and the switch can dry and seize the mechanism, making it unusable. Remove the plate from the wall, lay it flat on a piece of newspaper, and paint it there. Never paint a socket cover while it’s still fitted and live. Painting any electrical outlet while it’s still fitted to the wall is extremely dangerous — wet paint can access the plug holes or seep through to the wiring behind, Causing electrical faults or even electric shock.
When replacing is better than painting
Honestly? If a socket has been painted over so many times it looks like it’s wearing a thick jumper, repainting it yet again may not be worth the effort. Previously painted cover plates can be reused as long as they were prepared properly the first time, but switch plates that have been painted too many times tend to have a thick, lumpy appearance, and at that point it’s better to simply buy new ones. A pack of plain white switch plates and socket covers costs very little at any DIY or electrical merchant, and fitting a brand new face plate takes about thirty seconds.
There’s also a more design-forward option for those who want their sockets to disappear into the wall entirely. The beauty of paintable socket and switch plates lies in their versatility, unlike conventional fittings that limit your design choices, these pre-primed covers allow for true personalisation, whether you’re undertaking a full renovation or simply refreshing a single room. Several British electrical suppliers now offer these, and they make the colour-drenching look genuinely achievable without any compromise on safety.
So the next time you pick up a screwdriver before reaching for your paint tin, pause for just a moment. A half-turn loose is often all it takes. All those years of fully unscrewing, carefully storing tiny screws in a saucer (and inevitably losing at least one), and working around protruding back boxes, completely unnecessary. The question I keep asking myself is: who taught us to do it the long way round, and why did none of us ever think to question it sooner?