
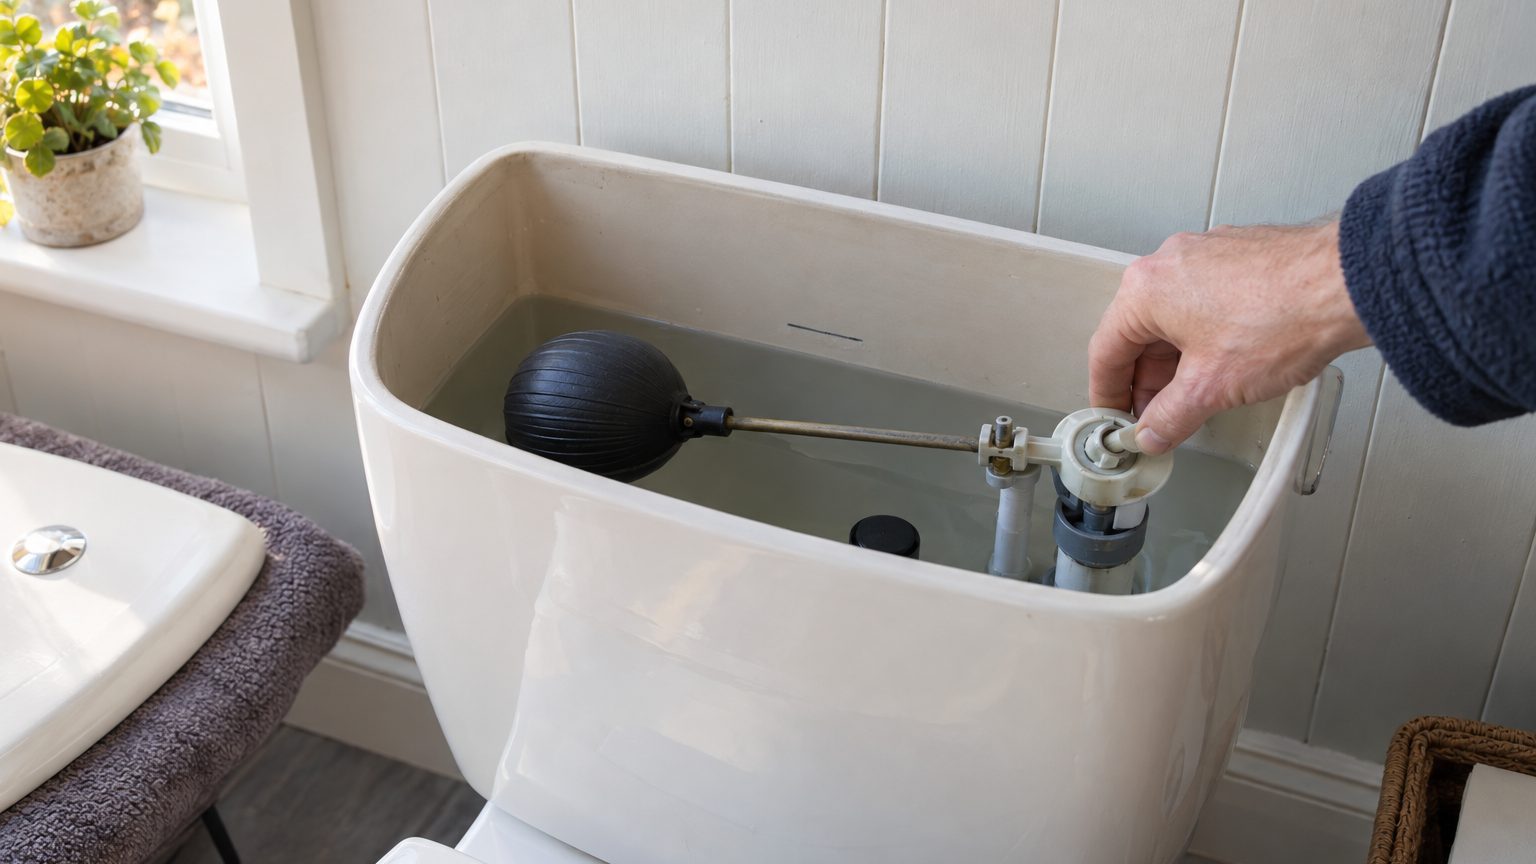
A dripping overflow pipe on an outside wall means your cistern is taking in more water than it can hold. The pipe is a warning pipe, placed there so a failing fill valve shows itself before water reaches your bathroom floor. The most common causes are a faulty fill valve or incorrect float height, and most of the repairs need little more than a screwdriver and a spare hour.
First, make sure it really is the toilet.
- A float set too high is the easiest fix: lower it by 5mm and the dripping often stops.
- A worn fill valve or limescale buildup can be cleaned with vinegar or replaced entirely for modest cost.
- A waterlogged float or high mains pressure are rarer causes, but both have straightforward solutions.
Check the Source Before You Reach for the Tools
Several pipes can drip outside a house. The usual sources are a toilet cistern with a faulty float valve, a loft water tank with the level set too high, or a boiler pressure relief valve. The pattern of dripping helps you tell them apart: hot water flowing out points to a boiler or hot water problem, and brief drips after heating cycles can mean thermal expansion or a lifting pressure relief valve. A steady drip that carries on overnight is the toilet’s signature. Boiler faults are not for amateurs, so ring a Gas Safe engineer if that is where the water is coming from.
Next, lift the cistern lid, taking care because ceramic lids are heavier and more brittle than they look. If the water sits above the overflow level, the fill valve is at fault. If it sits at the correct level but ripples as it trickles into the pan, the flush valve seal has gone. That second fault sends water into the bowl rather than out through the wall, so it will not be your dripping pipe.
Then try the lifting test. Gently raise the float by hand, and if the water stops, the float or its washer is the fault.
It is worth acting quickly, as an overflowing cistern in a UK home can waste hundreds of litres a day, sometimes over 400. If you are on a water meter, you will see that on the bill.
Cause One: A Float Set Too High
This is the easy one, and I always hope for it. If the float arm or cup sits too high, the valve keeps letting water in until it spills over. The water should sit about 10 to 15mm below the overflow.
Turn off the supply at the isolating valve, which is usually a small slotted valve on the pipe beneath the cistern. If you have no isolating valve, you will need to turn off the water at the stopcock instead. Then find the adjuster. Adjust the float using the screw or clip, lowering it by a few millimetres at a time. Turn the water back on, flush, and watch the refill. Mark the right water level with a pencil on the inside of the cistern if you want something to aim for.
A tweak of 5mm can be all it takes. Give it one flush and a proper look before you conclude it has worked.
Cause Two: A Tired or Clogged Fill Valve
Adjusting the float has no effect if the valve itself can no longer seal. The usual culprits are a perished diaphragm washer, or grit or limescale on the seat. A slow creep upwards is the clue here: if the water level rises very slowly and eventually reaches the overflow, limescale or a worn internal seal is often to blame. Hard water areas, which cover much of the south and east of England, see this more often.
Turn off the isolating valve, flush to empty the cistern, then open the valve according to its design (many have a cap that twists or unclips). Rinse out any grit. Wipe the seat with a soft cloth, and for stubborn limescale, soak the parts in a half-and-half mix of white vinegar and water for about half an hour. Cheap, old-fashioned, and it works. If the rubber washer or diaphragm looks flattened or cracked, replace it.
Sometimes the better course is to replace the whole valve. One plumber on a DIY help site says that with a standard valve he personally changes the whole thing, and I see the sense in it. A new valve is a modest outlay at any DIY shop, and a fresh one saves you taking the cistern apart again in a year. Take the old one along to match the connection and thread size, because inlets vary between bottom-entry and side-entry types.
Debris matters too. Dirt in the valve from older pipework or recent plumbing work can hold the seal open, so if the dripping began just after someone worked on your pipes, flush the valve through before replacing anything.
Cause Three: A Split Float or Pressure Trouble
Floats can fail without anyone noticing. If a float has split and filled with water, it will not rise and so cannot close the valve fully. Unscrew an old ball float from its arm and give it a shake. A sloshing noise means it has taken on water and needs replacing, which is a cheap job.
The last cause is the mains itself. A noisy refill with overflow can mean high pressure is affecting the valve. Normal pressure is typically 1.5 to 3 bar, and a gauge on an outside tap will tell you where you stand. If the reading is above that range, a pressure reducing valve is the fix, and that one is a plumber’s job rather than a Saturday project. Some valves are also made to cope with higher pressure, so mention this to the shop if you suspect it.
Sometimes DIY is not the answer. If the tank is cracked, or the overflow runs constantly whatever the float position, call a plumber.
After any repair, go outside the next morning and look at the pipe. A steady overnight drip usually points to a valve that is failing to reseat properly, so a dry wall after a night is the proof the job is done. A cheap trick: tuck a strip of kitchen roll under the pipe’s mouth before bed, and it will tell you in the morning if even a few drops are escaping.
Sources : fixmyplumbing.org | bookabuilderuk.com