Three attempts. Three tubes of sealant. Three rounds of that deeply satisfying (and then deeply disappointing) peeling-off of failed silicone. If you’ve ever resealed a bath and watched it go mouldy, lift at the corners, or simply refuse to stick properly within a fortnight, you’ll know exactly the particular frustration I’m describing. The good news is that there’s almost certainly one single Mistake at the root of it, and once a plumber pointed it out to me, I felt equal parts relieved and slightly foolish.
Key takeaways
- A plumber stopped the author mid-prep and identified the one error destroying every attempt
- The solution sounds almost absurdly simple, yet changes everything about the final result
- There’s a hidden difference between ‘clean-looking’ and ‘actually ready for sealant’ that most DIYers miss entirely
The mistake that ruins everything before you even open the tube
The plumber watched me prep the surface for about thirty seconds before he Stopped me. “You’re not waiting long enough after cleaning,” he said. That was it. That was the whole secret.
Most of us know to clean the old sealant off thoroughly, and we do. We scrape, we use remover gel, we wipe with white spirit or methylated spirits. But then, keen to get the job done, we crack open the new tube almost immediately. The problem is that silicone sealant will not adhere properly to a surface that is even slightly damp or has any chemical residue left on it. We’re talking about needing the surface to be genuinely, properly, bone-dry, and that takes longer than you think, especially in a bathroom that’s naturally humid.
The plumber’s rule of thumb was a minimum of 24 hours after your final clean before you apply new sealant. Not one hour. Not the time it takes to have a cup of tea. A full day. In a bathroom with poor ventilation, he suggested leaving a window open overnight or running a dehumidifier if you have one. Silicone bonds to surfaces, not to residual moisture, and once it cures over a damp joint, you’ve essentially sealed in the conditions for mould and adhesion failure from day one.
Getting the surface actually ready (not just clean-looking)
There’s a difference between a surface that looks clean and a surface that’s ready for sealant, and the gap between them is where most DIY resealing jobs fall apart.
Once the old silicone is removed, which usually takes a combination of a Stanley knife, a plastic scraper, and some patience, you need to clean the channel with a specialist silicone remover or, at a push, white spirit on a cloth. The goal is to remove any oily residue, soap scum, and the invisible film that old silicone leaves behind. Wipe it twice. Then leave it. Don’t touch it again with your fingers, because the natural oils in your skin are enough to compromise adhesion in a small area.
Once the 24-hour drying window has passed, run your finger along the joint without pressing into it. It should feel completely dry and slightly rough or matte, not smooth or waxy. If it still feels at all cool and damp to the touch, give it more time. Patience here saves you from doing the whole job a fourth time.
One extra step that’s worth doing, though often skipped: wipe the surface one final time with a clean cloth dampened very lightly with surgical spirit (isopropyl alcohol), and let that evaporate fully before you start. This removes the last traces of any oily residue and leaves the surface chemically ready to bond. It makes a real difference.
The actual application, which is simpler than most people make it
With a truly dry and prepared surface, the application itself becomes much more forgiving. Fill the bath with water before you start, this is a tip that surprises people, but it matters. When a bath is empty, it sits at its highest point; fill it with water and it sinks slightly under the weight. If you apply sealant to an empty bath and then fill it, the joint flexes and the sealant can pull away from one edge. Fill first, seal second.
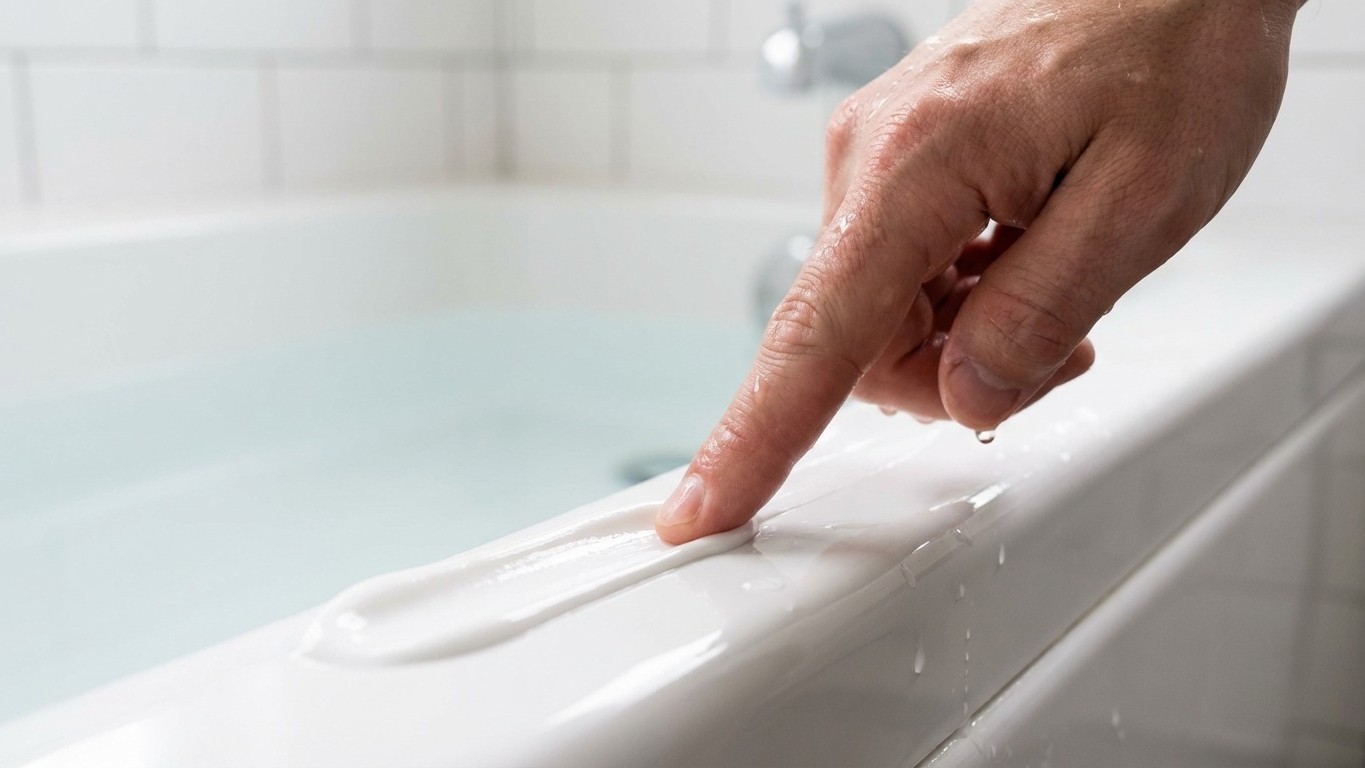
Cut the nozzle of the cartridge at a 45-degree angle, aiming for an opening of around 5 to 6 millimetres. Smaller than you think. Apply in a single smooth, continuous bead without stopping if you can manage it, holding the gun at a consistent angle. Don’t try to be too neat at this stage, the smoothing comes next.
Dip your finger in a small bowl of water with a tiny drop of washing-up liquid in it, and run it along the bead in one firm, smooth stroke. The soapy water stops the silicone sticking to your finger and lets you create a clean concave profile. Wipe your finger, do any corrections, and then leave it completely undisturbed. The packaging will tell you how long to wait before using the bath, and that figure is there for a reason. Silicone that’s disturbed before it has fully cured often looks fine on the surface but fails far sooner.
Why it keeps going mouldy (and what actually helps)
Even perfectly applied sealant can go black over time in a bathroom that’s always steamy and never quite dries out. The mould isn’t usually growing on the silicone itself but on the soap residue, body oils, and limescale that accumulate on top of it. A weekly wipe with a diluted white vinegar solution (roughly one part vinegar to four parts water) keeps that build-up at bay without damaging the sealant.
Choosing a sealant with a built-in fungicide helps, and most bathroom-specific products sold in UK hardware shops now include this. It won’t make your sealant immortal, but a well-applied bead in a well-ventilated bathroom, kept reasonably clean, should realistically last five to seven years before you need to think about redoing it.
The strange thing is that I spent more time, more money, and more energy doing it wrong three times than the plumber’s simple advice would have cost me at the start. Sometimes the most useful household knowledge isn’t technical at all, it’s just knowing which step to slow down on.