For years, I filled every hole in my walls the same way: grabbed whatever tub was open, pushed it in, and hoped for the best. The results were predictably patchy, cracks that reappeared within months, nail holes that swelled into ugly bumps, and one particularly embarrassing repair around a door frame that looked worse than the original damage. The truth is that different hole sizes genuinely call for different materials and methods, and once I Understood why, my walls finally started looking as they should.
Key takeaways
- Why shrinkage happens with standard fillers and how it ruins deep repairs
- The three hole-size categories that need completely different approaches
- Professional tricks that actually prevent repairs from cracking and re-opening
Why one filler doesn’t suit all
Most of us reach for a standard ready-mixed filler from the DIY shop and assume it covers everything. For tiny hairline cracks and pin holes, it does a reasonable job. The problem starts when you try to use the same product to fill a screw hole the width of your thumb, or patch a chunk of plaster that’s crumbled away. Ready-mixed fillers contain a lot of water. As they dry, that water evaporates, and the filler shrinks, sometimes quite dramatically. In a shallow hole, this barely matters. Pack the same material into a deep cavity and you’ll come back a day later to find a sunken dimple where your proud flush repair used to be.
There’s also the question of what’s actually happened to the wall. A small nail hole is just a surface wound; the surrounding plaster is solid and undamaged. A large area of loose or blown plaster is a structural problem requiring a material that bonds firmly and doesn’t flex as it cures. Using the wrong filler in the wrong situation wastes your time and your money, which is rather the worst combination.
Matching material to hole size
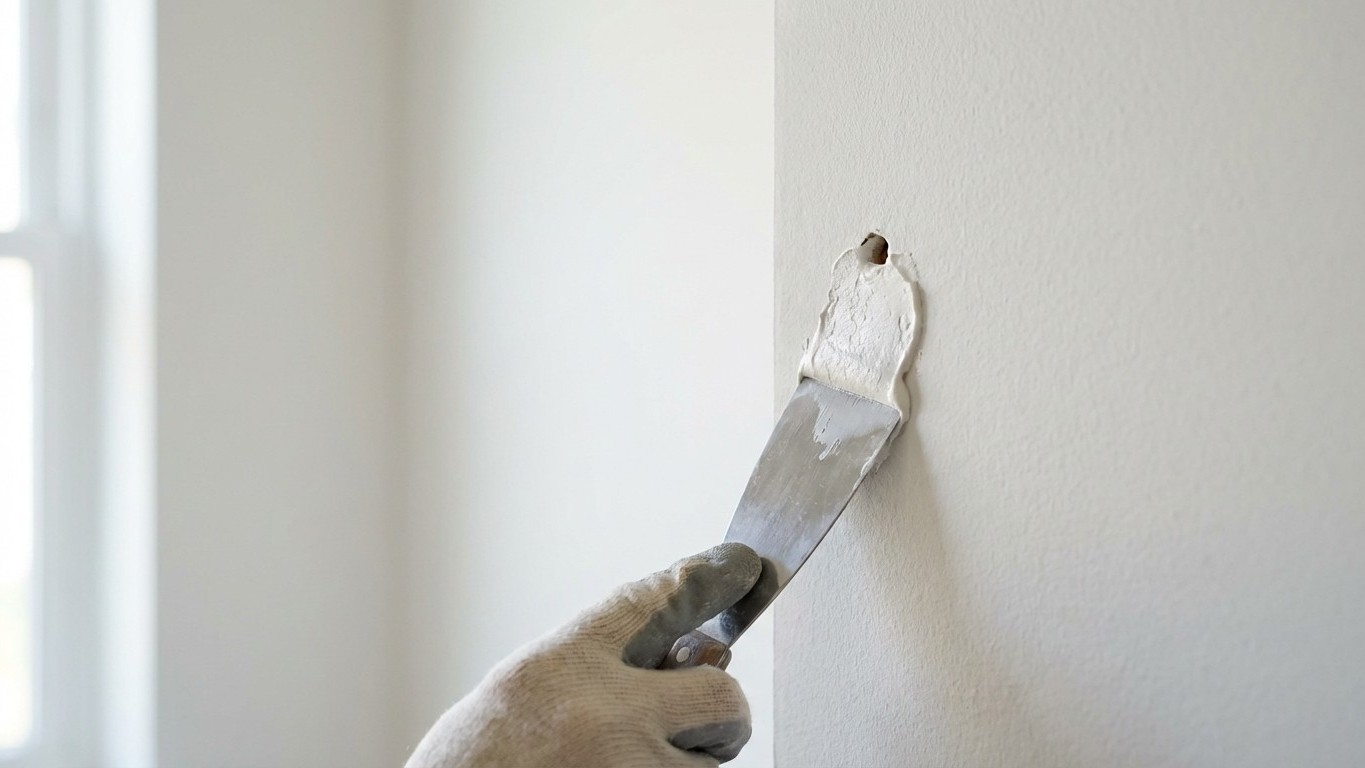
Think of wall repairs in three broad categories: small, medium, and large. Small means anything up to roughly five millimetres across, pin holes, hairline cracks, the kind of damage left by picture hooks. Here, a fine-surface ready-mixed filler works beautifully and dries quickly. Apply it with your fingertip or a small flexible knife, leave it slightly proud, and sand lightly once dry. No drama, no second coats needed in most cases.
Medium holes, say from five millimetres up to about two centimetres, are where most people go wrong. This range covers rawl plug holes, small chips, and cracks that have developed a bit of width. Ready-mixed filler will shrink back here, leaving you frustrated. A powder filler mixed to a stiff paste is your friend for this size, the chemical set (rather than simple drying) means it holds its volume as it hardens. Mix only a small amount at a time, because once it starts going off, no amount of added water will rescue it. Press it firmly into the hole, slightly overfilling, and give it at least an hour before sanding smooth.
Large repairs, anything over roughly two centimetres, or holes that go deeper than about a centimetre into the wall, genuinely need a two-stage approach. First, fill the bulk of the cavity with a bonding or base coat product, which is designed to be applied thickly without sagging or shrinking. Allow this to dry almost completely, it should feel firm but not powdery. Then skim over the top with a finishing filler to bring the surface perfectly flush. Trying to do this in one single application, however tempting, nearly always produces cracking as the outer skin dries faster than the interior.
A few things nobody mentions in the instructions
Dusty holes are the enemy of good adhesion. Before you apply anything, dampen the edges of the repair with a little water on a brush or your fingertip. On very absorbent surfaces, old dry plaster will simply suck the moisture straight out of your filler before it has a chance to bond, leaving you with a crumbly repair that pops out if you sneeze near it. A PVA solution brushed in and left until tacky solves this entirely, and a small bottle costs almost nothing from any hardware shop.
Hairline cracks along the edge where a wall meets a ceiling, or running vertically down a corner, are worth treating a little differently. These are often movement cracks that will simply reopen if you bridge them rigidly with plaster-based filler. A flexible decorators’ caulk, applied with a gun or even a small squeeze tube, accommodates the slight seasonal movement that causes these cracks in the first place. It’s paintable once skinned over, and a tube from a pound shop will last through multiple repairs. I wish someone had told me this about fifteen years ago.
One thing that surprises people is how much difference temperature makes. Most fillers won’t cure properly below about five degrees Celsius, which matters if you’re working in an unheated room in January. The filler may appear to have hardened but will be weak and prone to crumbling. Give the room time to warm up, or accept that the repair will need redoing come spring.
Getting the finish right
Even a perfectly filled hole can look dreadful if the final surface preparation is sloppy. Sand with progressively finer paper, starting around 80 or 100 grit, finishing with 120 or 150. Always sand in a circular motion rather than back and forth in one direction, which can create visible Scratch marks under paint. Wipe away the dust with a barely damp cloth, let it dry completely, and then apply a spot of diluted emulsion as a mist coat before your final paint. This seals the filler and prevents that tell-tale dull patch where the repaired area absorbs paint differently from the surrounding wall.
There’s a quiet satisfaction in a repair done properly, one that disappears completely under a coat of paint and never comes back. After years of half-hearted patching, I’ve come to think of wall repairs as a small exercise in patience more than skill. The right material, used correctly, really does make all the difference, and once you’ve seen a flawless repair, you’ll never reach for the first tub on the shelf again.