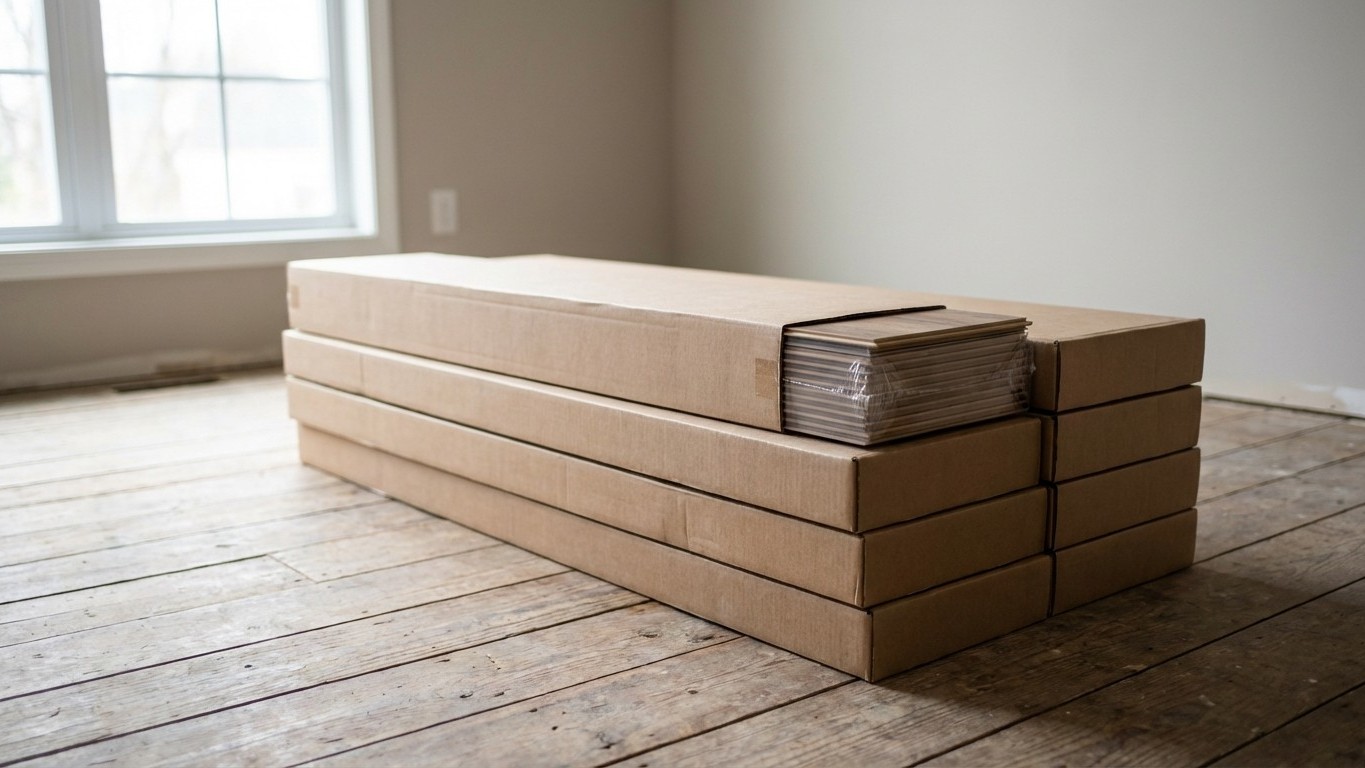
Two hundred square feet of laminate, laid over a long weekend, looking beautifully crisp, and then a fitter friend popped round, glanced at the floor, and asked the four words you never want to hear: “Did you acclimatise these?” I hadn’t. Not even close. The boxes had arrived on Friday morning and by Friday afternoon I was clicking planks Together like an overexcited child on Christmas Day. What followed was a masterclass in why the most important part of a flooring job happens before you even open the first box.
Key takeaways
- What happens when you ignore the one word a professional uses before touching a single plank
- Why UK weather makes this step non-negotiable (and continental homes might get away without it)
- The tell-tale signs appearing weeks later that scream ‘I should have waited’
The Science Behind the Wait
Laminate flooring is constructed in layers, with a core layer that is sensitive to temperature and humidity Changes. That core, a compressed fibreboard, behaves a little like a sponge: it absorbs moisture from the air around it and expands, then contracts again when conditions dry out. Just like solid and engineered wood, these materials can expand and contract depending on their environment.
Think of a wooden door that sticks in August but swings freely in January. The same principle is at work under your feet, just on a much larger scale. Flooring materials, especially laminate, react to changes in temperature and humidity, they expand when it’s humid and contract when it’s dry. If you install them before they’ve adjusted to your home’s environment, you might wake up a few weeks later to planks that have buckled, separated, or warped. In my case, the tell-tale signs started appearing at around the six-week mark: a gentle ridge forming across the centre of the room, and a soft springiness underfoot that no amount of walking could explain away.
Skipping this step, especially in the UK’s changeable climate, risks severe buckling or gapping after installation. That last detail matters enormously here. Our Weather is erratic in a way that mild continental climates simply aren’t, a damp March morning followed by a week of central heating cranked up high is precisely the kind of temperature swing that makes unadjusted laminate misbehave.
How to Acclimatise Properly (and What Most People Get Wrong)
The good news is that acclimatisation costs nothing except time, and the method itself couldn’t be simpler. Read the instructions from your manufacturer on how long your flooring needs to acclimatise, and if you don’t have any instructions, leave your flooring for a minimum period of 48 hours in the room you’re going to place them. Most manufacturers recommend between 48 and 72 hours, though that can increase in rooms with unusual humidity levels or following recent wet trades work.
One thing that trips a lot of people up: where and how you store the boxes. To acclimatise flooring, simply lay packs flat in the room you will be fitting them in for the recommended time. Leaning packs against the wall or standing them on their edge might seem like a good idea to save space, but it will damage your flooring and cause the boards to bow or misshape. Your boards will come in pre-packaged boxes that you should keep intact, and you should lay each box horizontally flat on a space on the floor of the room it will be fitted in with a gap between each. This ensures that all your boards will acclimatise similarly, and you won’t break or bend any boards by stacking them upwards, as this can cause damage to the joints and locking mechanisms.
There are also a few conditions the room itself needs to meet. Make sure that any painting or plastering is fully dried with a minimum of seven days before you begin to acclimatise your laminate flooring, because this can affect the moisture in the air more than you realise. Ideal conditions are often cited as 15–22°C with 30–75% relative humidity. If your room is currently being used as a temporary storage space with the back door propped open, give it a few days to settle into its normal living conditions before you start timing your acclimatisation period.
The Other Steps That Trip Up DIYers
Acclimatisation is the step most often skipped, but once the fitter had my full attention, he walked me through everything else I’d almost got wrong too. The subfloor deserves far more scrutiny than most of us give it. Subfloor prep makes or breaks a laminate flooring job, and too many people rush into installation without checking the basics underneath. Specifically, any dips deeper than 3mm over a 2-metre span need to be filled. A self-levelling compound is your friend here, and a bag costs very little compared to the cost of relaying a floor.
Then there’s the expansion gap, the narrow breathing space left between the edge of the flooring and every wall, pipe, and door frame. Insufficient or no expansion gap is the number one cause of buckling laminate. Leave 8–12mm minimum everywhere. Laminate flooring is designed to be installed as a “floating floor” — it is not nailed or glued to the sub-floor and works as one big “pancake” that expands and contracts with temperature and humidity changes. Block that movement in any direction and something has to give. I’d left a gap on most walls, but had completely forgotten the door frame on the far side of the room. One small oversight, multiplied across 200 square feet of connected planks.
Underlay is another area where corners get cut. Underlay is mandatory for all laminate flooring installations. It supports the click system, improves acoustic performance, enhances underfoot comfort, and helps accommodate minor subfloor irregularities. As you place sheets of underlay next to each other, make sure they don’t overlap, because if two sheets overlap, the extra thickness could create bumps or uneven sections in your floors. And if you’re laying over a concrete subfloor, check whether your underlay includes a built-in damp-proof membrane, in a British home with a solid floor, that layer is not optional.
Before You Lay a Single Plank: A Practical Checklist
The honest truth is that the preparation stage, from delivery day to the moment you click the first plank into place, is where the quality of a laminate floor is actually decided. The laying itself is the enjoyable part, but it’s entirely dependent on everything that comes before it.
Before you begin, run through these essentials:
- Let unopened packs lie flat in the room for at least 48–72 hours, or as per your manufacturer’s guidance.
- Check subfloor moisture levels (aim for below 12% on timber subfloors) and level any dips greater than 3mm per 2 metres.
- Lay underlay without overlapping seams, and include a damp-proof membrane over concrete.
- Leave an expansion gap of 8–12mm around every wall, door frame, and fixed obstacle.
- Never nail or fix the laminate to the subfloor, it must float freely.
Over half of laminate floor failures come down to installation mistakes, and the vast majority of those are preventable with patience and proper preparation. My 200 square feet were eventually relaid correctly, expansion gaps intact and boards acclimatised. The ridge in the middle of the room is long gone. What remains is a quiet appreciation for the two days of doing absolutely nothing that could have saved me a very long weekend of doing it all over again.