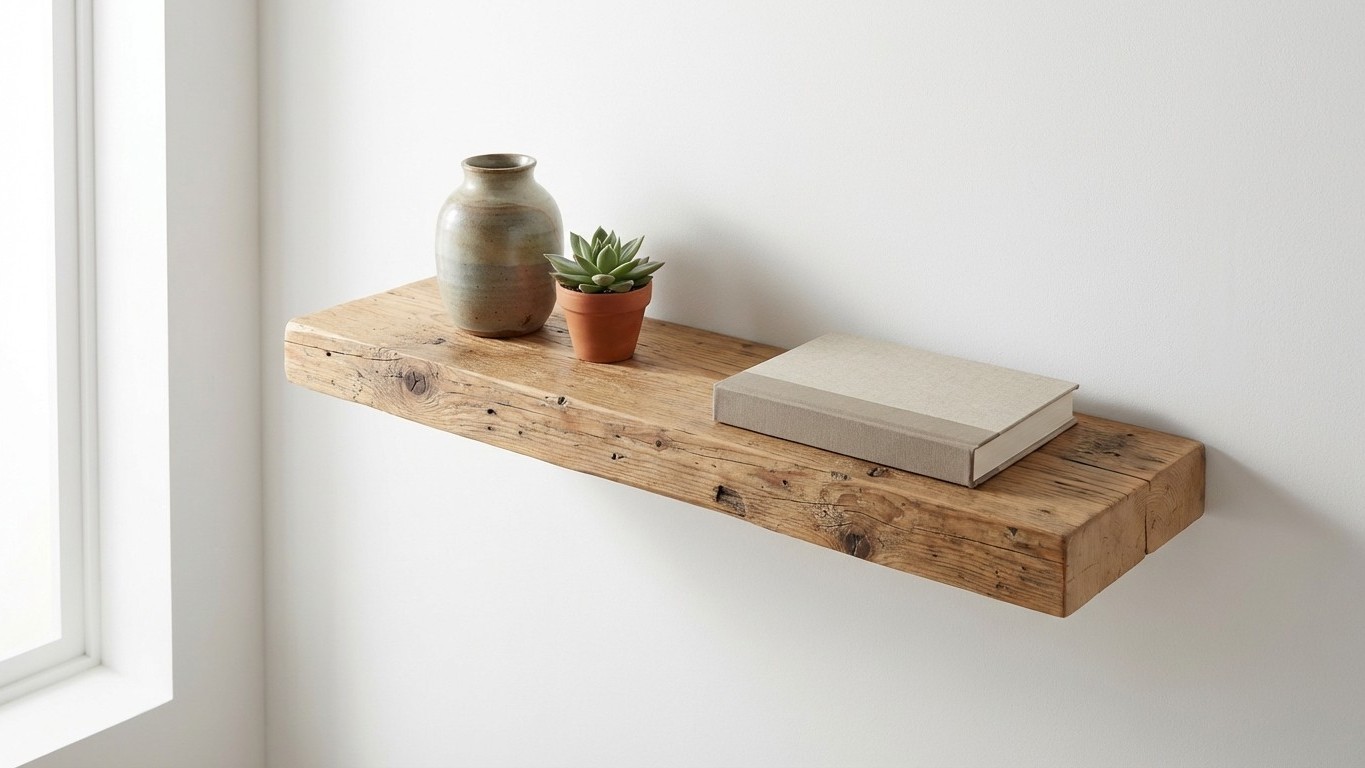
Floating shelves that truly look as though they’re growing straight out of the wall, no brackets peeking out, no visible fixings, nothing to break the clean line — are one of those small domestic triumphs that feel disproportionately satisfying. The good news is that you don’t need to spend a fortune on a designer joinery kit to achieve them. A stack of reclaimed pallet wood, a handful of sturdy hidden brackets, and a free afternoon are genuinely all it takes.
Key takeaways
- The one bracket type that leaves zero trace of its existence
- Why pallet wood finishes better than most people expect
- The acclimatisation secret that prevents warping and gaps
Why pallet wood is better than you might think
Pallets have a reputation for being rough, splintery, and awkward to work with, and honestly, that reputation is half-deserved. But here’s what most people don’t know: the timber used in standard European pallets (the square ones stamped HT, which means heat-treated rather than chemically treated) is typically solid pine or spruce, dried to a reasonable moisture content and perfectly capable of taking a smooth finish once you put in a little effort. I’ve seen shelves made from pallet boards that, once sanded and oiled, were genuinely indistinguishable from planks bought at a timber yard for several pounds per metre.
Finding them costs nothing. Garden centres, supermarkets, DIY sheds, and furniture warehouses all accumulate pallets they’d rather see the back of. Ask politely at the back door on a weekday morning and you’ll almost always come away with a few. Just make sure you’re choosing HT-stamped ones and avoiding any with dark staining, chemical residue, or boards that crumble when you push a nail in.
Disassembly takes patience more than skill. A pry bar and a rubber mallet will get the boards off without too much splitting, though expect a few casualties along the way. Once the boards are free, give them a thorough inspection for nails and staples, remove every last one, and you’re ready to start thinking about your shelf.
The invisible bracket trick that actually works
The real magic in a truly floating shelf lies in the fixing method. Standard L-brackets, however small, always announce themselves eventually, especially once the shelf is loaded and the bracket shifts slightly. The approach that gives you a genuinely clean result uses hollow floating shelf brackets, sometimes called blind shelf supports or concealed rod brackets. These are essentially steel rods or tubes that bolt flush into the wall, slide inside a cavity routed into the back edge of your shelf, and leave absolutely nothing visible from the front, sides, or underneath.
You can find these brackets at most large hardware shops and online suppliers, usually sold in packs of two or three for a modest sum. For a shelf up to about 80cm long carrying moderate weight (books, plants, ornaments), two brackets set roughly 15-20cm from each end is the standard approach. For anything longer or heavier, three brackets spread evenly across the span gives you far more confidence.
The installation sequence Matters enormously here. First, you locate your studs or wall plugs and fix the brackets into the wall so they project horizontally, perfectly level. Then you lay your shelf board face-down, mark the bracket positions carefully by holding the board against the wall and transferring the marks, and drill or rout a snug channel into the back edge deep enough that the bracket slides in without wobbling. A 25mm spade bit works well for round-rod brackets; a router gives a cleaner slot for rectangular ones. Dry-fit the shelf before any glue or filler comes near it, slide it off, and only then commit.
Getting the finish right on reclaimed wood
This is where the difference between a shelf that looks homemade and one that looks intentional is made. Pallet wood arrives with mill marks, greyish weathering, and a texture that catches dust rather than repelling it. Start with an 80-grit sandpaper on an orbital sander if you have one, or by hand if you don’t, working along the grain. Take it down to 120-grit, then 180-grit, and you’ll find that what was a rough plank starts to feel genuinely pleasant under the hand.
For finish, the choice depends on where the shelf is going. A simple danish oil brings out the grain beautifully and is forgiving to apply: wipe it on with a cloth, leave it for twenty minutes, wipe off the excess, and repeat two or three times. For a kitchen or bathroom where moisture is a concern, a hard wax oil gives better protection. Avoid heavy varnishes on reclaimed wood if you can; they tend to sit on the surface rather than soaking in, and the result looks plasticky against the natural character of the timber.
Once the finish is dry, fill any remaining small holes or gaps with a tinted wood filler (matching your stain colour as closely as you can), sand back lightly with 220-grit, and apply a final coat of oil. The imperfections that remain after this process are no longer flaws. They become the thing people ask about when they come to visit.
A few things worth getting right from the start
Load-bearing is the one area where optimism gets people into trouble. Hidden brackets in solid masonry or timber studs will hold a surprising amount of weight, but brackets plugged into hollow plasterboard without a stud behind them will eventually fail. Always locate the studs, use appropriate fixings for your wall type, and be honest about what the shelf will carry. A row of heavy cookbooks is a different proposition from a few decorative objects.
Allow the pallet boards to acclimatise indoors for at least a week before you work with them. Timber that moves after the shelf is up will open gaps and, in the worst cases, cause the whole thing to bow. A week sitting in the room where it will live is a small investment against that particular frustration.
There’s something rather pleasing about the idea that the same wood that once carried tins of paint or bags of compost across a warehouse ends up as the thing people compliment in your sitting room. Perhaps that’s the real trick, not the brackets at all.